Design, Details, Delivery - from concept to bespoke carpentry

 |
||
|
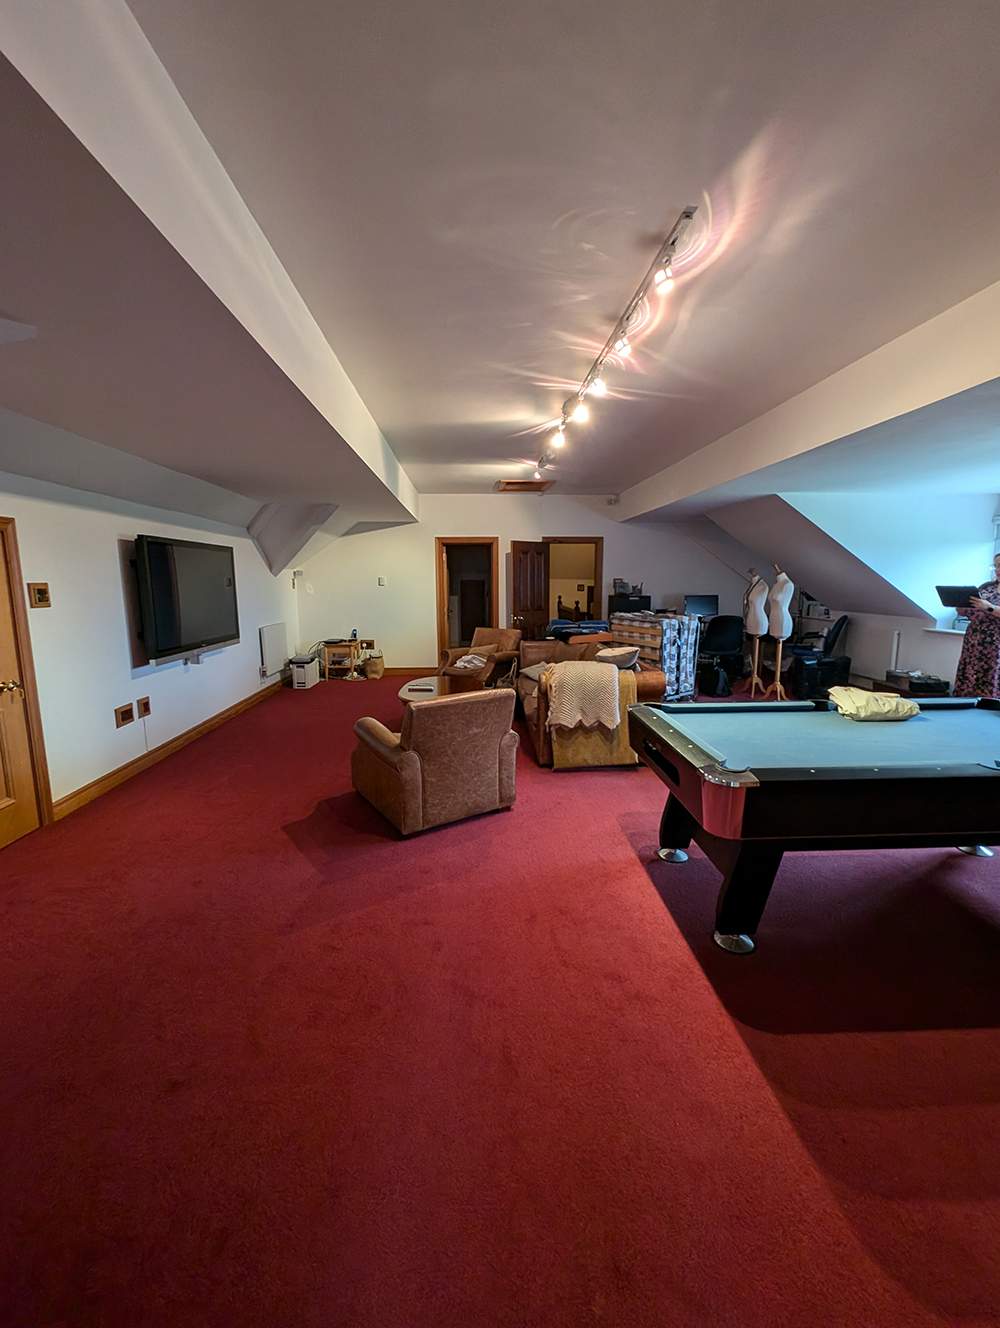
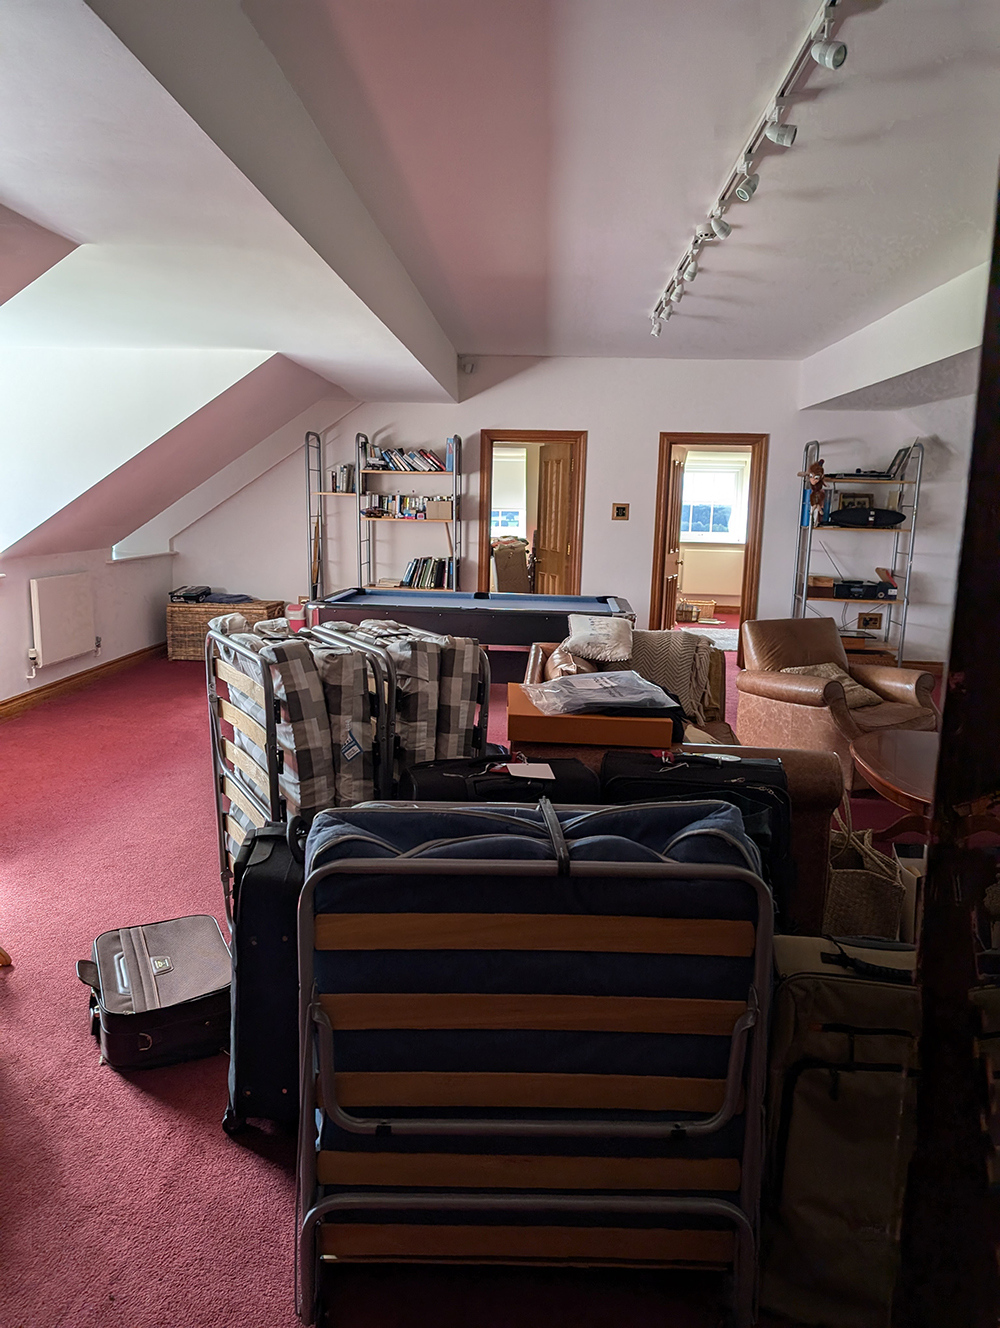
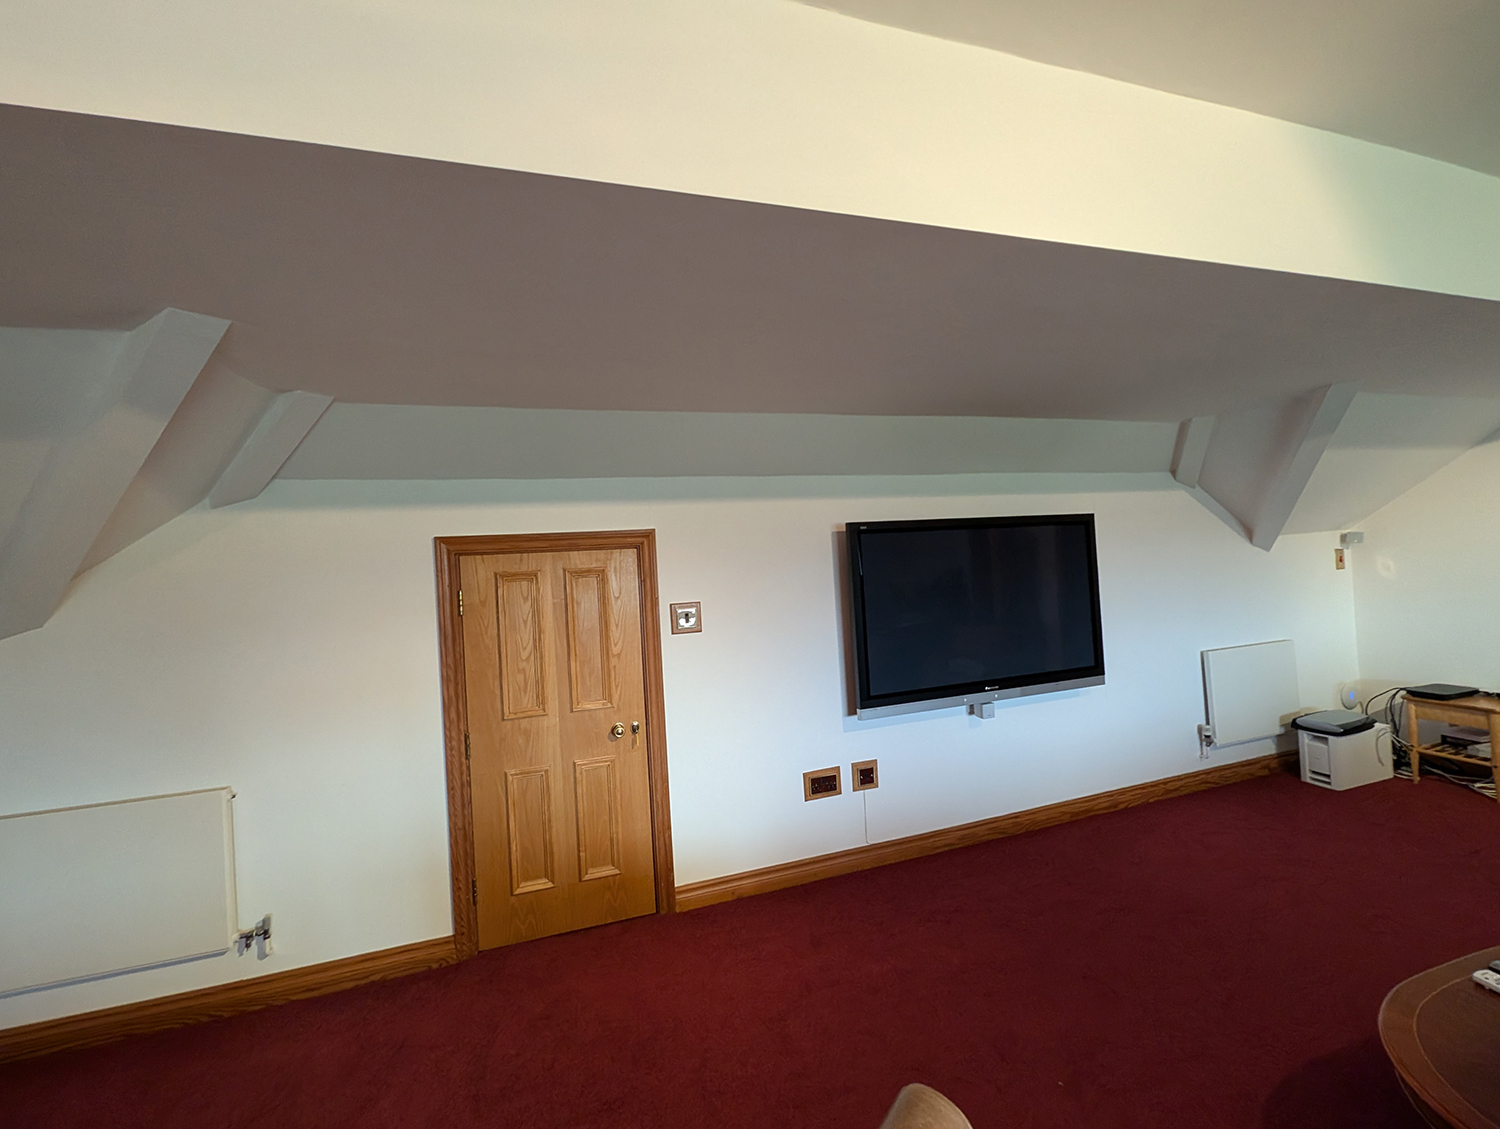
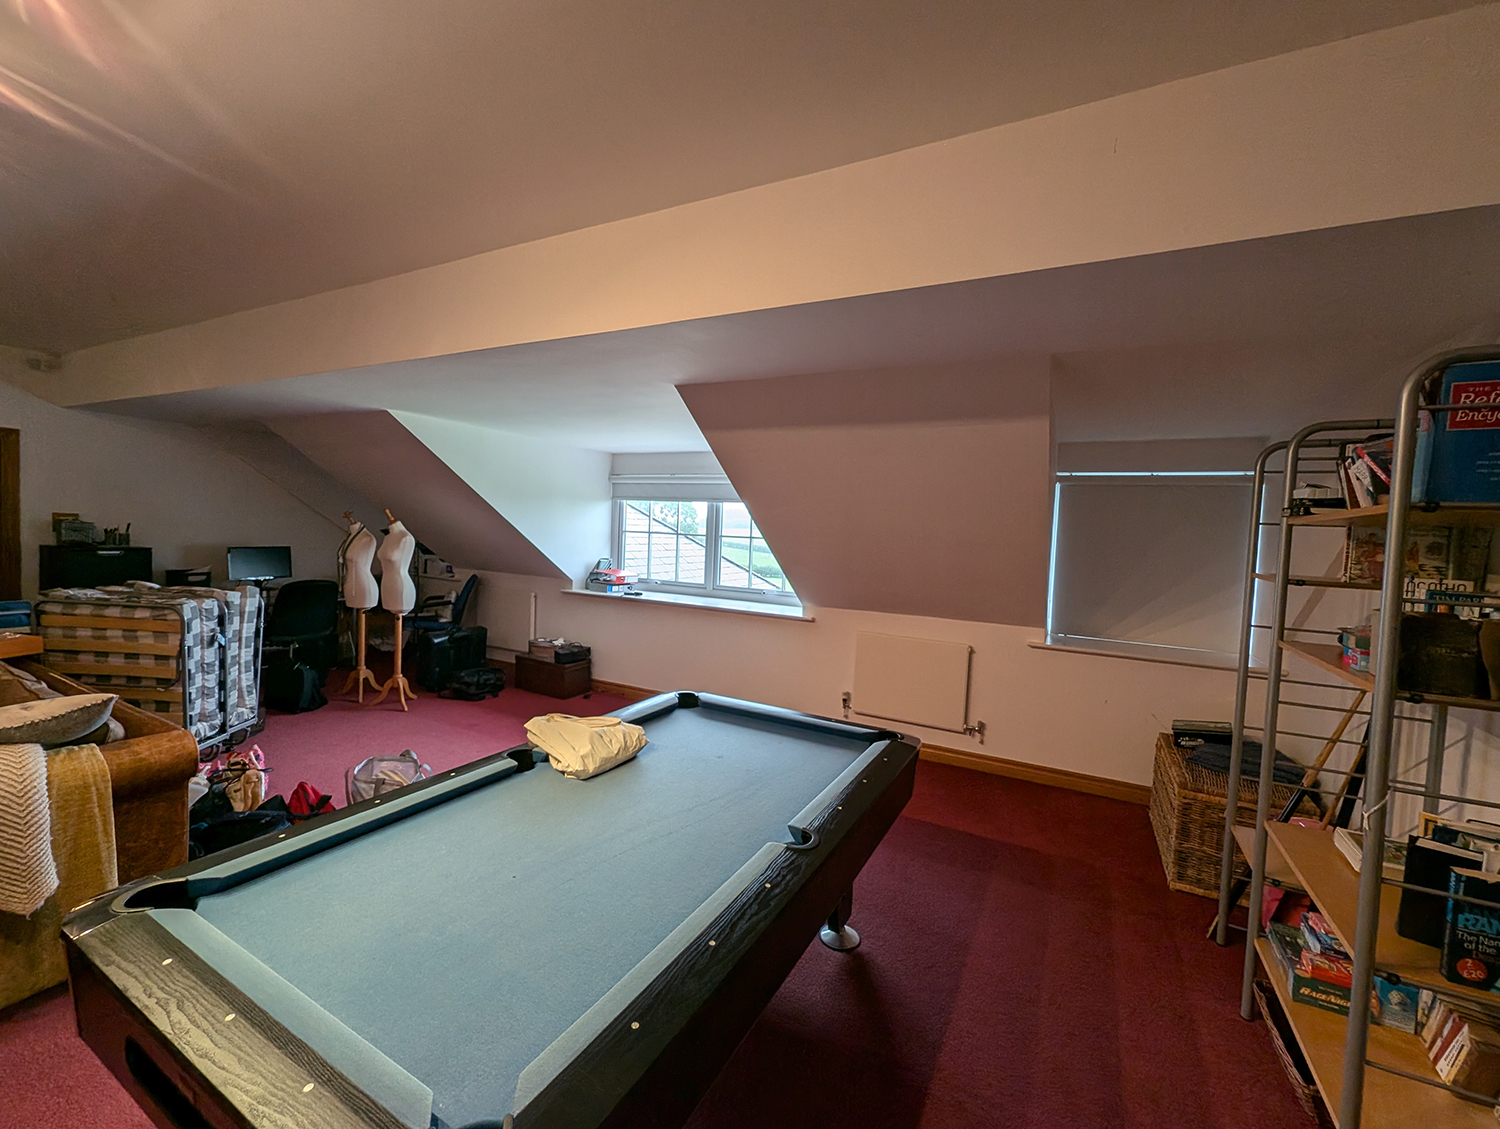
This month we are looking at work in progress on one of our projects - the stylish cinema room. Situated way up in the loft of a large house, our clients were already using the space as an informal TV/games room, but wanted something more dramatic and fit for purpose - a space to relax and switch off. This was how the space looked when we first visited: |
||
 |
||
 |
||
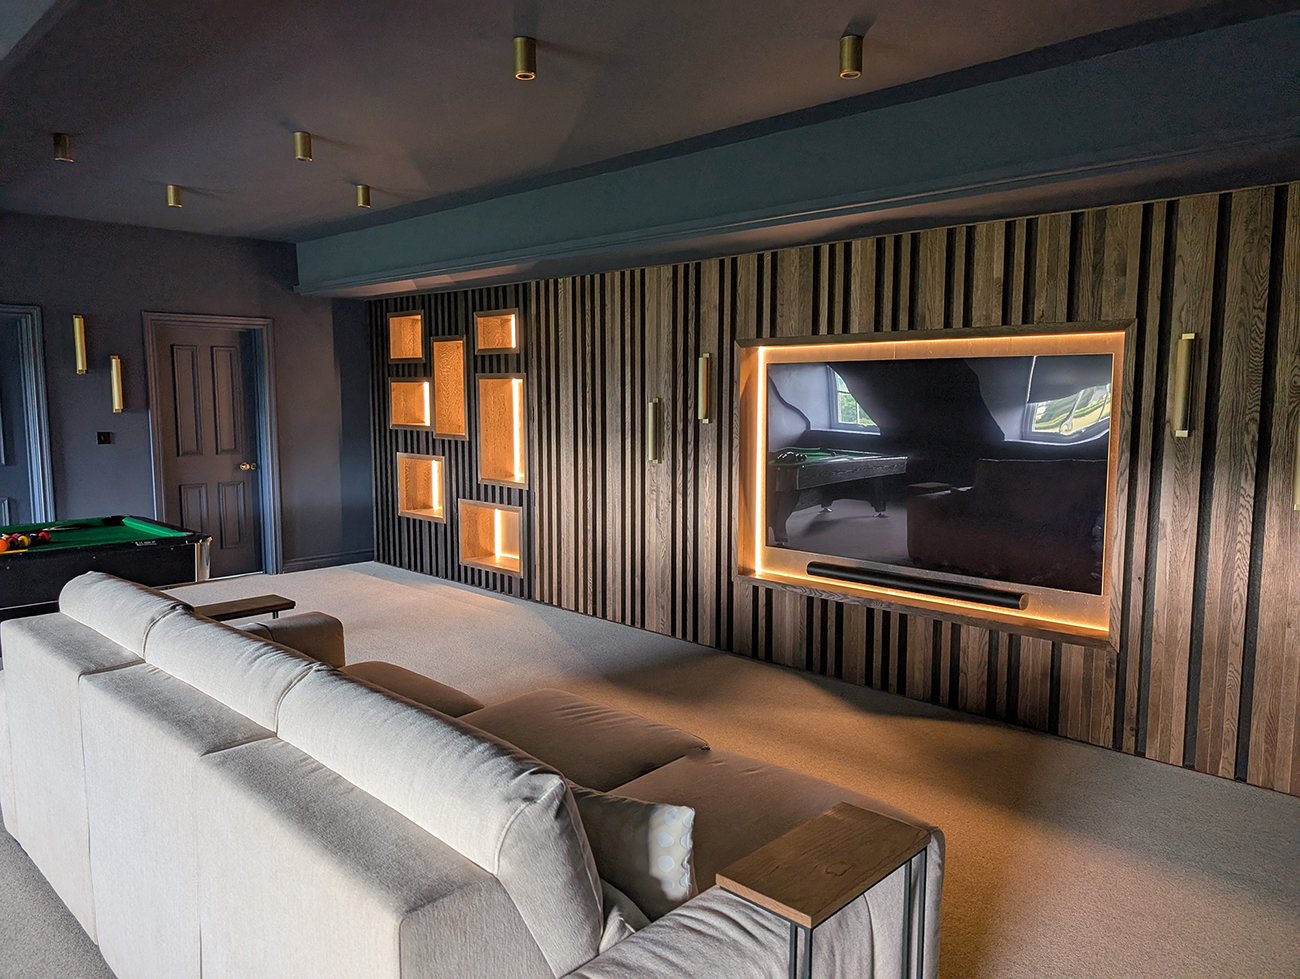
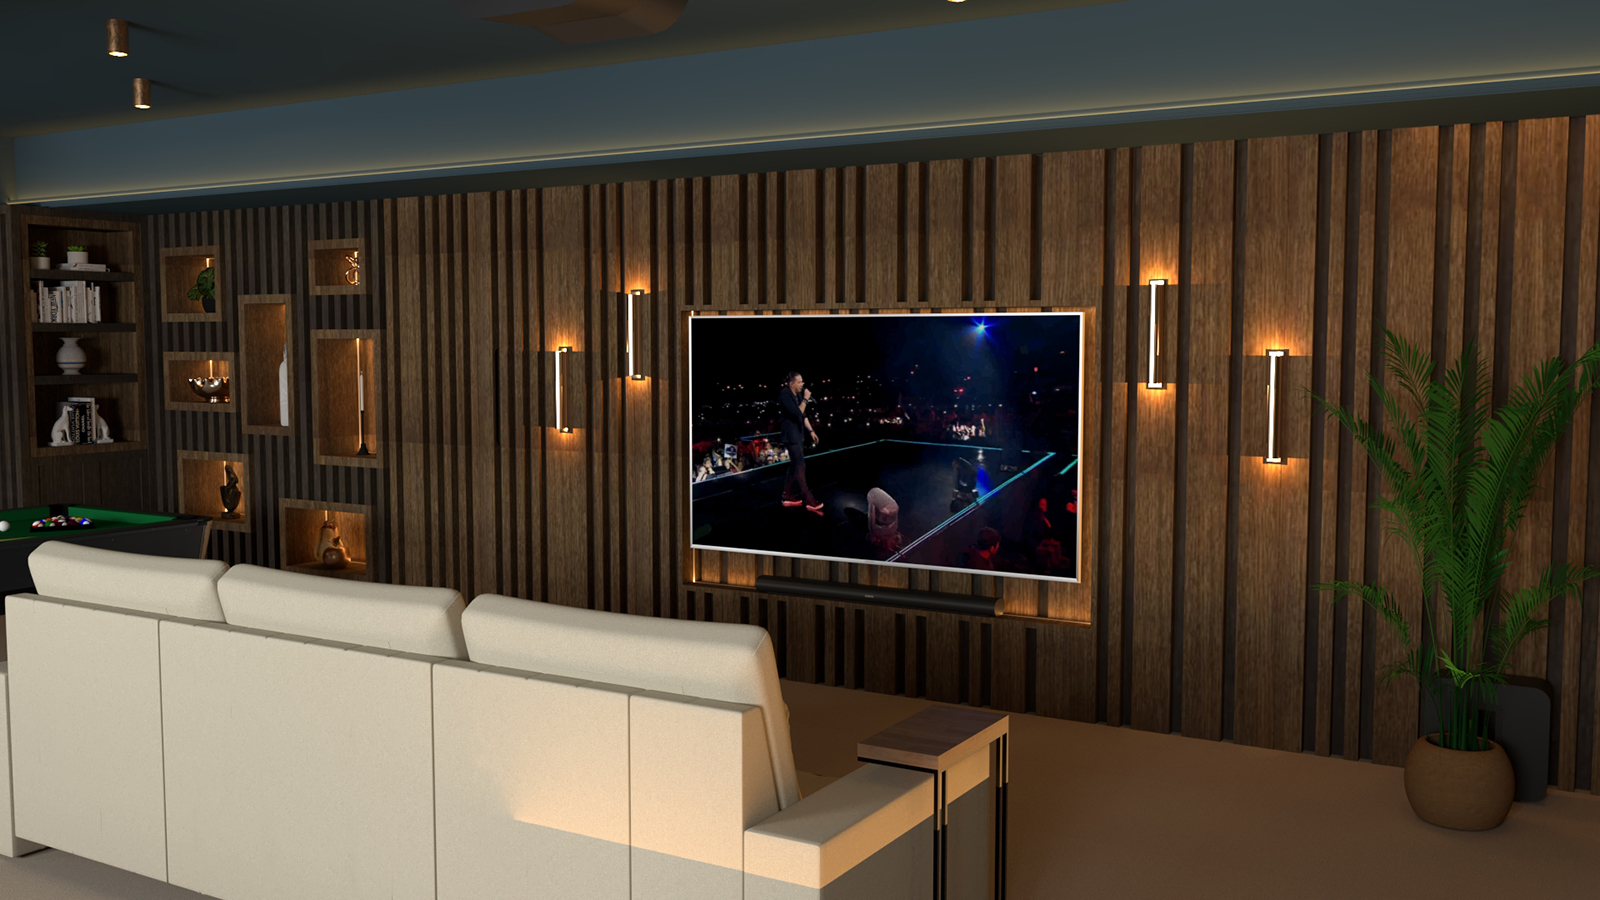
The existing layout was pretty sensible, but everything needed an upgrade - new furniture, lighting, colour scheme, carpet, radiators etc. Our clients knew they wanted to make the large room feel cosy and create the right atmosphere for movie nights, so they were open to a darker shade on the walls. We chose a beautiful rich blue for them, which is reminiscent of star filled nights and is perfect for the way our clients would use the room. In what is now one of our signature moves, we chose to take the colour over the ceiling and drench the whole room, including doors, skirting boards and architraves. This was done with intent - we wanted these features to recede (particularly the many angles of the ceiling) so that the room would feel calm and relaxing to be in. The main focus of the brief was to create a large media wall to house the new TV and cover the awkward space where the roof beams were located. The idea was that it would be floor to ceiling and create a stunning backdrop for the tech, with some additional nooks for display. Our clients were very keen on using wooden slats, but this is a look that is very much on trend, and we wanted to personalise the design for them. We encouraged them to let us go further and designed something more unique, just for them. |
||
 |
||
| Our 3D visualisation of the wooden slatted media wall | ||
|
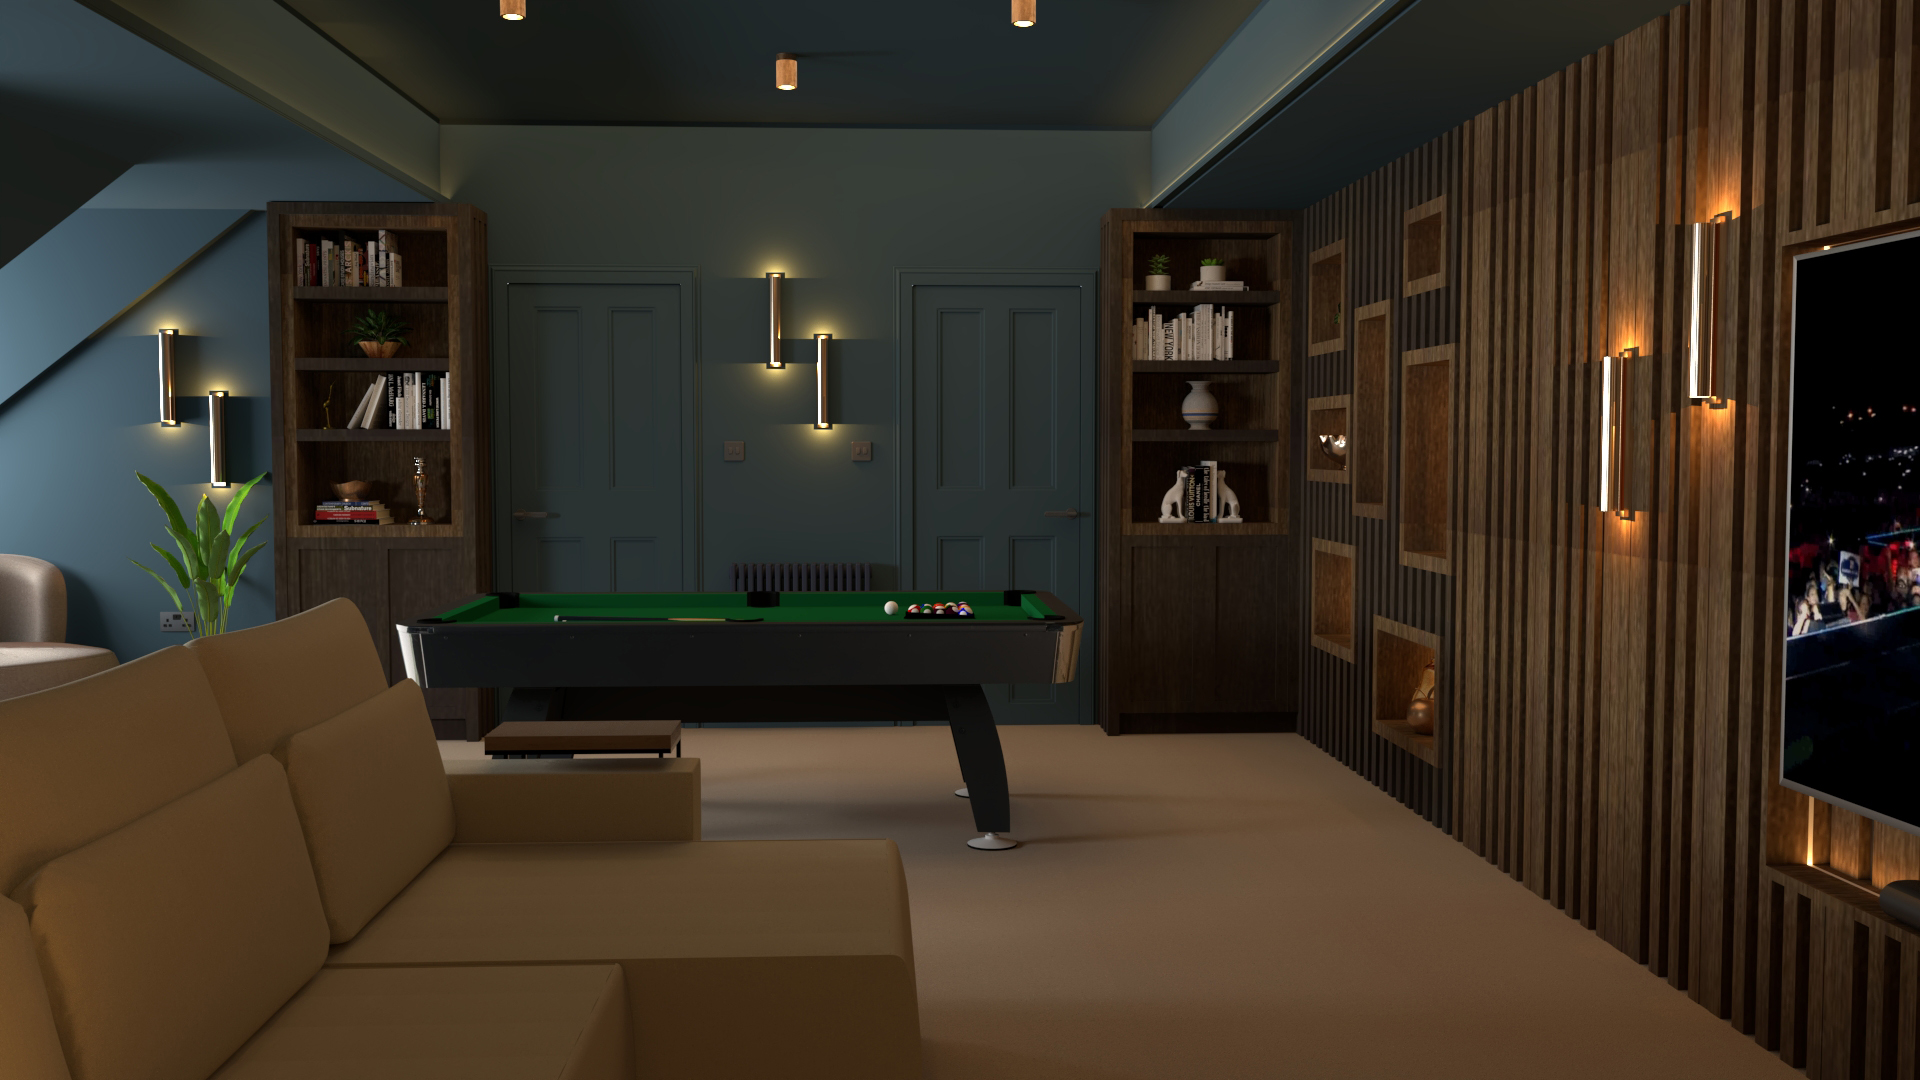
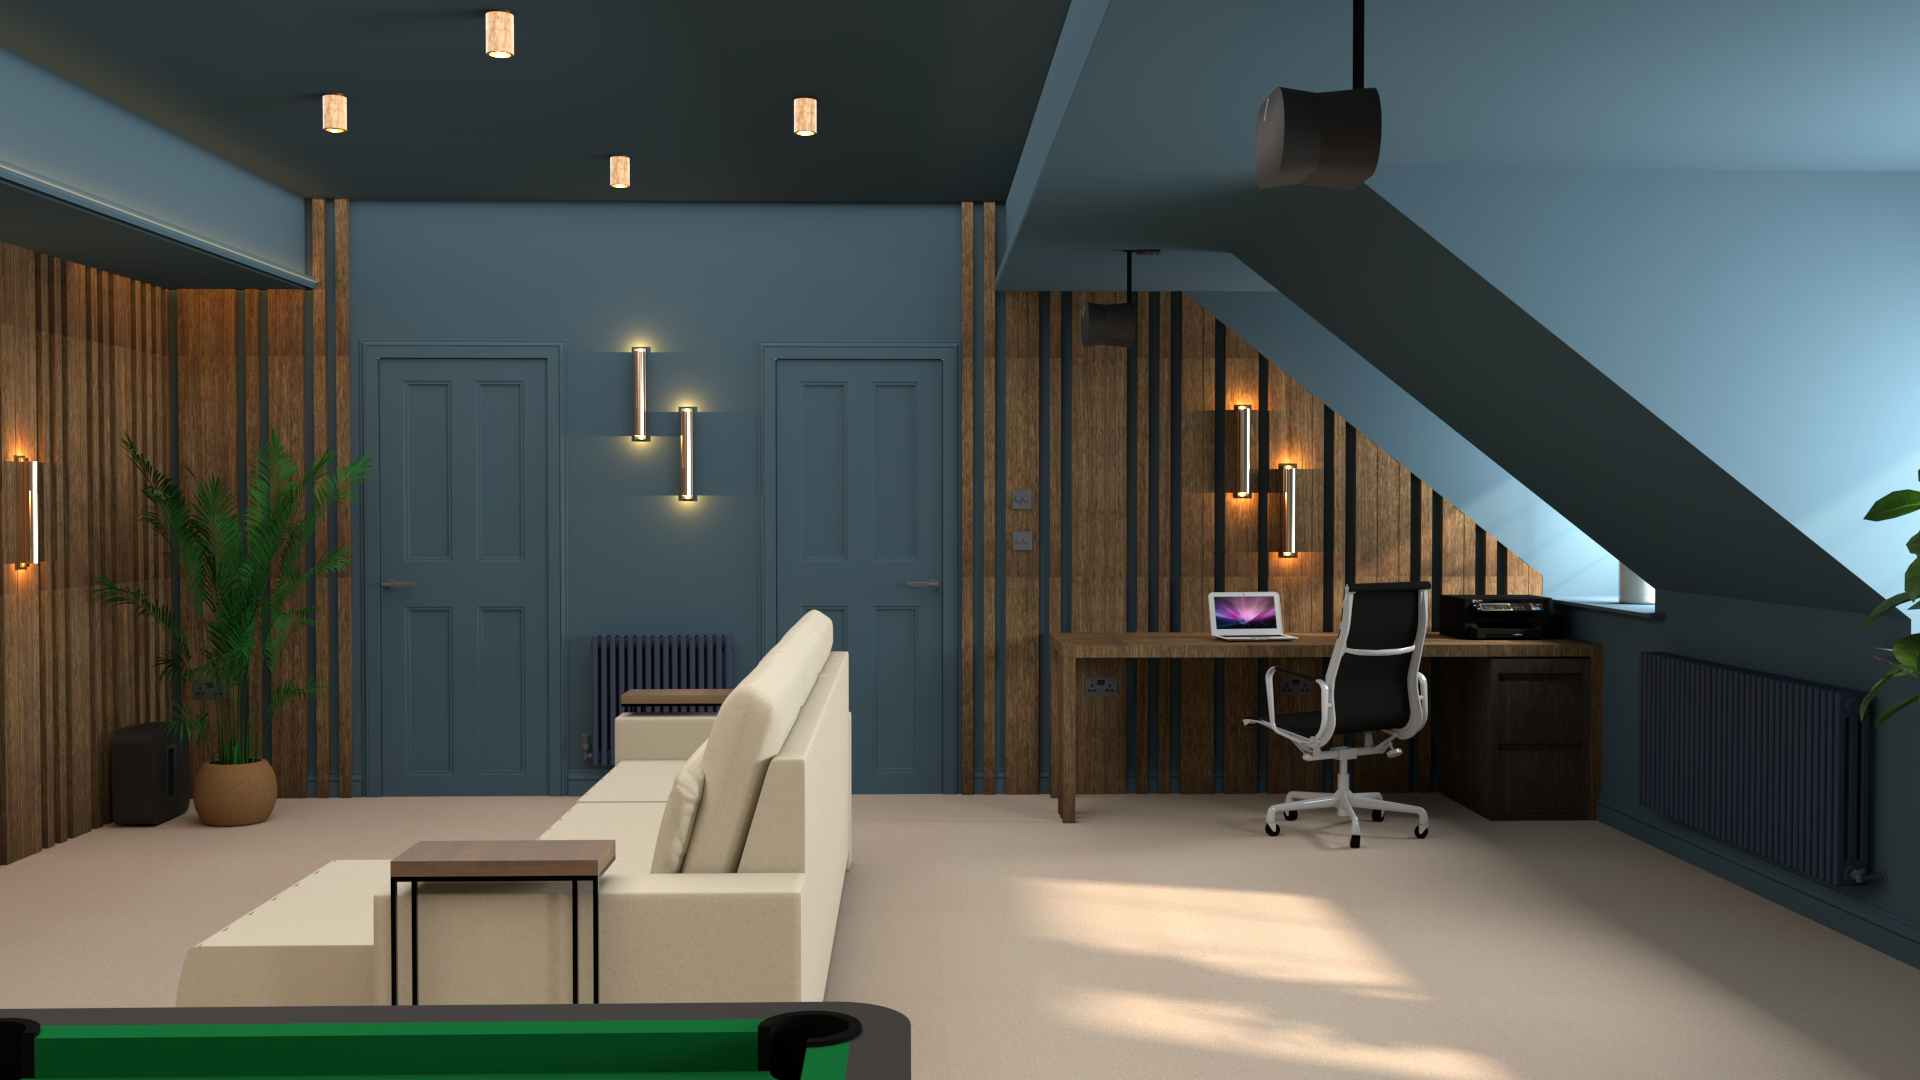
We designed the wall with slats sitting on a dark wood stained base, spaced apart at intervals, so the dark wood underneath could be seen. The slats themselves would be stained in a lighter finish, and would be 50 mm wide. To make the wall unique, the slats wouldn’t be set in a uniform way (as is usual with a slatted wall), they would be grouped in numbers of two, three, four or five, fanning out from behind the TV, which concentrates attention on the TV area and breaks up the long wall. We also continued the slats around the corners onto the end walls, with bespoke bookcases at one end and a purpose built desk at the other. This had the effect of further enveloping the room, making it feel more inviting and less imposing. |
||
 |
||
 |
||
|
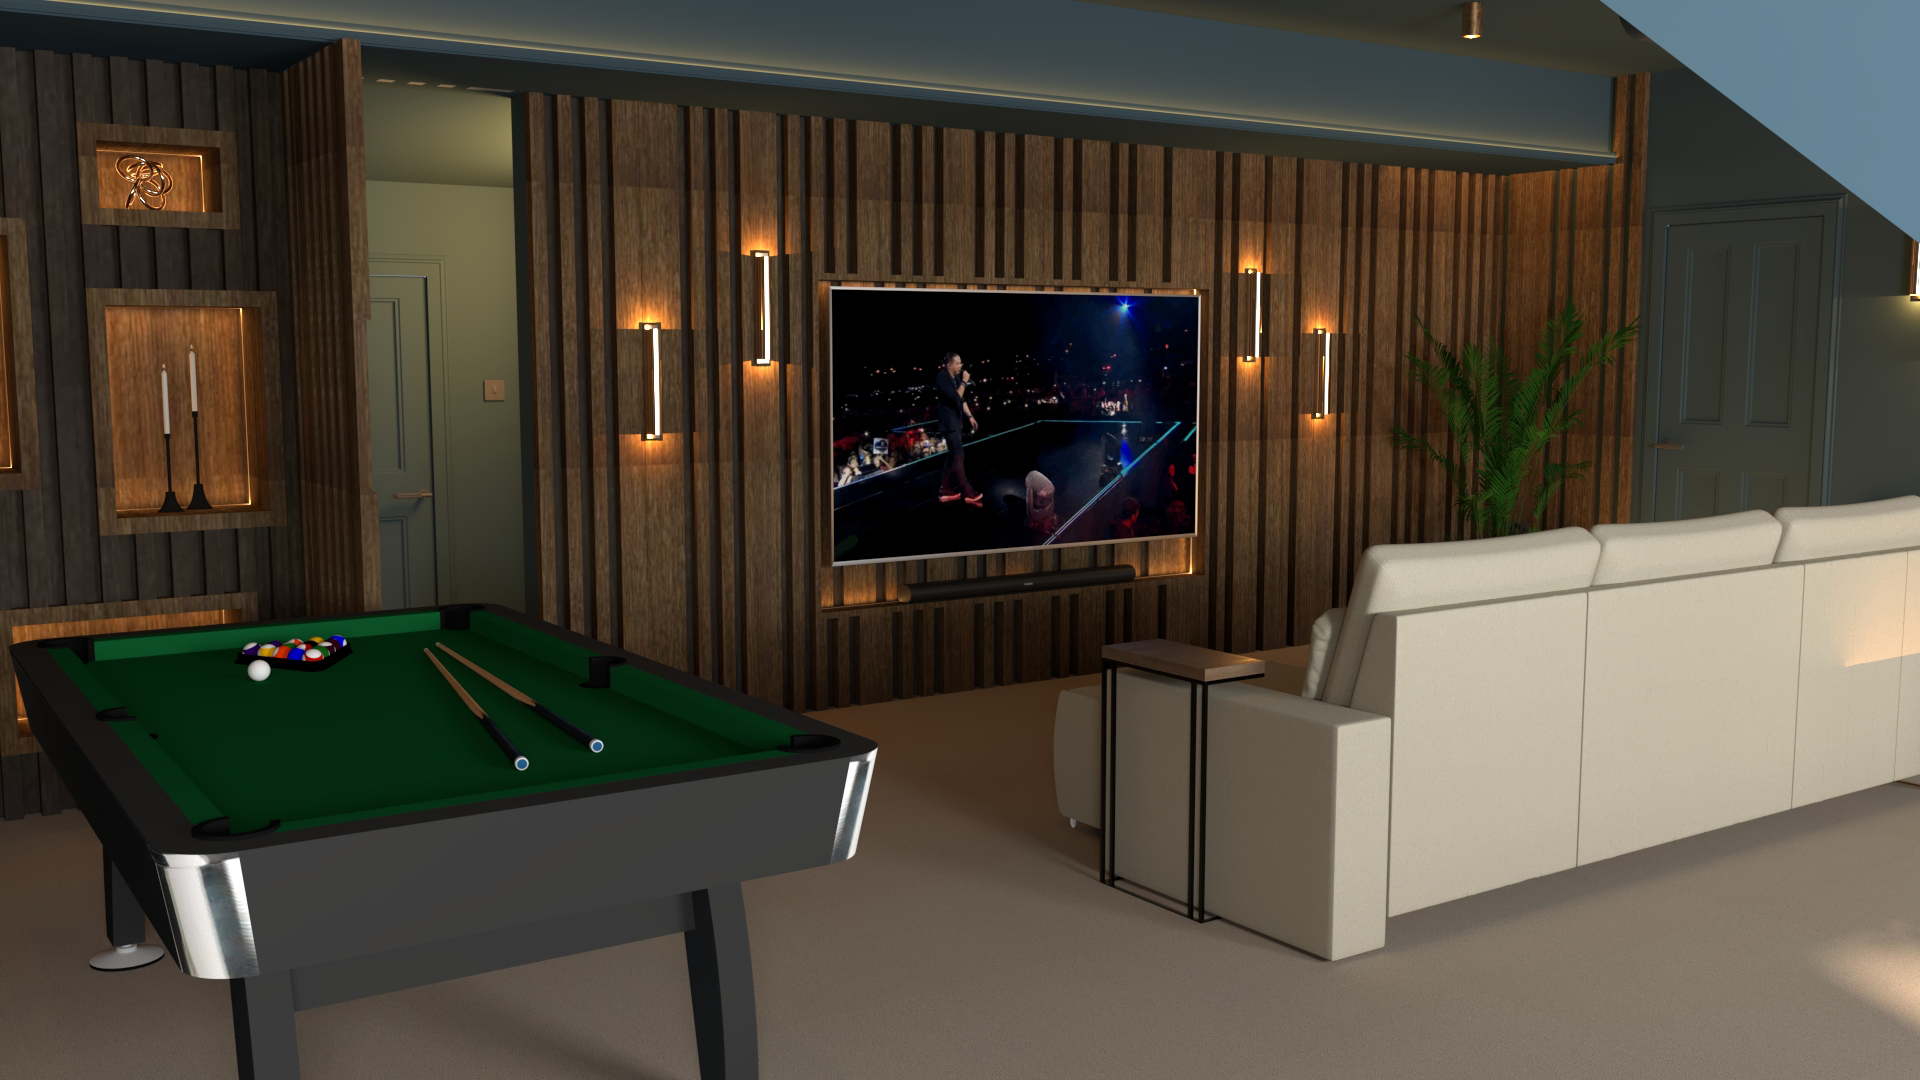
At the point where the slatted wall turns the corner to the next wall, we chose not to use the dark wood base here, instead placing the slats straight onto the wall so that the rich colour could be seen. Again, this continues the fanning out of the slats and makes them less concentrated at the edges of the scheme, drawing the eye in further towards the TV. The eagle eyed among you may have spotted from the ‘before’ pics that there is a door in the wall where the media wall would be built. This door leads to storage and the small plant room for the home, so we needed to make sure that this area could be accessed easily. Our solution was to design a hidden door within the slatted wall. As the new media wall would be placed in front of the existing wall, we could keep the door to the plant room and add a slatted wood door with a secret handle, so that it looks like part of the media wall. As you can see from our 3D visual, the door is positioned perfectly for access to the existing door. |
||
 |
||
|
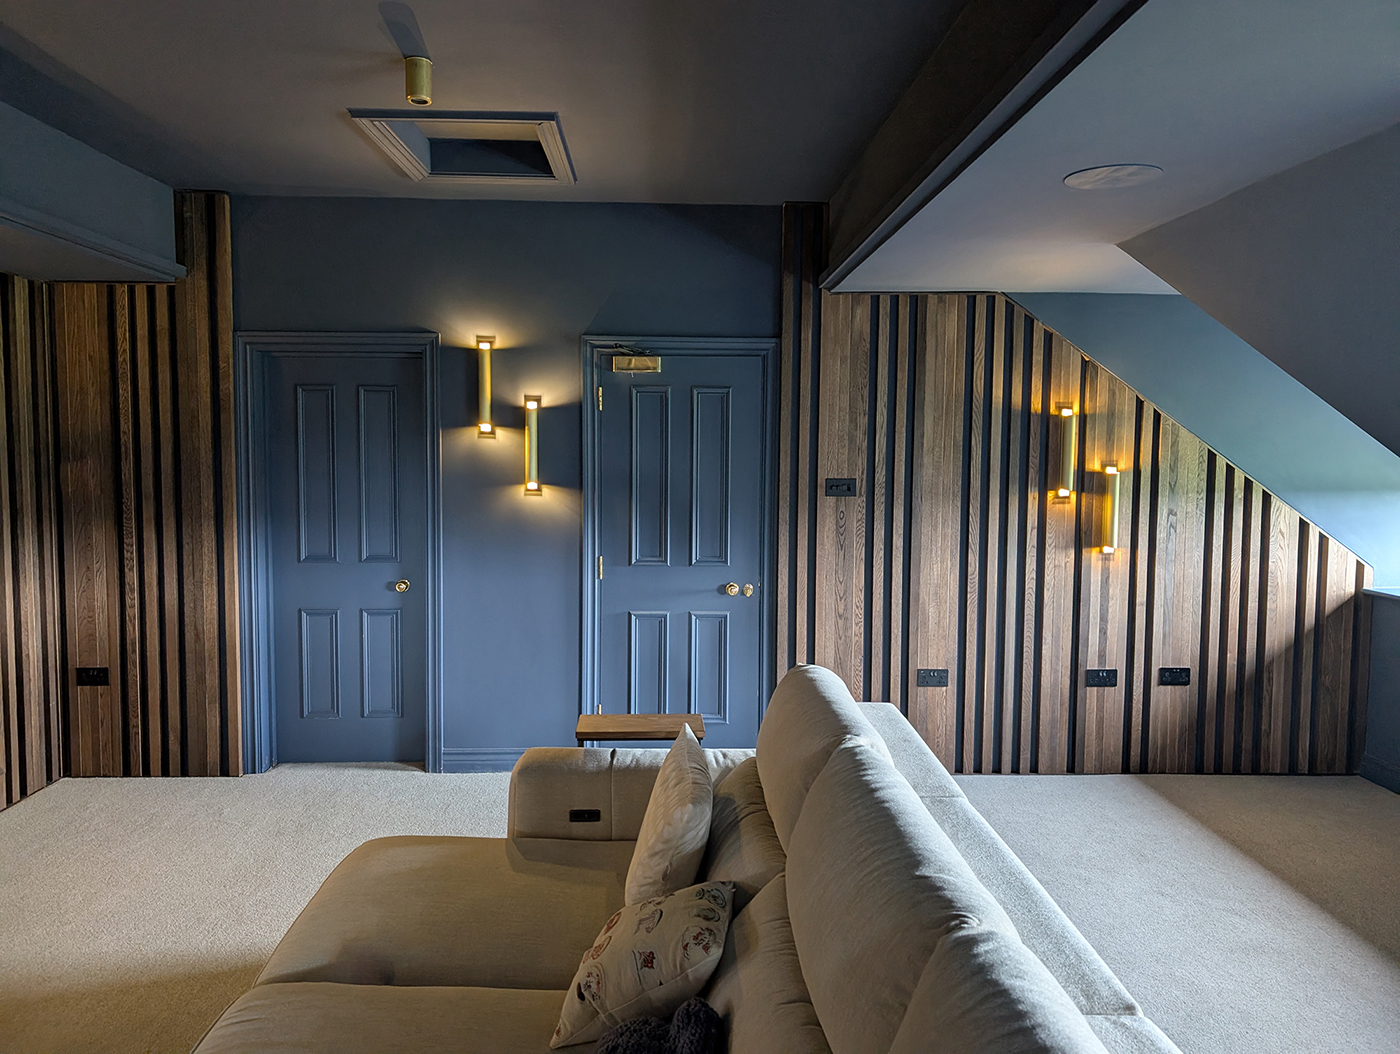
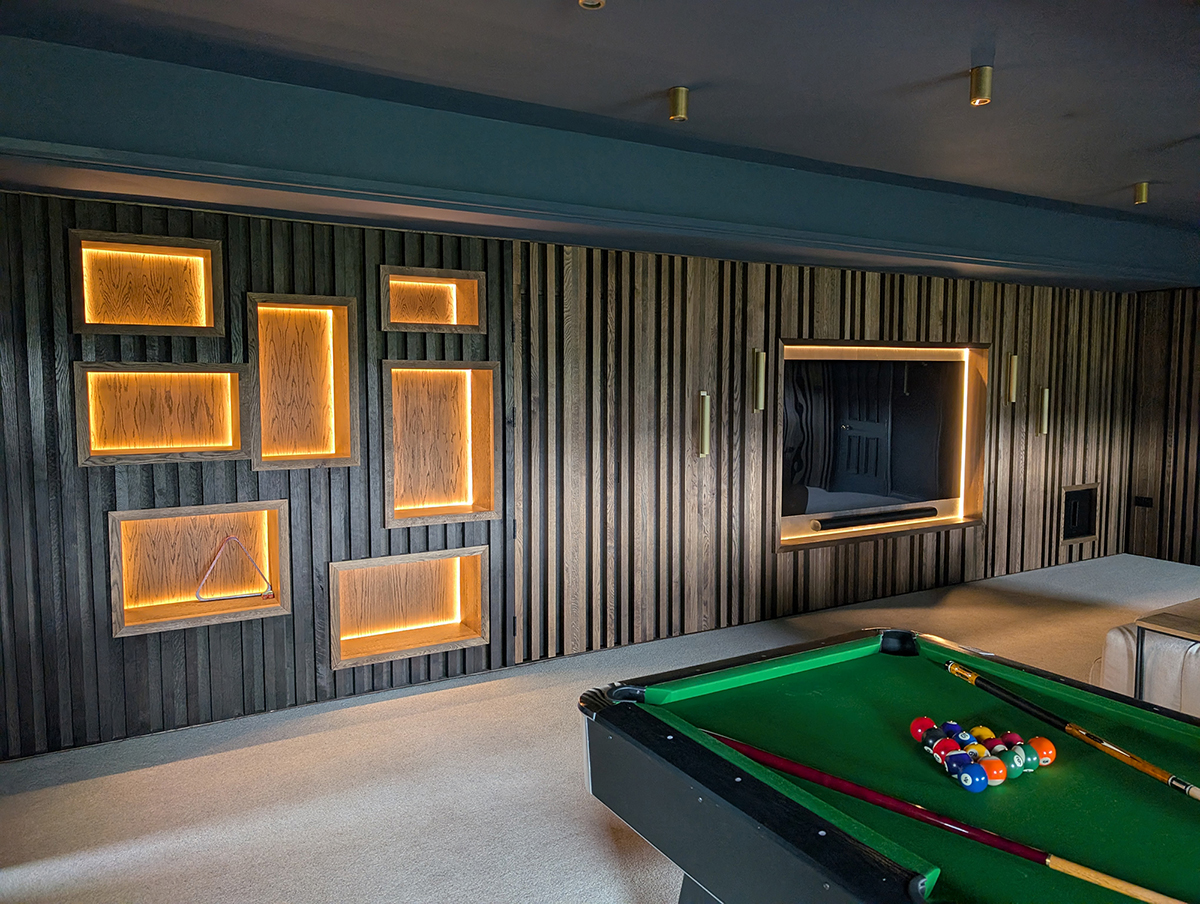
Continuing with the design, we turned our attention to the TV itself. The clients wanted it to be as large as possible for that true cinema experience, so we worked out exactly where the new sofa would be positioned in order to specify the TV based on the ideal viewing distance. In other words, the screen size would be determined by how far away the sofa would be from it. We chose an 85 inch TV in 4K Ultra HD, as this screen type means you can have a large screen and sit closer to it, because individual pixels won’t be seen the closer you get. We designed a nook to fit around it, which included space for the soundbar. We considered a separate nook for the soundbar to sit in, but decided against this approach, as the sound coming from a soundbar needs space above it to be heard properly. Once we’d added space for the speakers, sub woofer and additional plug sockets, this part of the brief was complete, and we moved on to the lighting. The existing lights were on a track and placed high on the ceiling, which meant they gave off a harsh light which didn’t spread out to light the room evenly - not great for playing pool. To solve this, we added tall, evenly spaced spotlights instead of the track lighting, and used elegant wall lights in pairs around the room to add more light and to recreate the cinema experience. These wall lights have bulbs at the top and bottom, which cast a lovely soft glow on the wall, and can be dimmed to create atmosphere when watching a movie. We also included some coving in our design, to go on the beams on the ceiling. We placed LED strips in the coving, which throw a lovely wash of light upwards when lit. The LEDs in the nooks in the media wall also give an extra layer of light, so the room can be very well lit when it is being used as a games room. |
||
 |
||
|
A photo of the cinema room, showing the brass wall lights |
||
 |
||
|
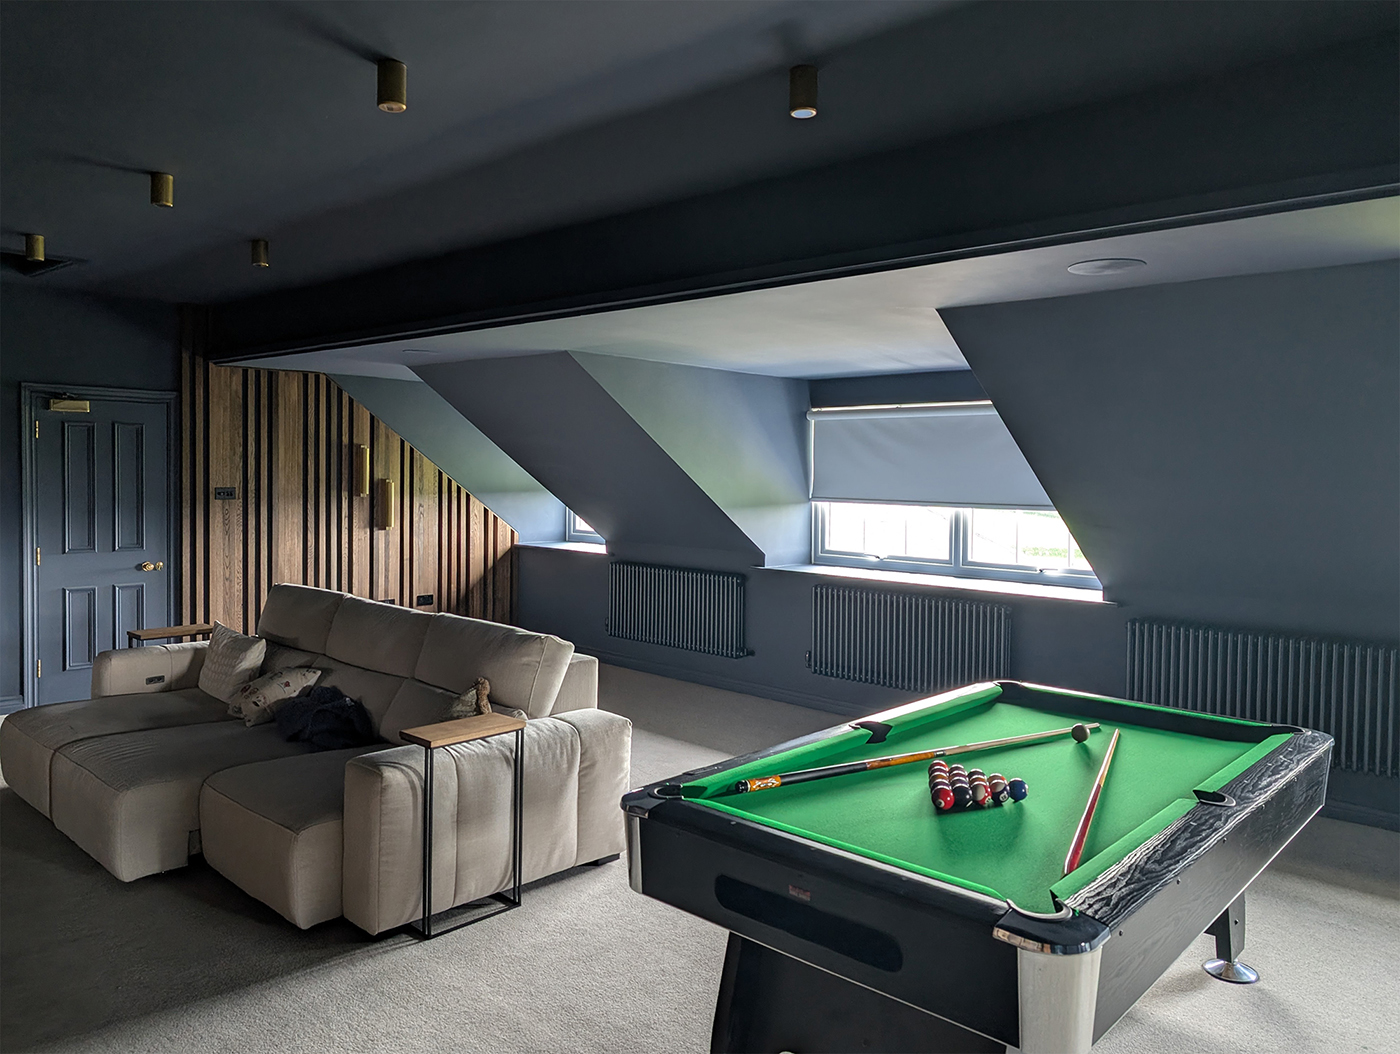
The LED lighting around the TV and display niches The next item to tackle was the heating. Our clients told us that the room was often cold as the radiators didn’t give off enough heat, so after working out how much heat the room needed, we chose some new ones with a much higher heat output, and added an extra radiator on the wall under the windows. We chose radiators in a deep blue colour which tones with the walls perfectly. |
||
 |
||
| The three new rich blue radiators | ||
|
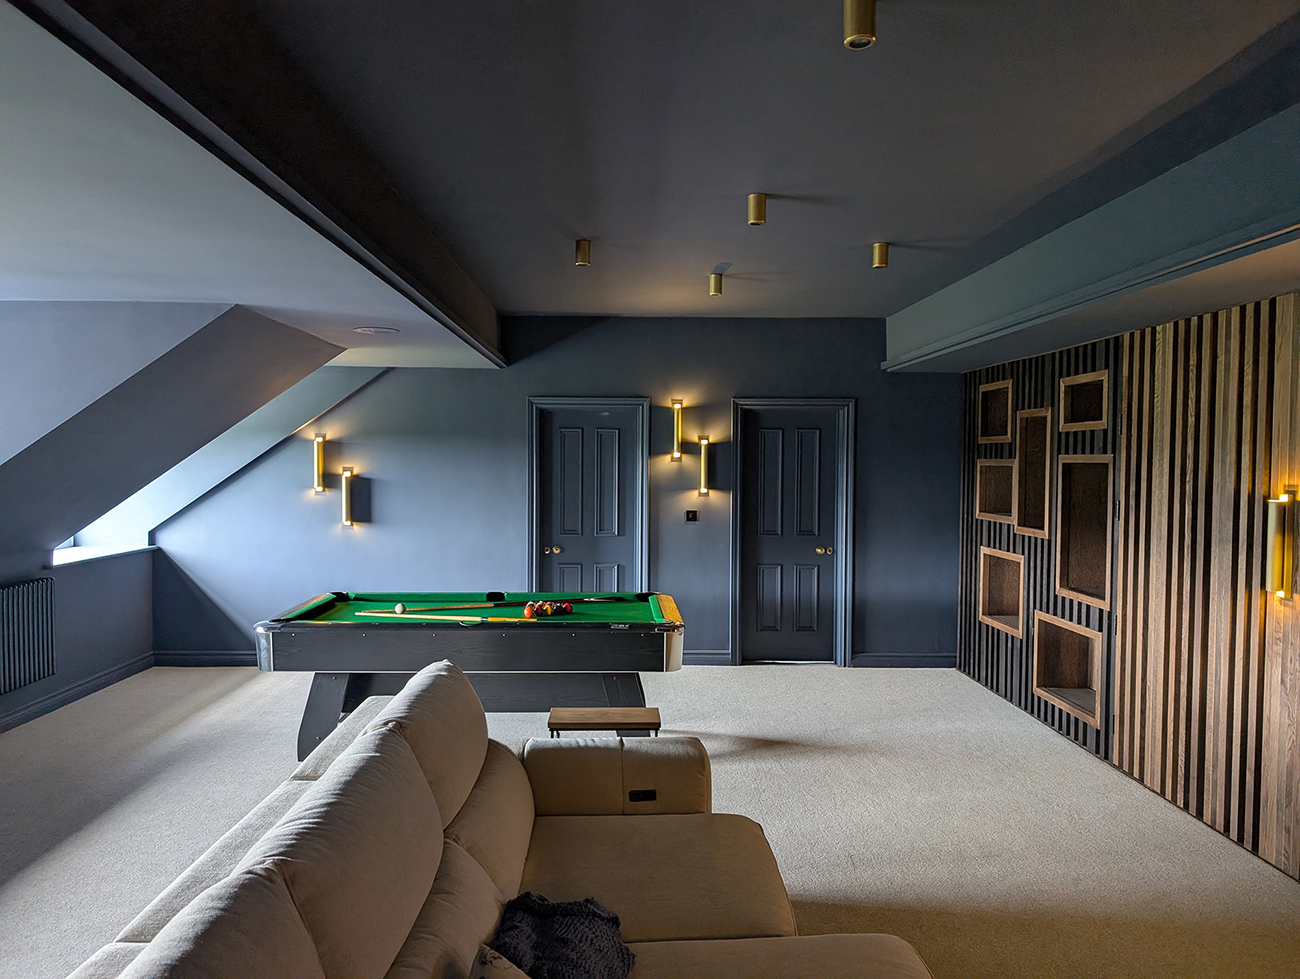
The clients were happy to keep their existing pool table, so we chose a new fabric for it and had it recovered. The green is smart and is a lovely contrast to the blue walls. Our clients told us they wanted a light carpet and sofa, to lift the overall scheme, so we sourced a cream carpet with light specks of blue which connects it to the wall colour. Our clients also felt that a coffee table would get in the way, so we sourced side tables that sit over the arms of the sofa for placing drinks on - a very neat solution. The final pieces of furniture were an armchair and some footstools, to provide additional seating when the family are playing pool. These are being made to order and have yet to arrive, so aren’t in these photos. The bespoke bookcases and desk haven’t been made yet, so you can see that these are very much work in progress photos until the finishing touches arrive. |
||
 |
||
|
The clients are already using the room, and are delighted with how cosy and welcoming it feels. They tell us it is perfect for movie nights when it’s just the two of them, and they are looking forward to when the family come to stay so they can make full use of the pool table. Turning this room into a luxury cinema room is a great use of the large space above the house, and it feels like a haven away from the 'working' rooms downstairs. |

Welcome to the design blog, where you'll see posts about anything from the projects we are working on, to the latest fabric and wallpaper collections, and all things interiors related. We love colour, pattern, architecture and old buildings, and we love to share our finds with you.
Happy reading!