Design, Details, Delivery - from fabric to finished curtains
 |
|||
|
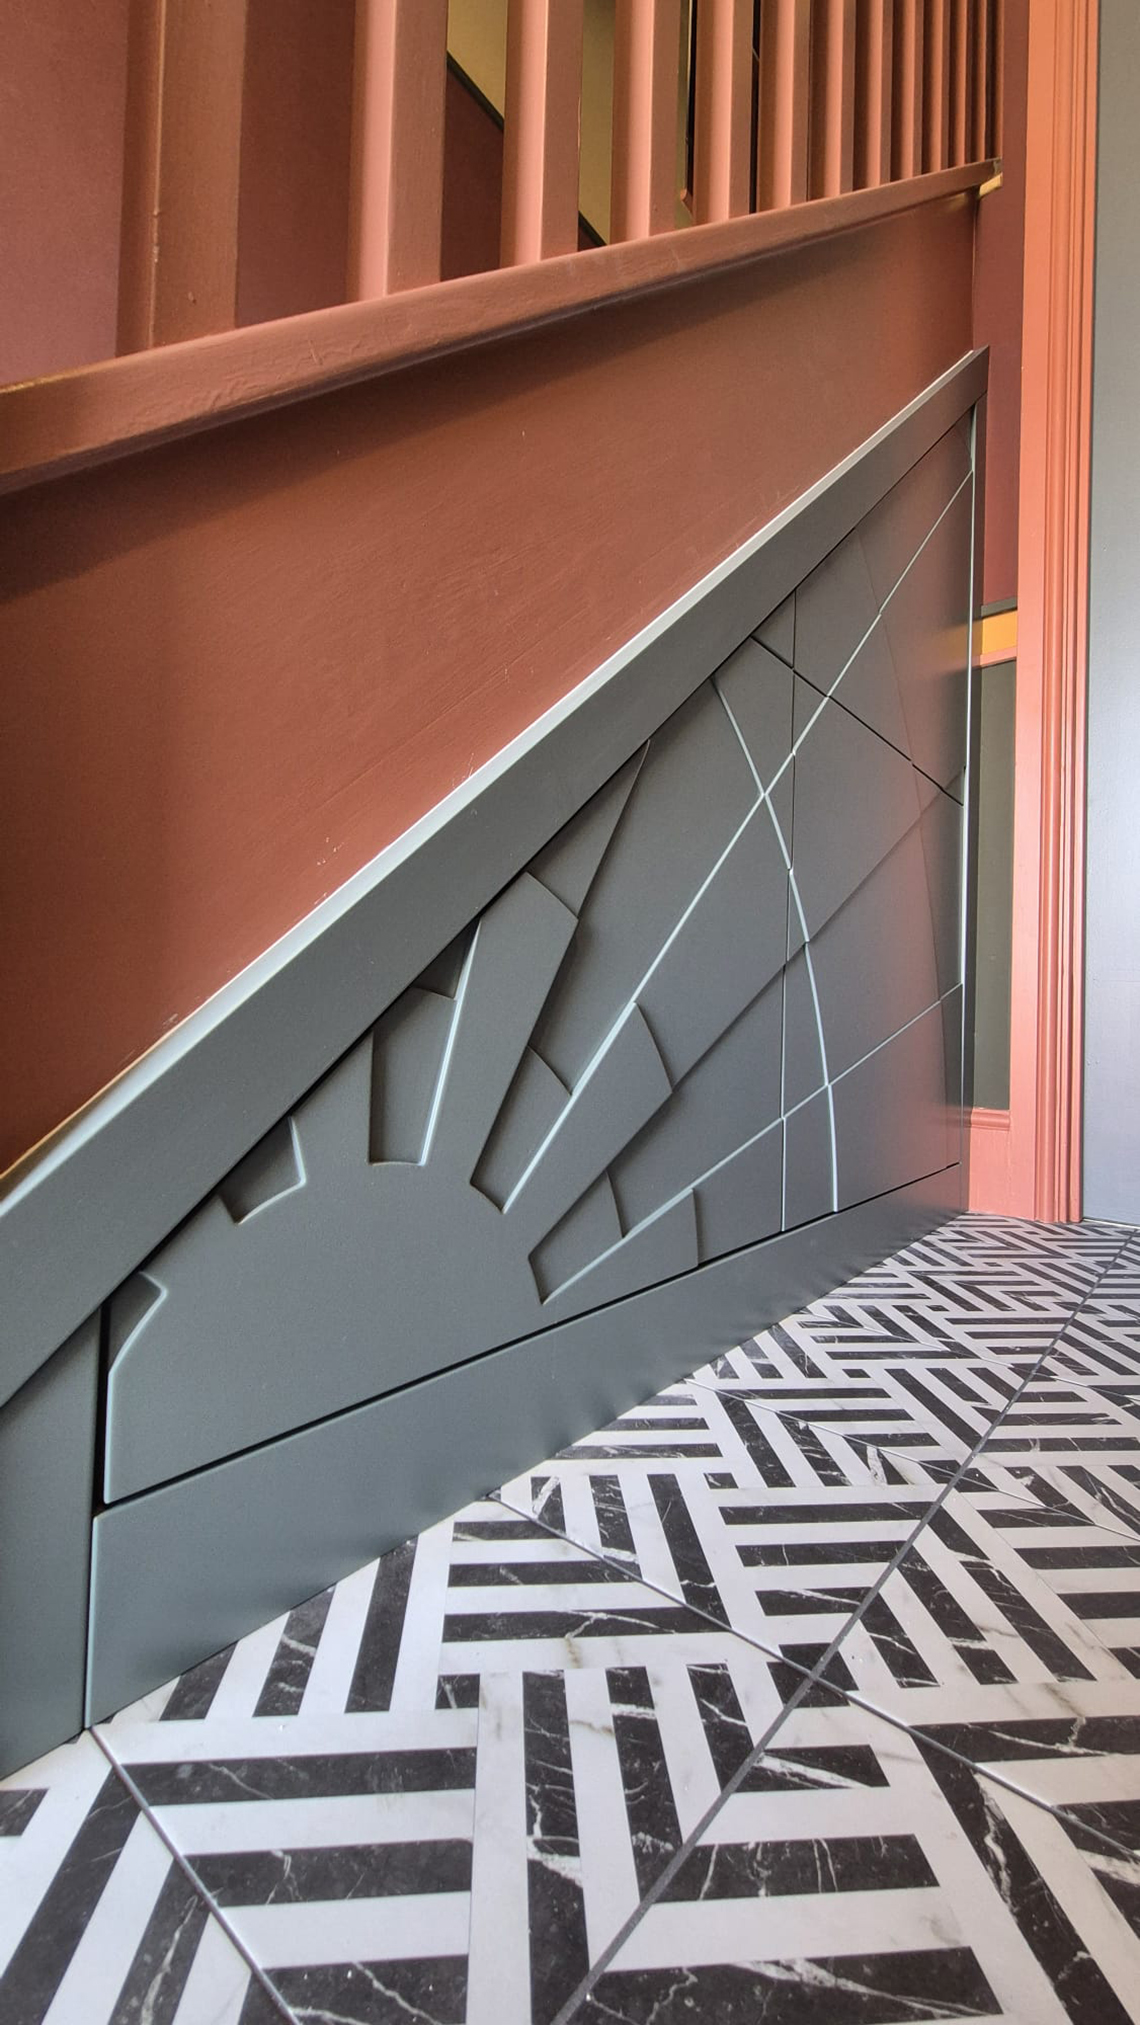
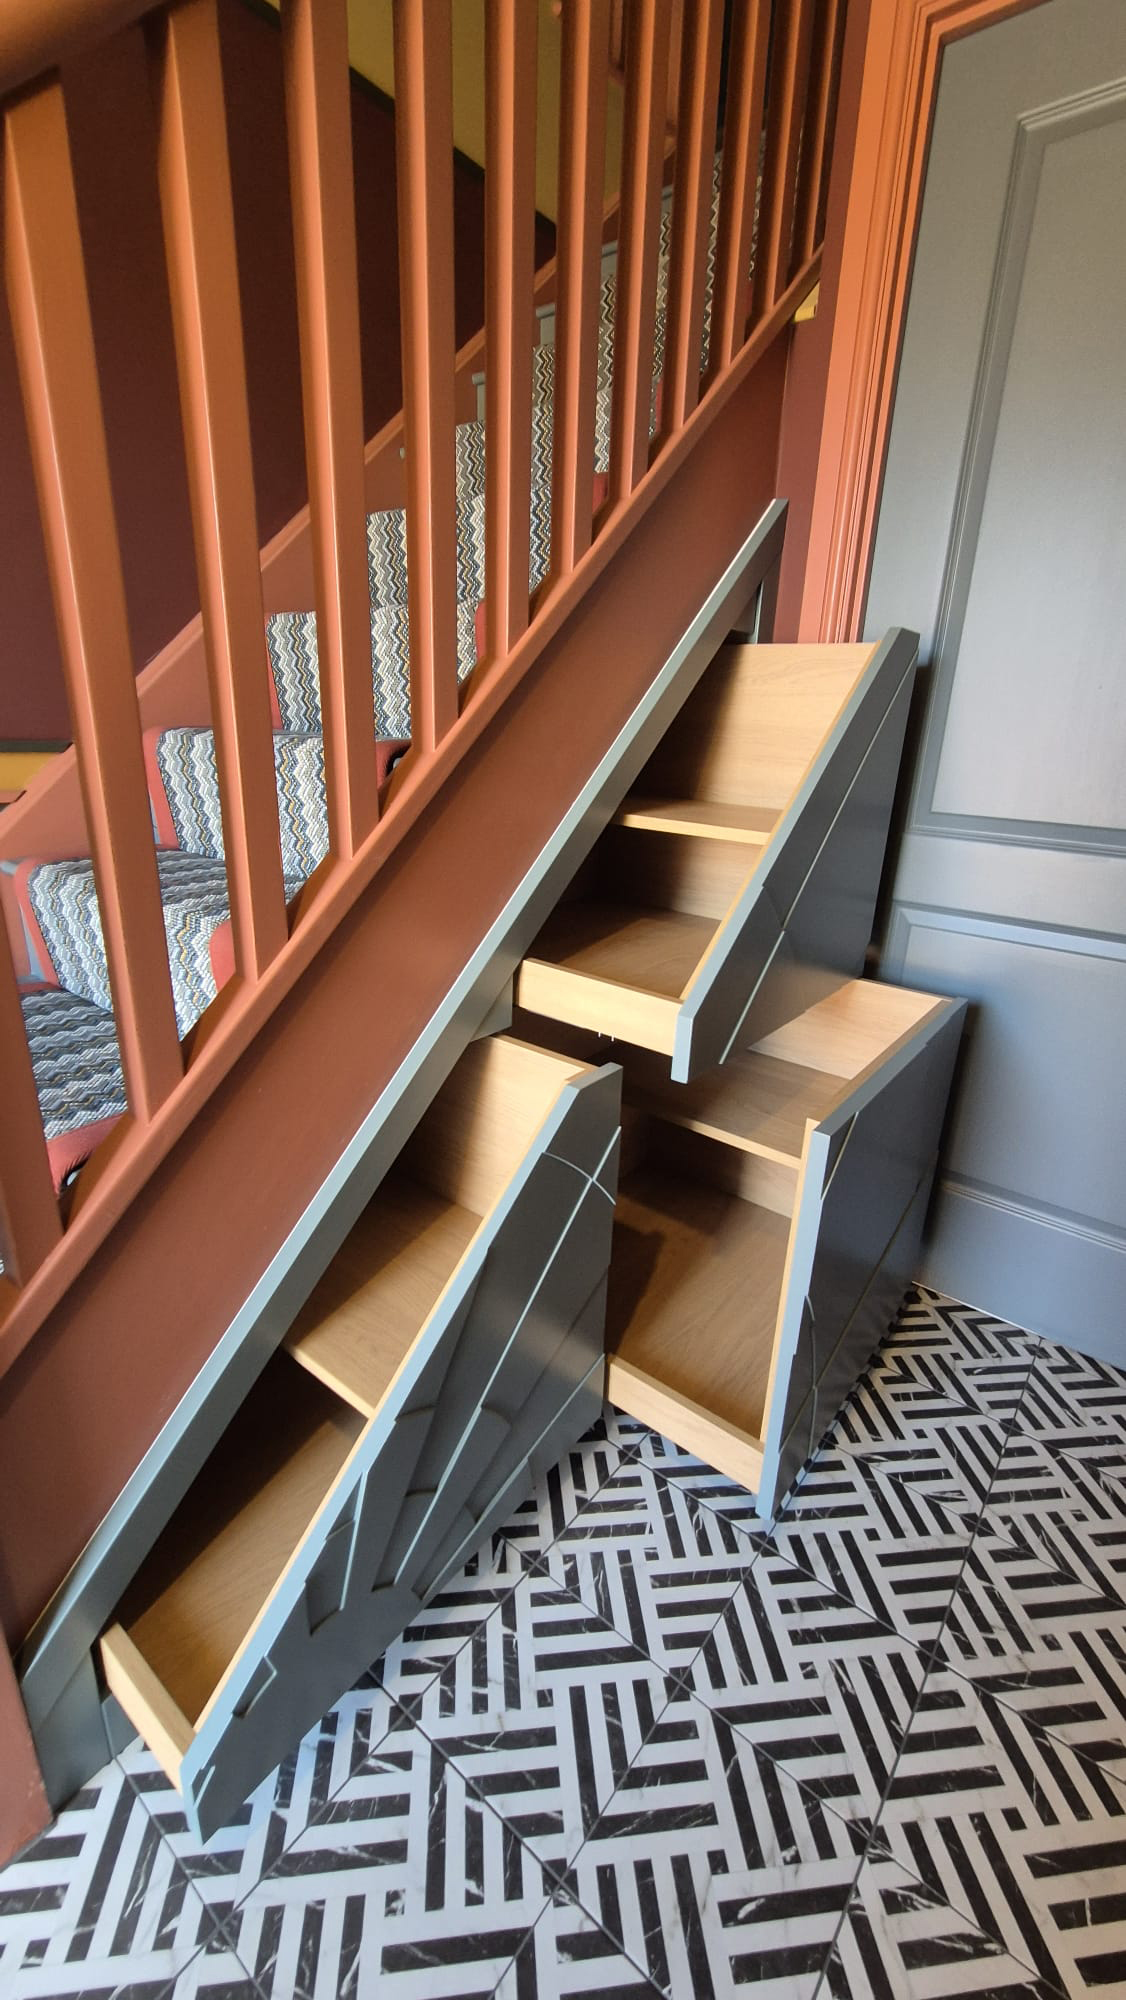
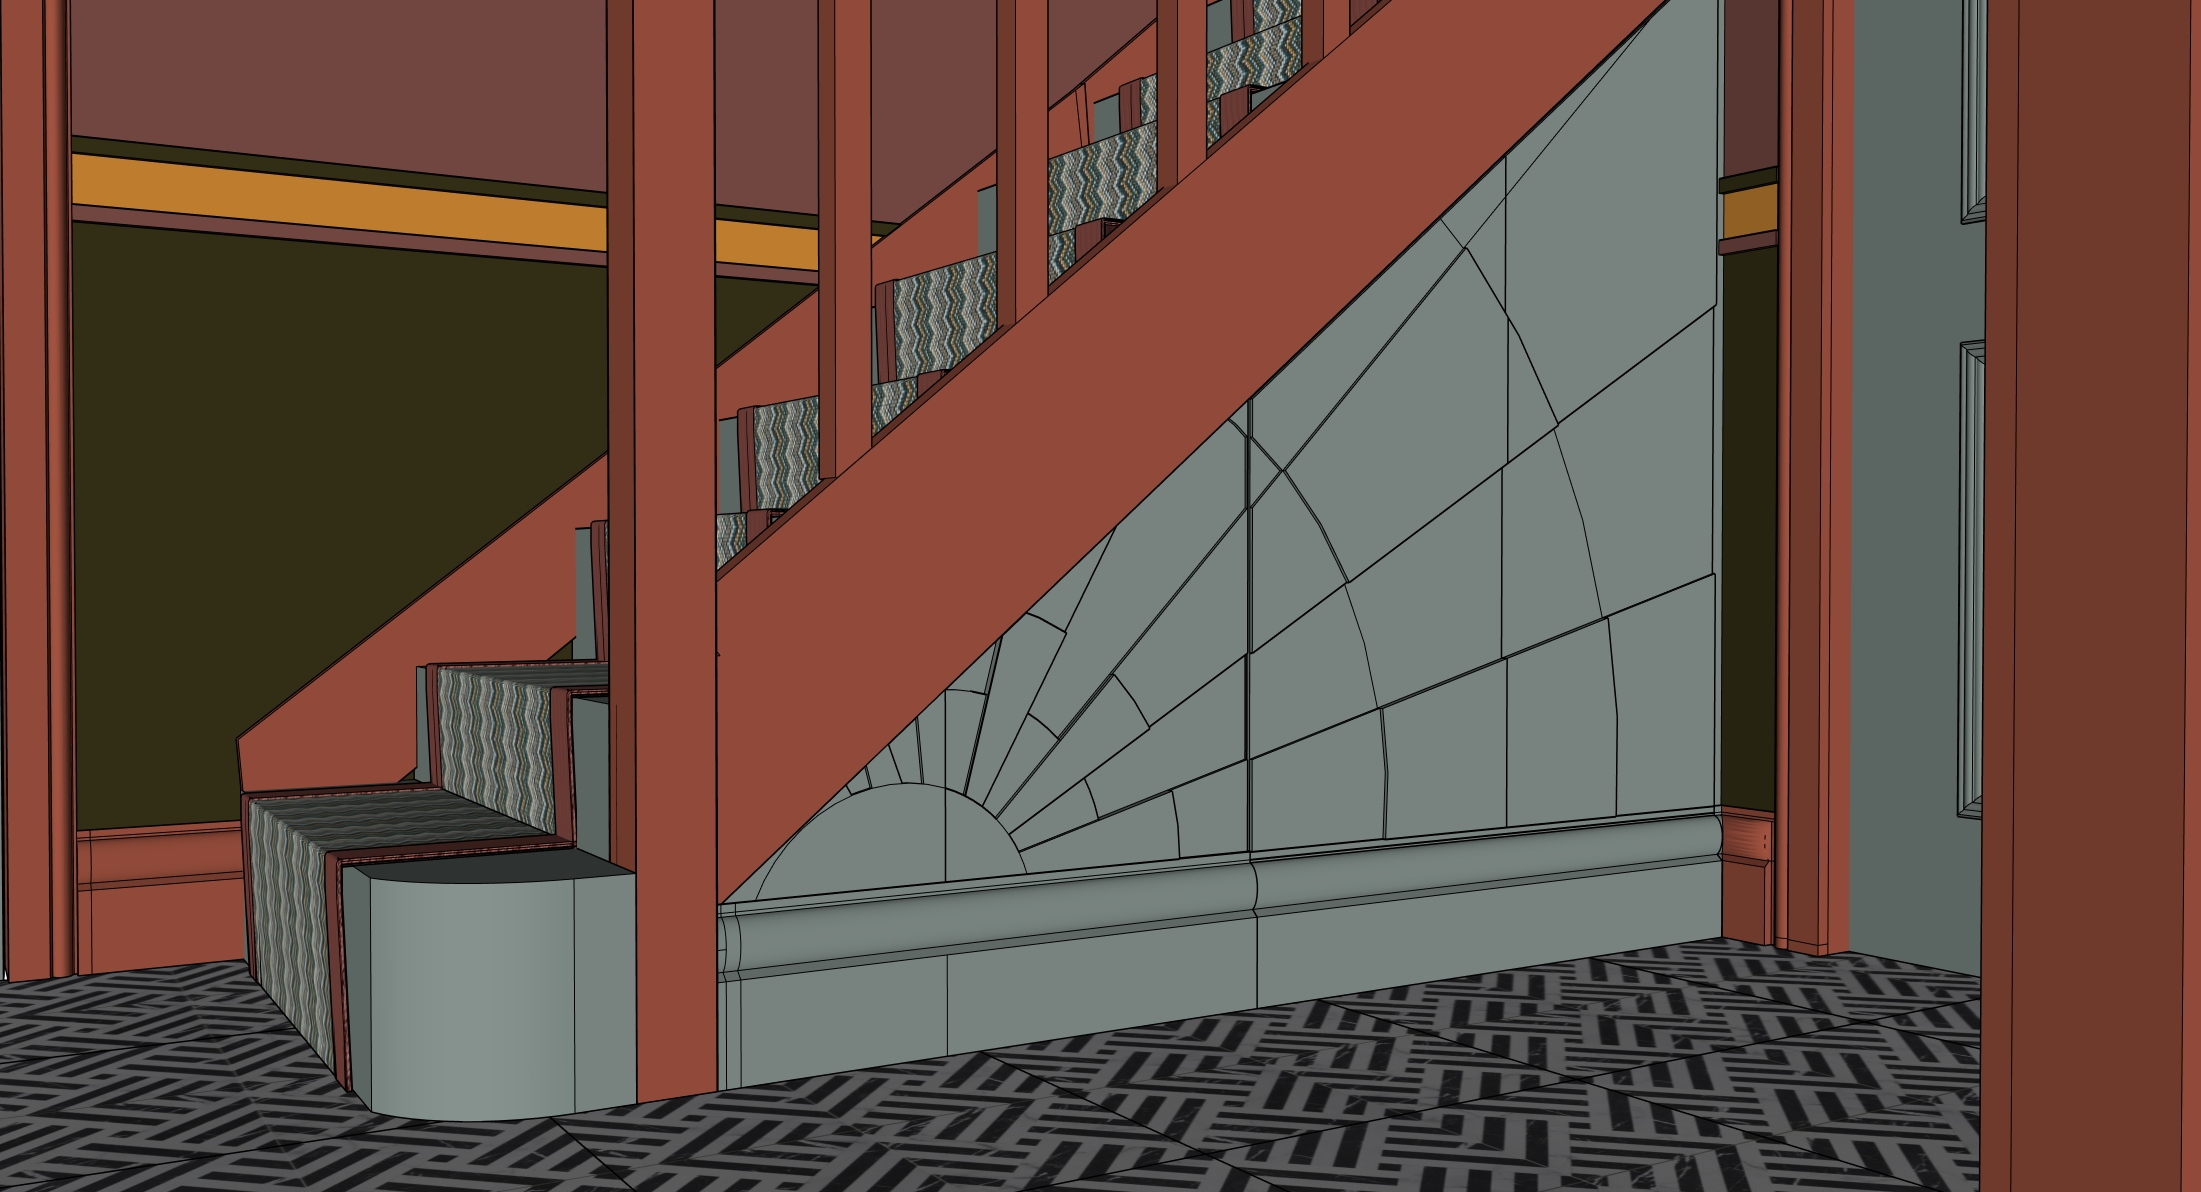
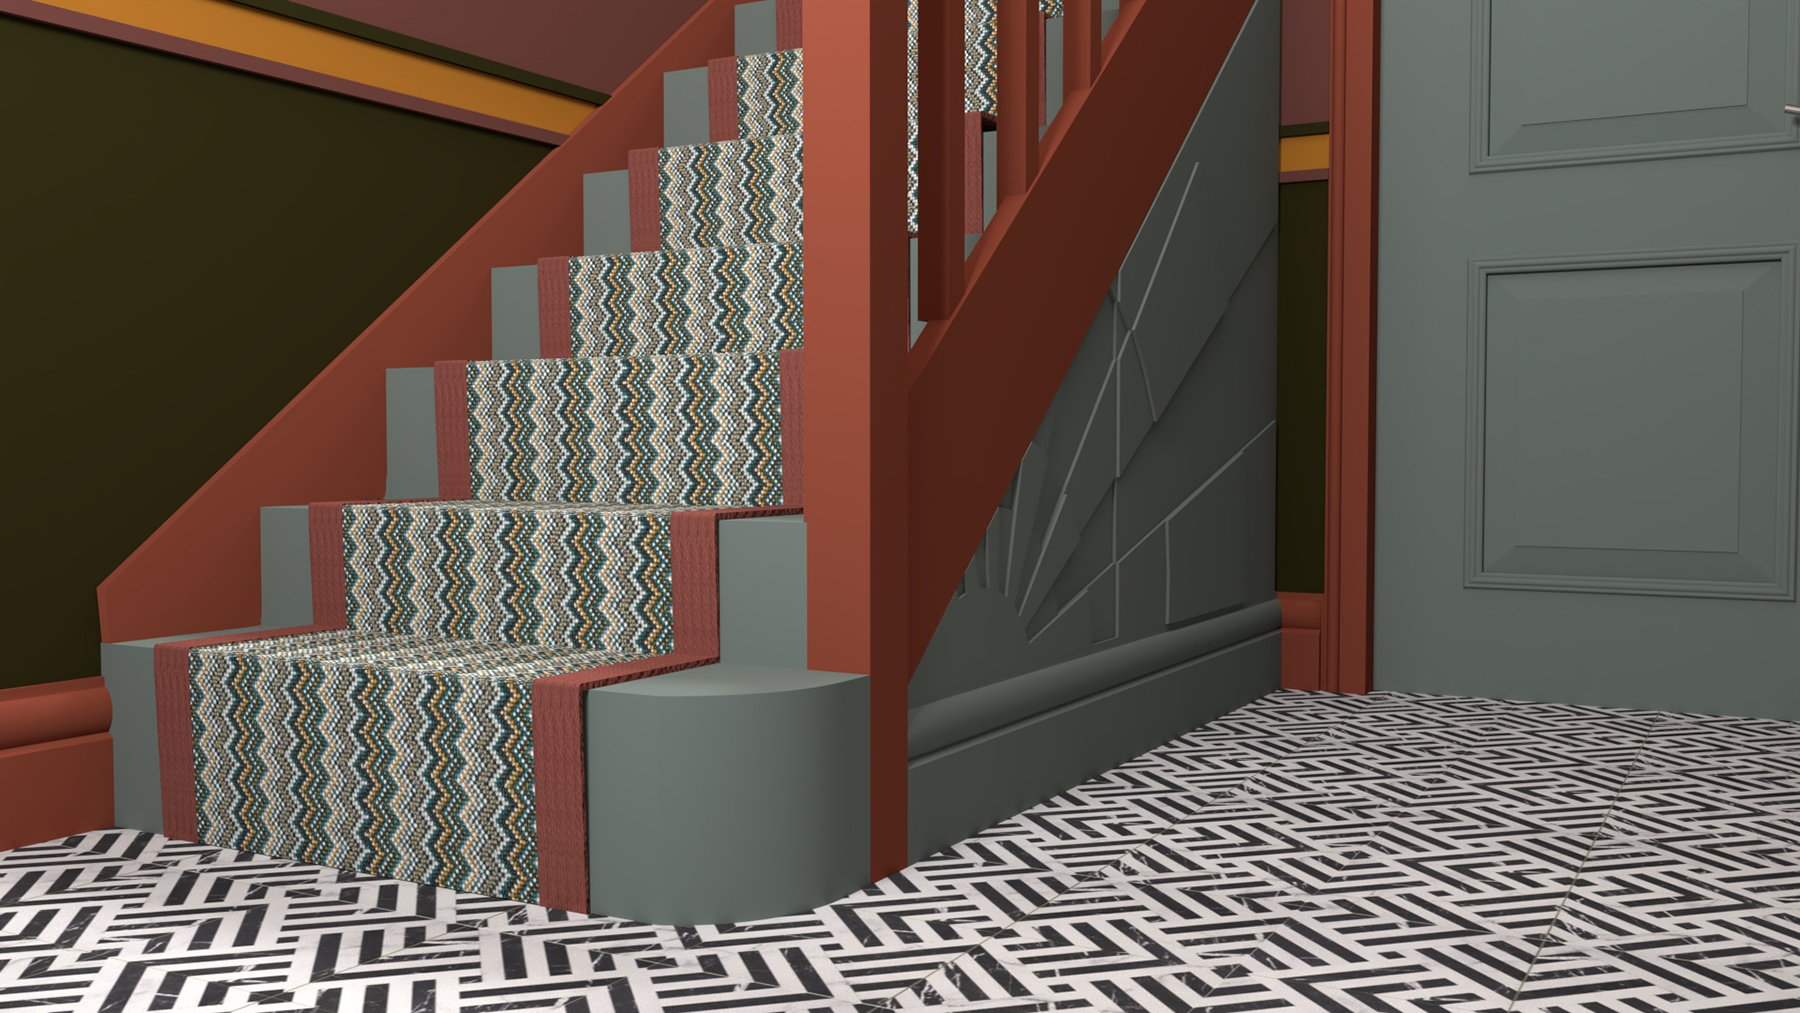
We’re continuing our new mini series this month with a look at bespoke carpentry, as it's something we do a lot, and in my opinion, it always improves the design outcome of any room. Most people crave more storage in their homes, and would usually like more efficient and better looking storage. Of course, you can buy off the shelf solutions, such as shoe racks, coat racks, TV units and wardrobes, but I can guarantee that you’ll save space and add more usable storage if you opt for a bespoke solution. You’ll also have a unique piece of craftsmanship in your home, which will look beautiful and function well for years to come. If you do go down the bespoke route, the major upside of having a piece made just for you is that it will fit exactly around your needs. You can have a shoe rack made which fits the size of your family's shoes, with different heights between the shelves so you can store heels, ankle boots, wellies and kids' shoes all in one place. Or you could have a wardrobe made with the hanging rails at the correct height for hanging long dresses, short dresses, suits and trousers. There would also be just the right number of drawers of the right size to store your items neatly. Everything would be organised and to hand when you need it, just the way you want it to be - that’s my definition of interiors luxury, and is essential for making everyday living just that bit easier. Designing bespoke pieces of furniture is one of our specialities, as we’ve done it so many times, and we encourage our clients to consider unique carpentry as a beautiful solution in most projects. A good example is this under-stair shoe cupboard we installed last year - it’s not only practical, but it adds an extra layer of depth to the space’s overall design: |
|||
Here’s how we took it from an idea for some hallway storage to the beautiful finished piece. Our clients’ wishlist included some storage under the stairs for ankle boots and both men’s and women’s shoes, and they wanted this piece to reflect the 1930s inspired design style we were using throughout the rest of the home. The space under the stairs was tight, so we decided to ‘steal’ some of the understair cupboard accessed from the kitchen. |
|||
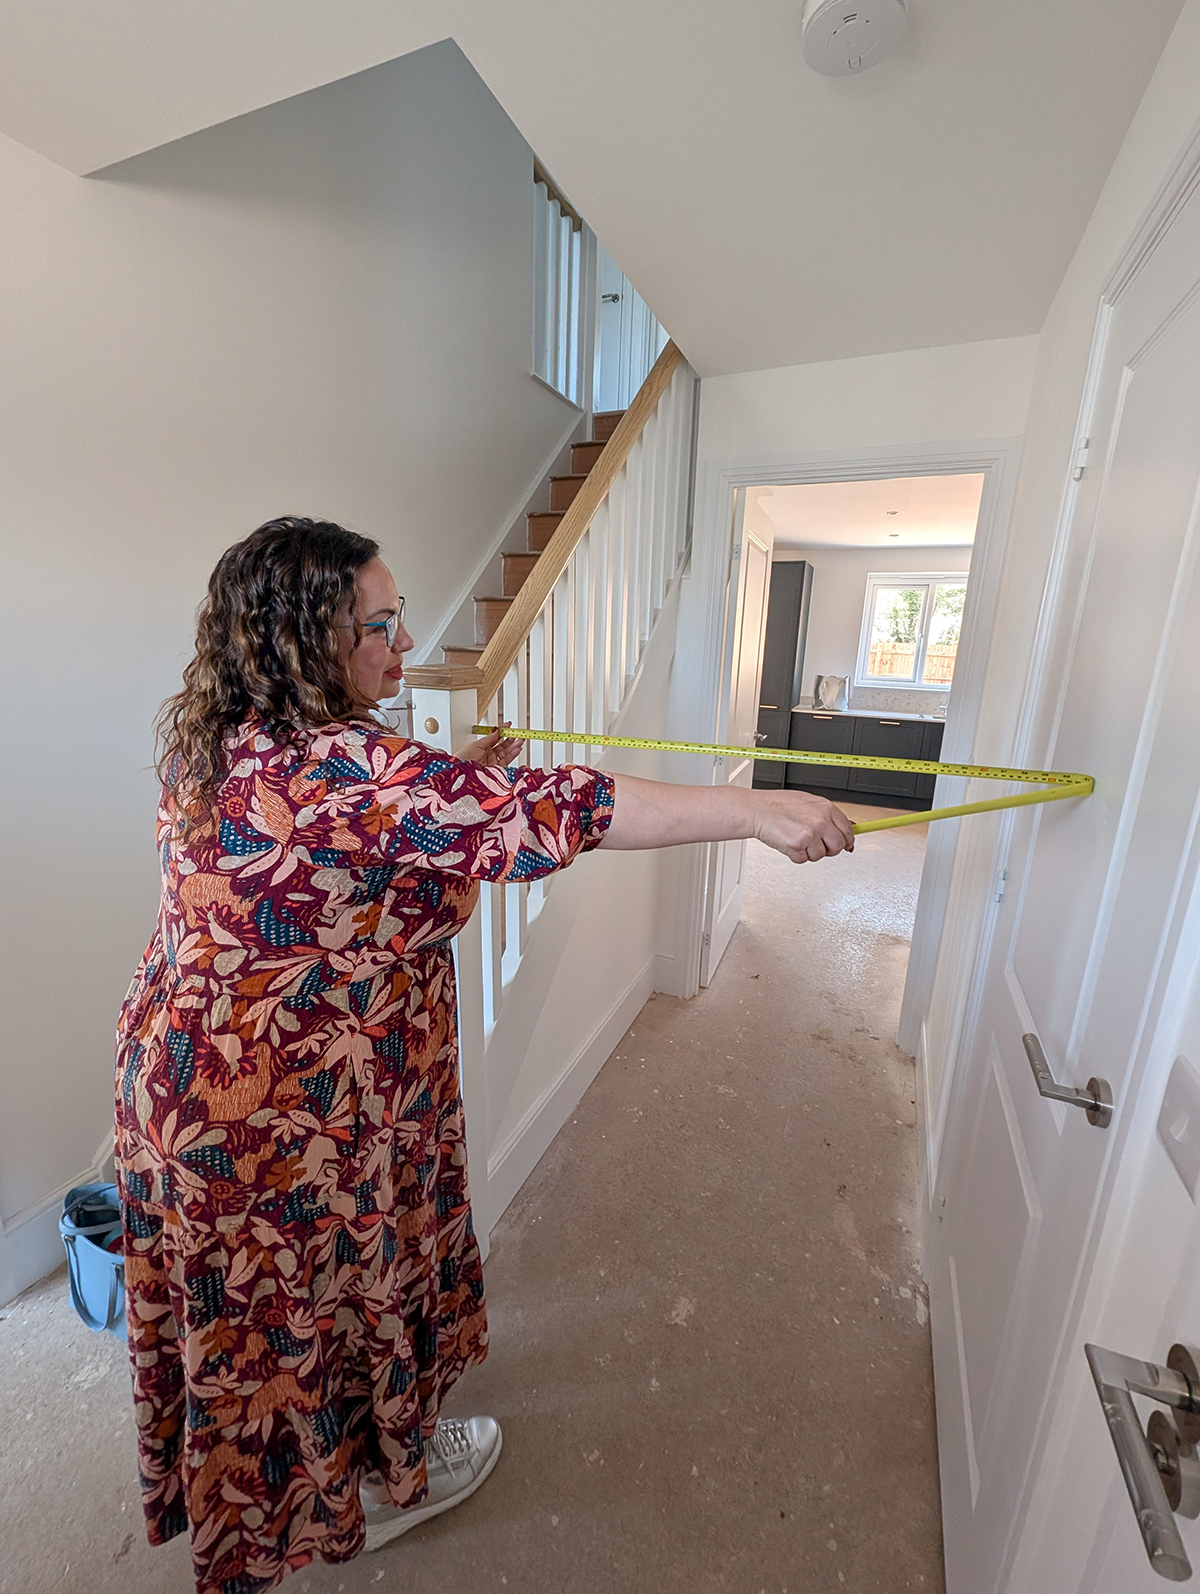
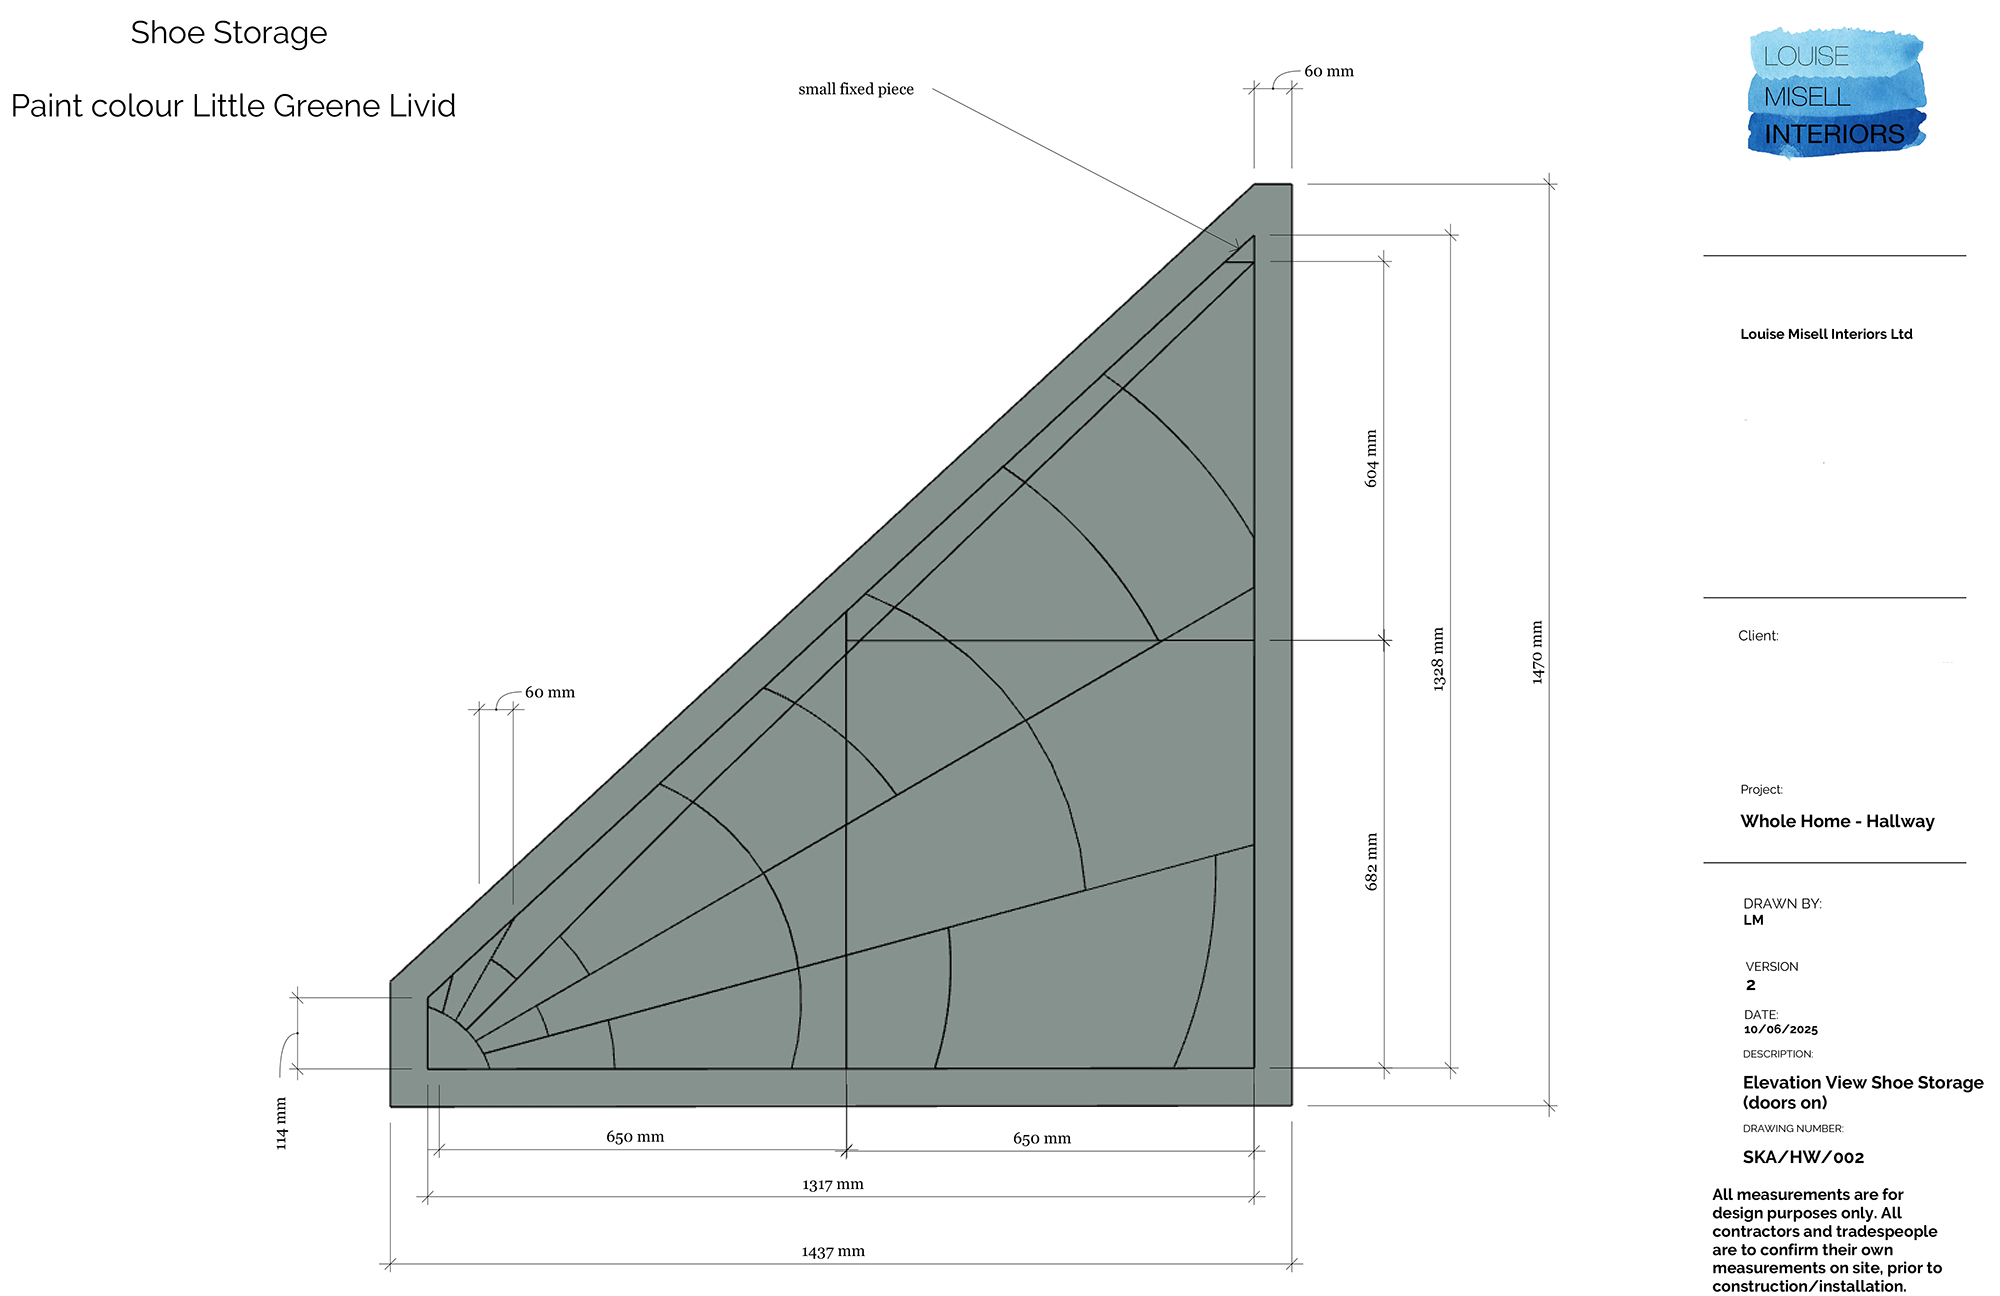
In order for this to work, our measurements needed to be spot on. The first step at this stage is always a site measure, where we take lots of photos and measure the space in minute detail. When we come to design the piece in our 3D modelling software, it needs to be accurate so we can be sure the design will fit properly in the real home once it's been made. We also need to measure the whole space, so we can be sure that things like cupboard doors will have enough space to open all the way, and note anything like plug sockets or door swings which could impact the design. After we’ve taken all the measurements and built a 3D model of the room, the next step is to design the storage itself. |
|||
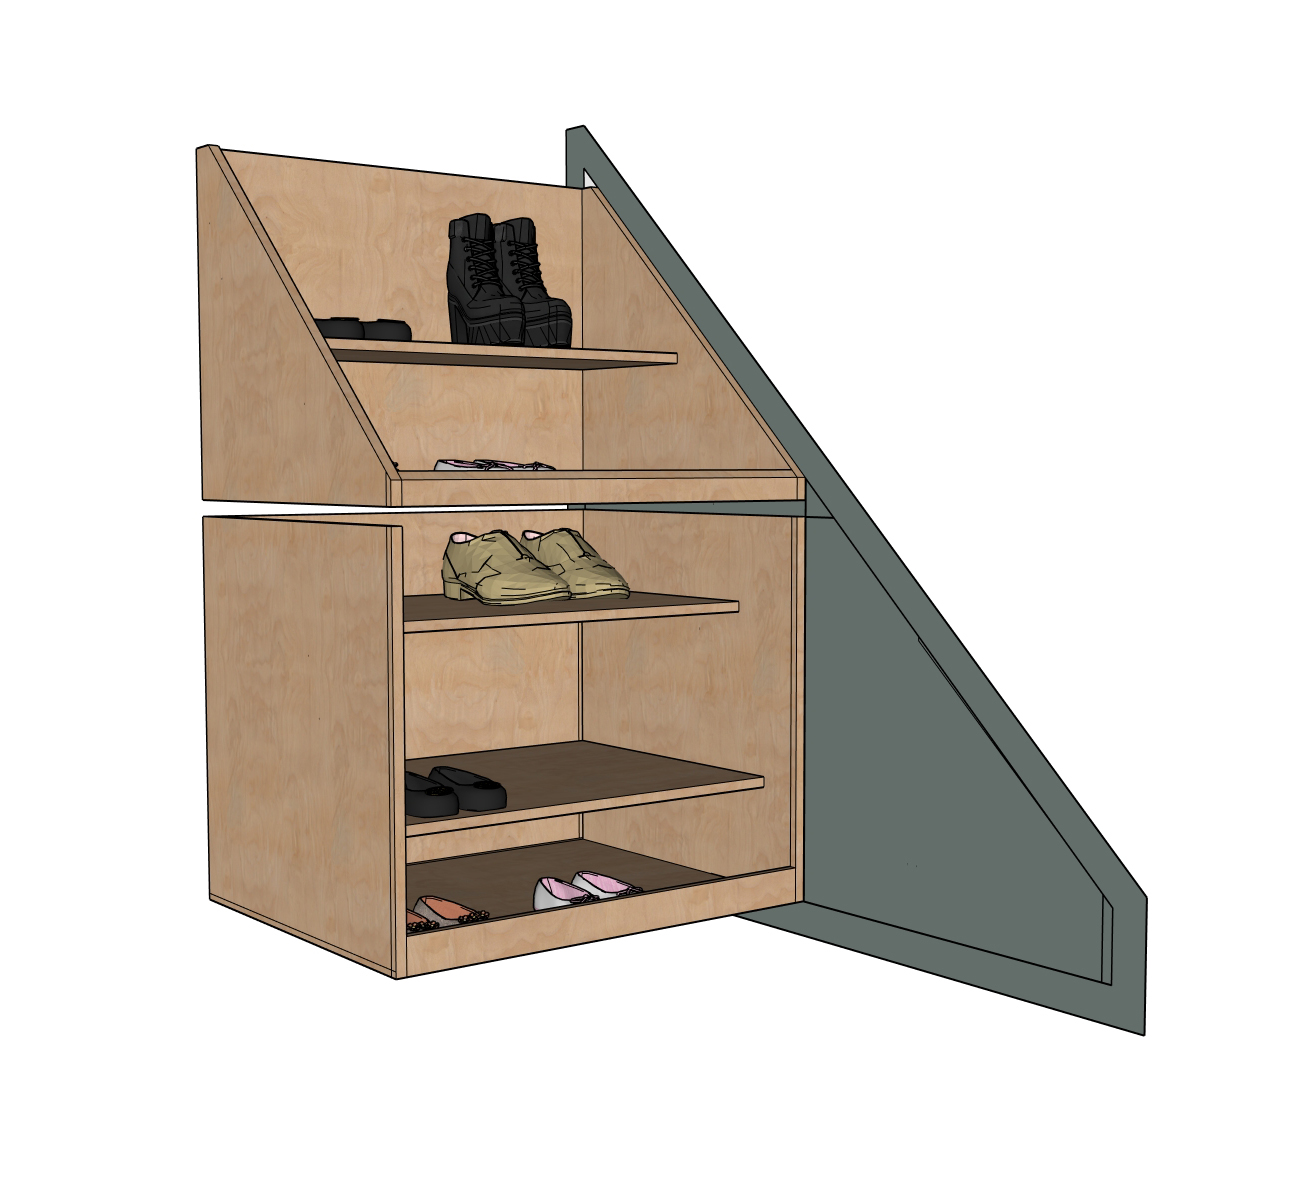
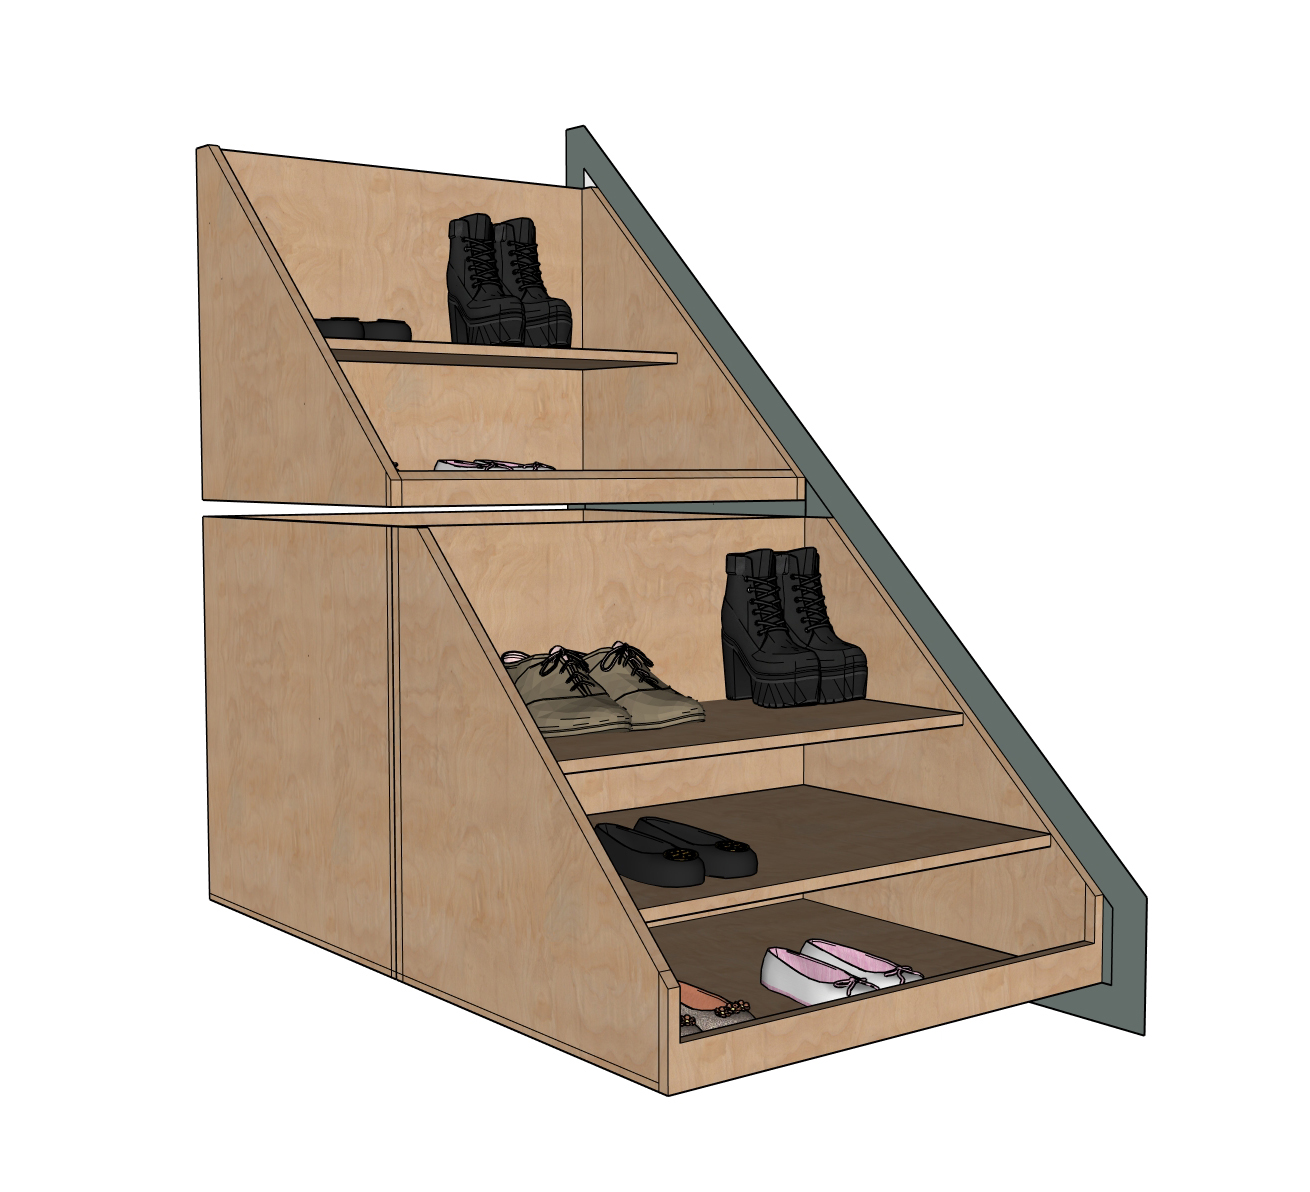
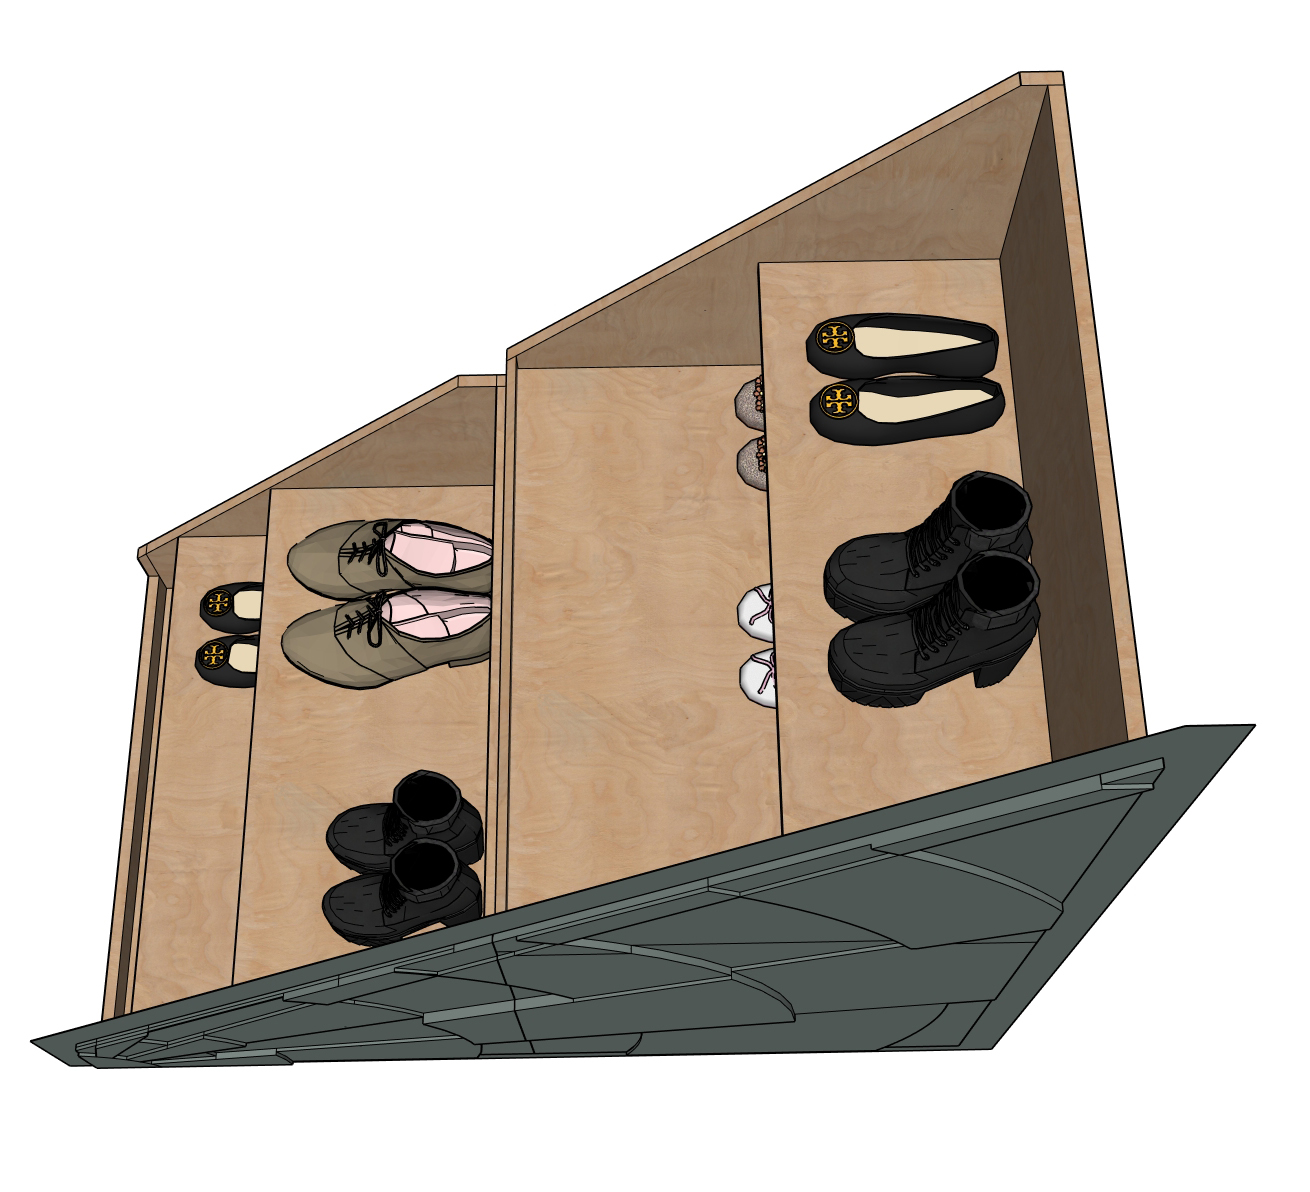
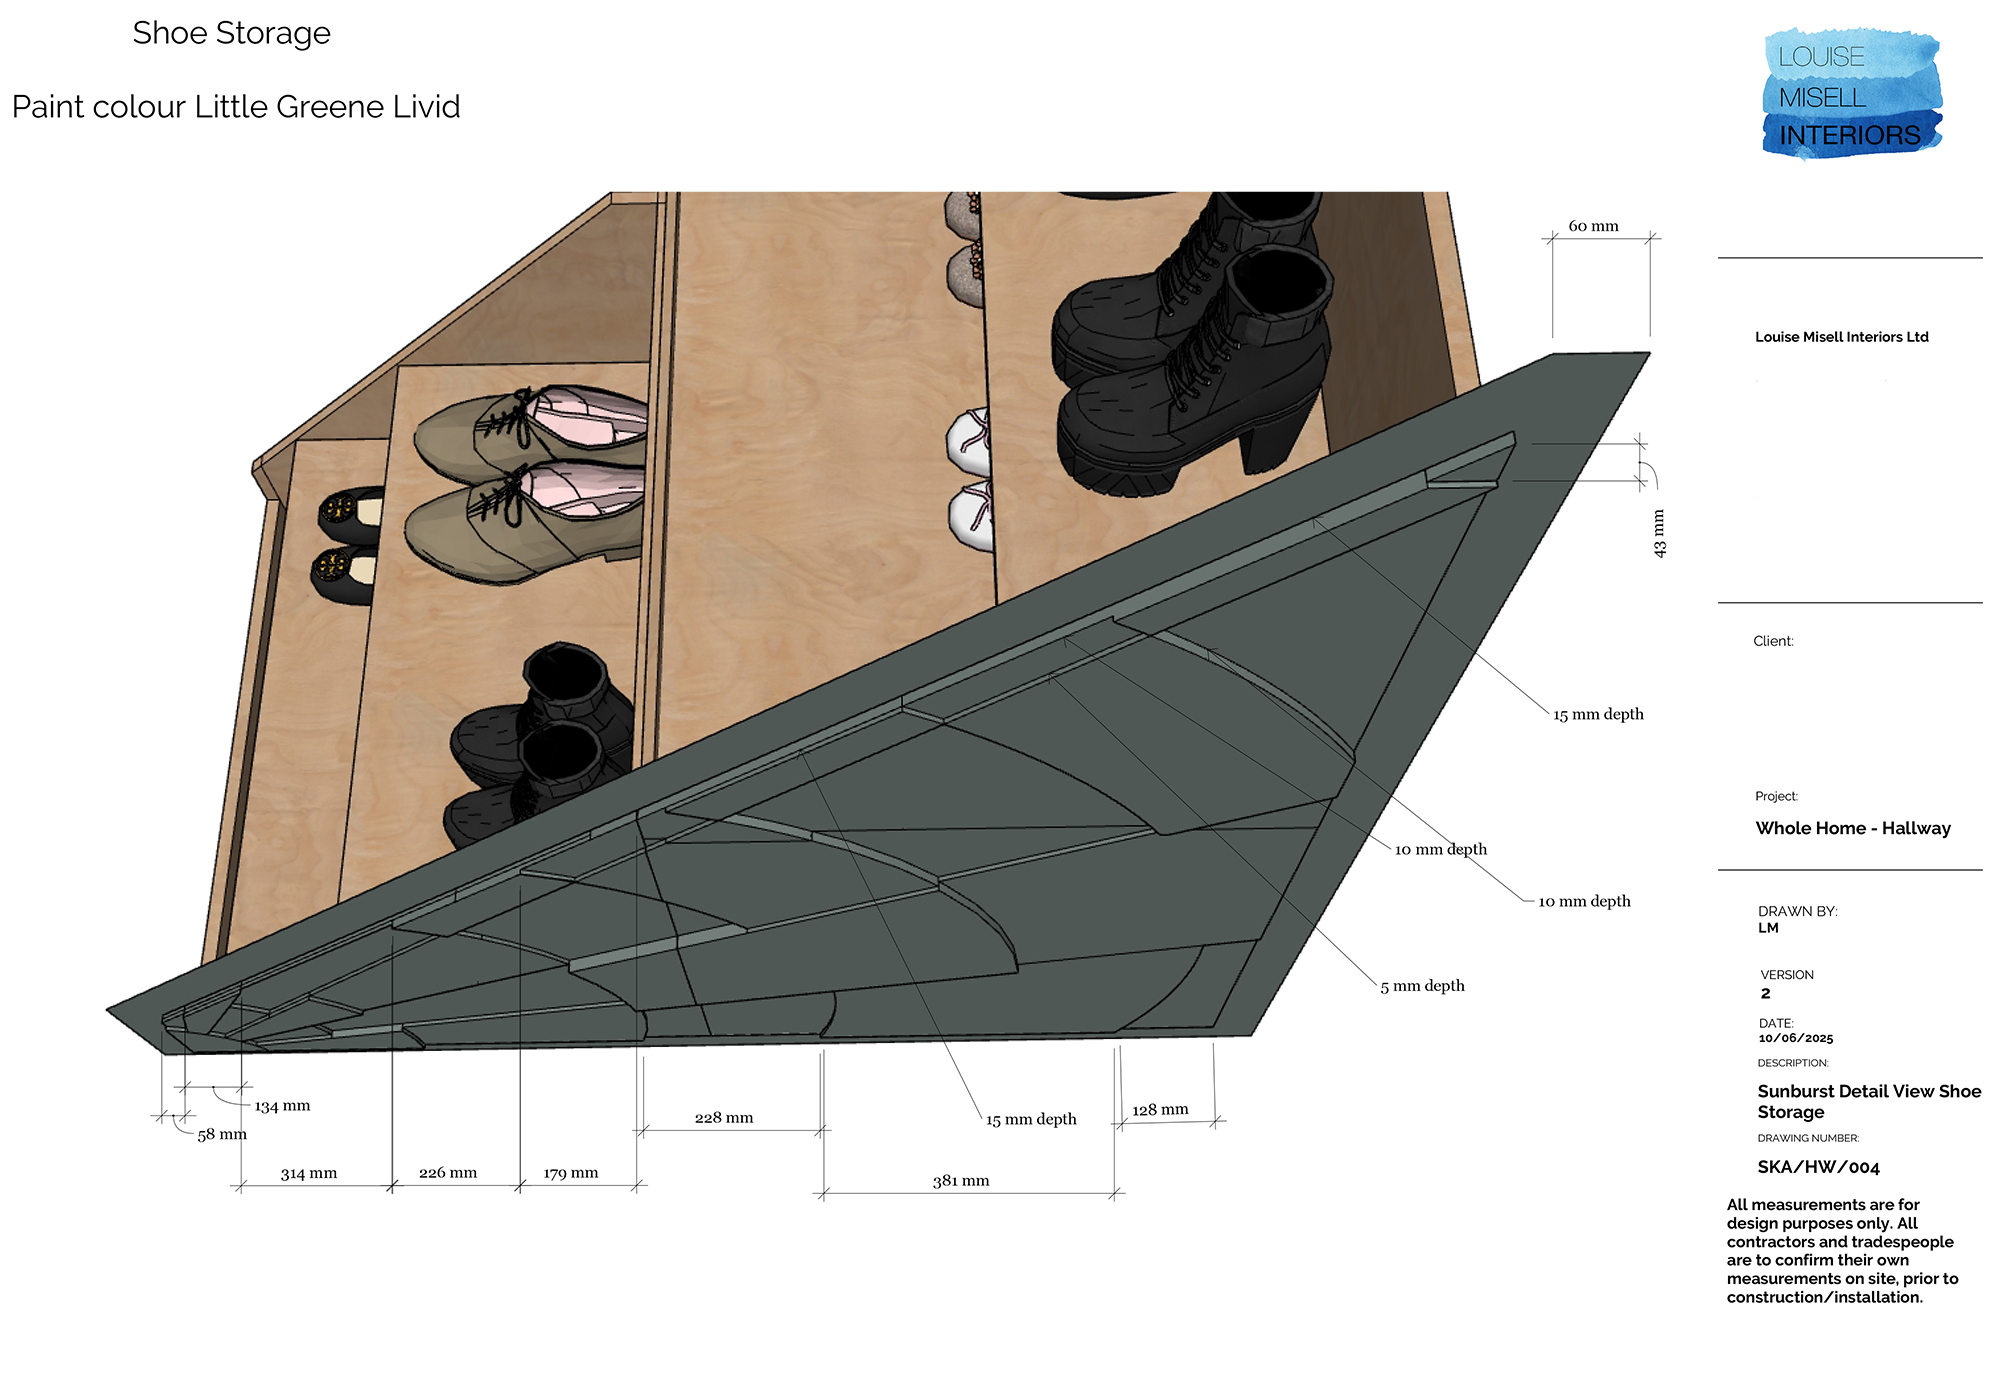
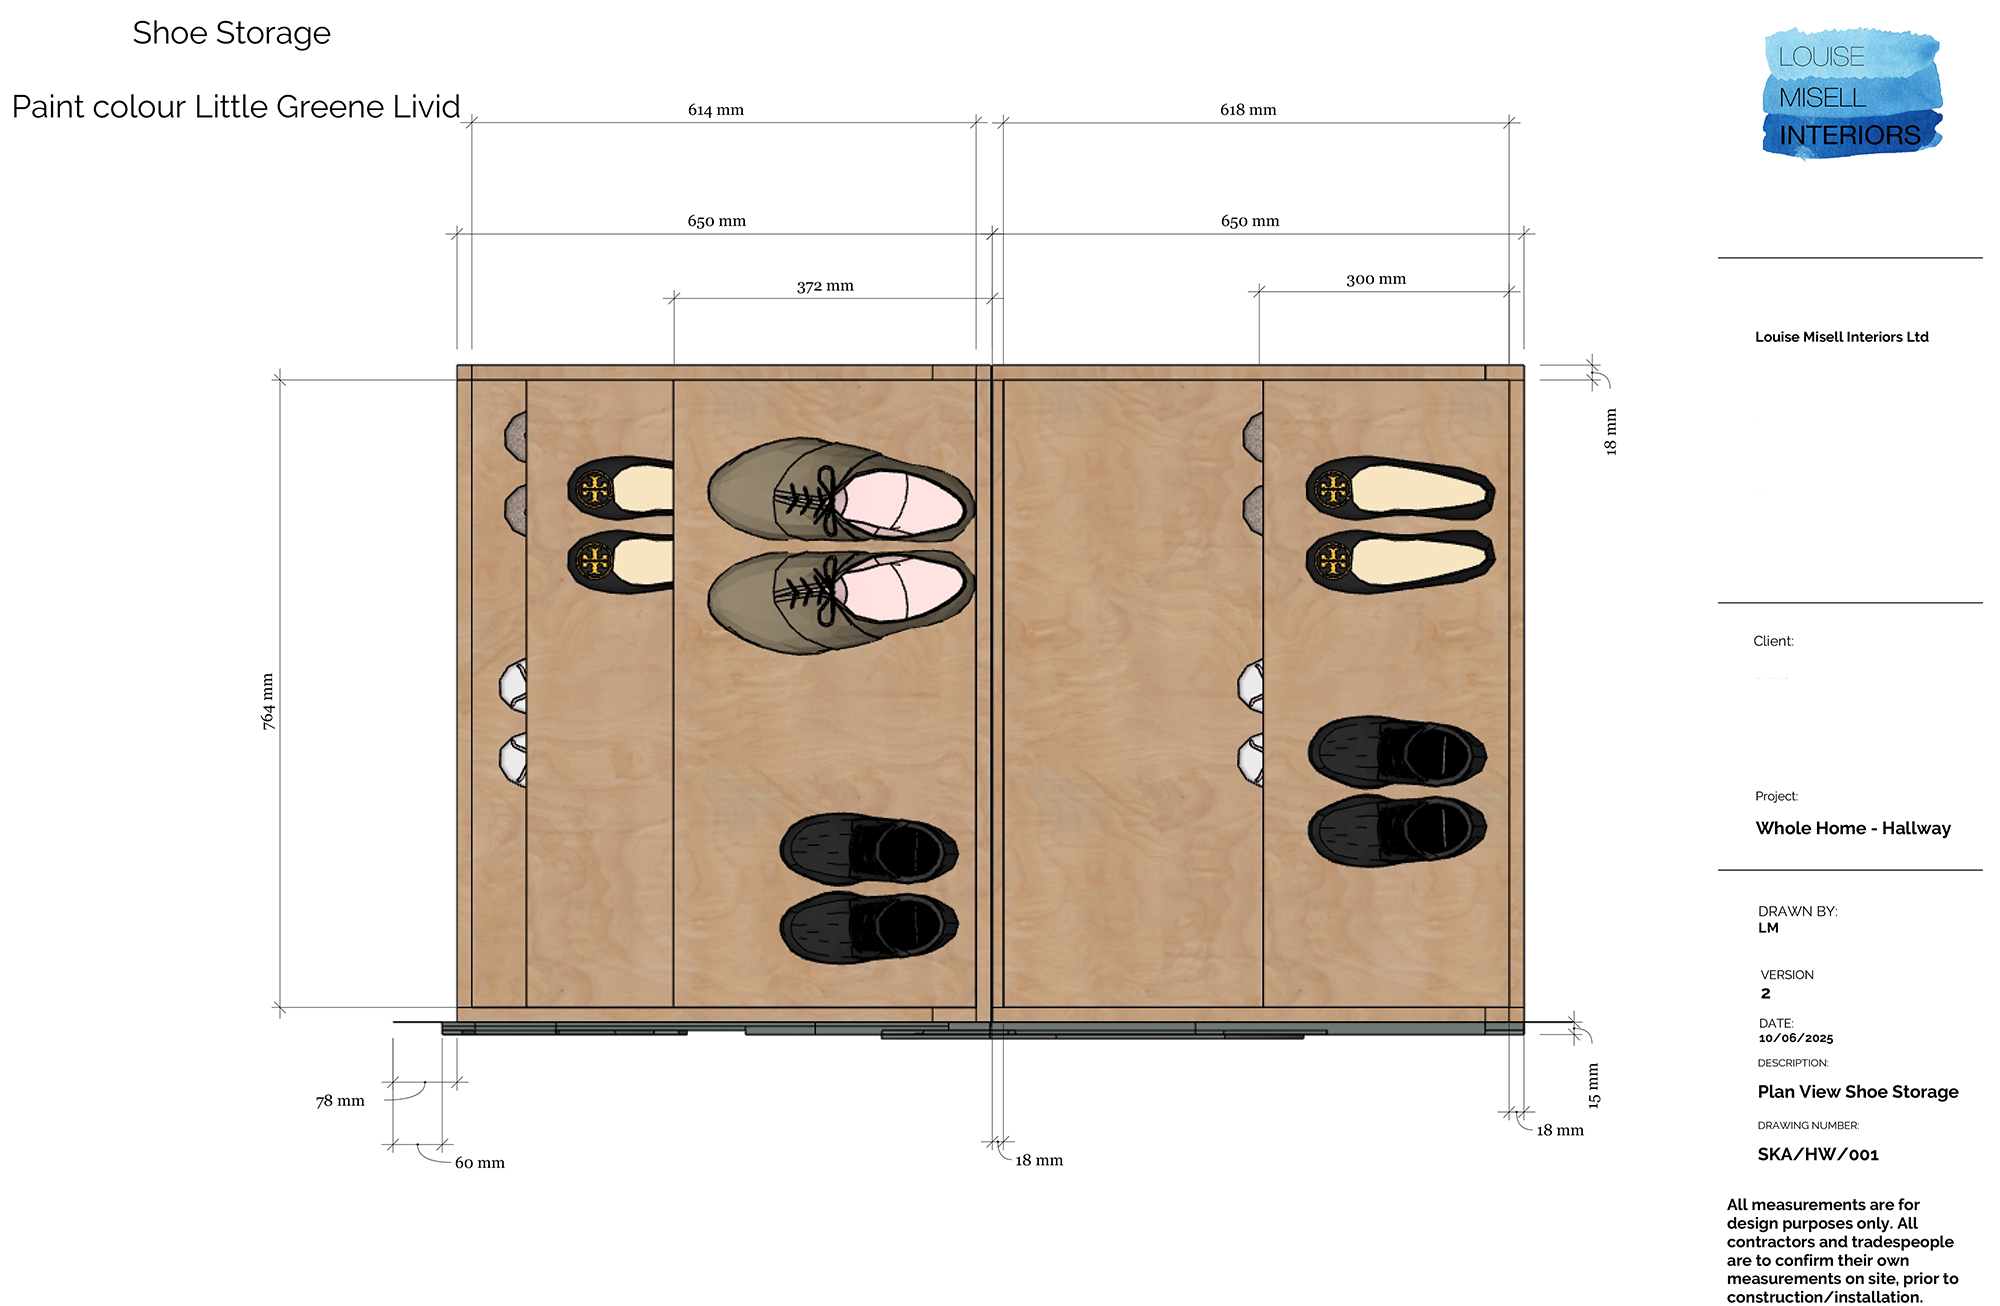
You can see from these drawings that we’ve designed the shelves to fit different lengths of shoes (men’s and women’s) and also different heights of shoes (ankle boots, flat shoes). This takes some maths to work out, and because the cupboard is under the stairs and access is on an angle, we also had to make sure that the shoes could be reached easily when the drawers were open. We designed the piece around standard MDF board thicknesses when drawing the shelves and doors, so that our carpenter could buy sheets of MDF without having to alter the thicknesses himself. This saves him time and saves our clients the extra labour costs. When the overall design of the piece is ready, we then consider how to finish the wood. We opted for an oil for the insides of the shelving, which is rubbed on by hand and is hardwearing enough to withstand shoes being moved around and pulled on and off. We chose a spray painted finish for the doors, to add some colour to the design and to tone with the scheme in the rest of the hallway. Once the internals were designed, we moved on to design the outside of the cupboard doors themselves. Our clients wanted something unique and inspired by 1930s graphics, so we based this design on the classic 1930s sunburst. This is a design which was often featured in the glass on front doors, but is usually picked out in different colours of stained glass, to look like the sun’s rays. In this case, as we wanted the design to nod to the 1930s but not ape it completely, so we chose to keep it all in one colour to add subtlety. The sunburst is created with relief and protruding pieces of wood, all following the curve of the sun at the starting point. |
|||
 |
|||
|
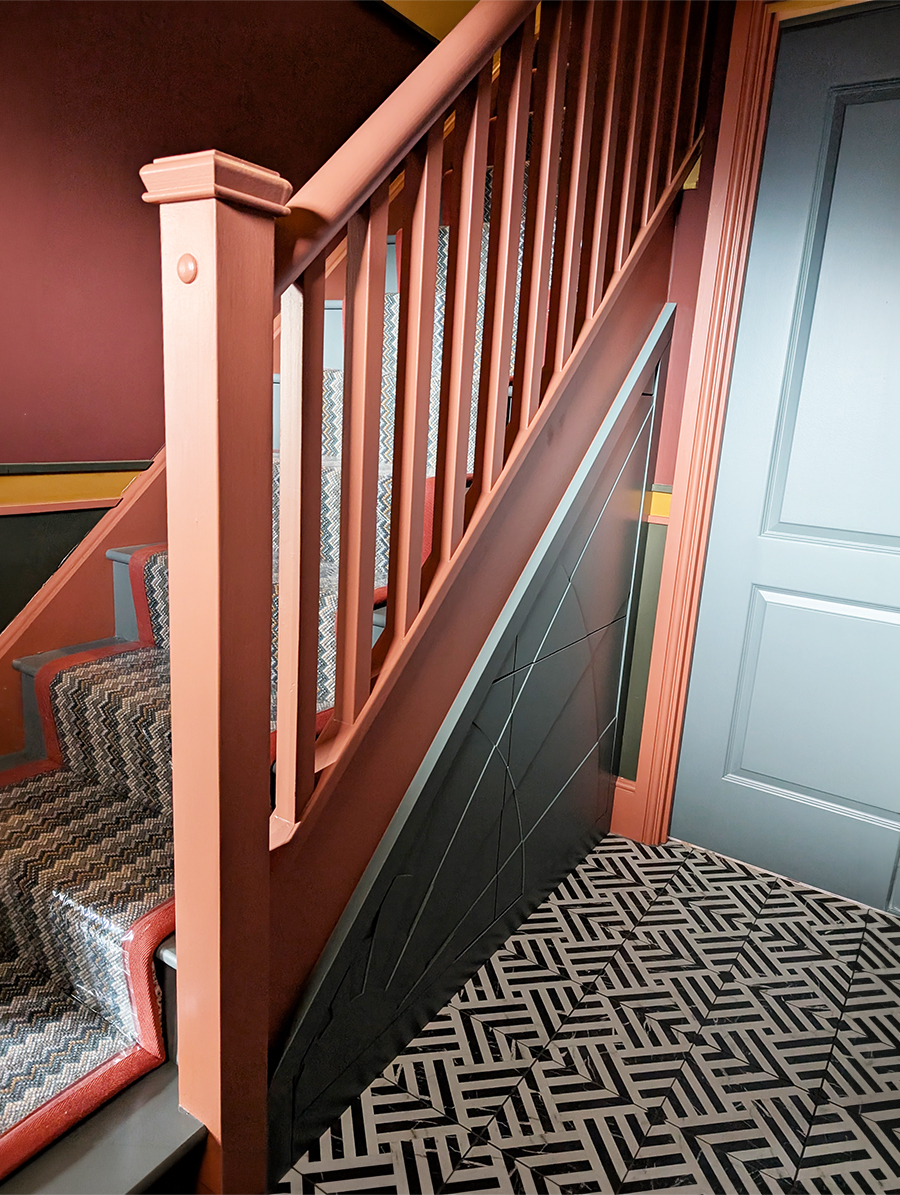
When the design is complete, as with any piece of cabinetry, we also have to consider how our clients can pull out the drawers and if any handles or hardware are needed. In this case, we opted for push click drawers because they would be installed in a fairly narrow hallway, and we didn’t want to risk anyone hurting themselves on protruding handles as they walked past. So there are no visible handles on this piece, which means the graphics on the drawer fronts are uninterrupted, too. Here is the finished design: |
|||
 |
|||
|
Once the design is ready and approved by our clients, the next step is to send construction drawings with measurements and finish details to our wonderful carpenter, who is fantastic at following the drawings and building exactly what we have envisioned. These drawings need to show him every detail and measurement, so he can follow the design and build every piece to the correct size. Here are some of the drawings we sent to him: |
|||
 |
|||
 |
|||
 |
|||
|
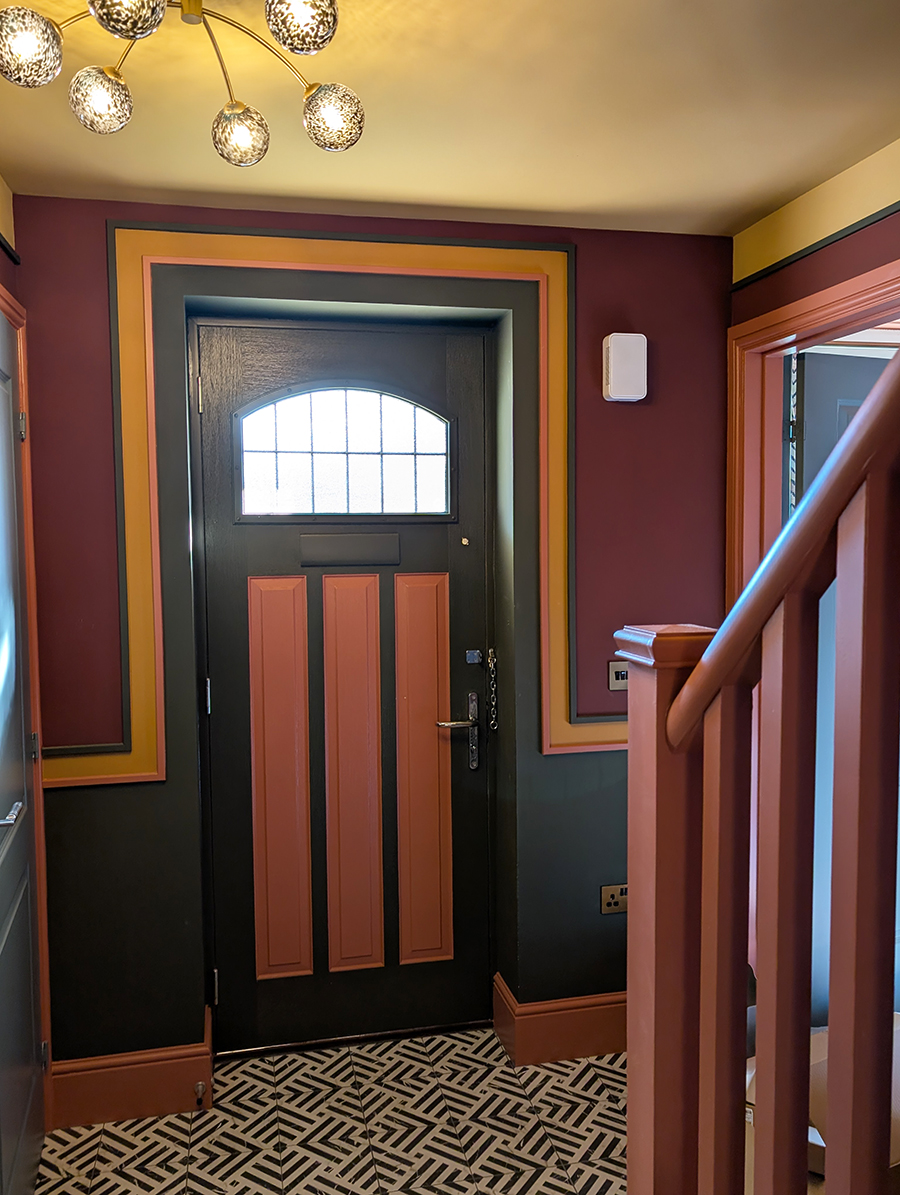
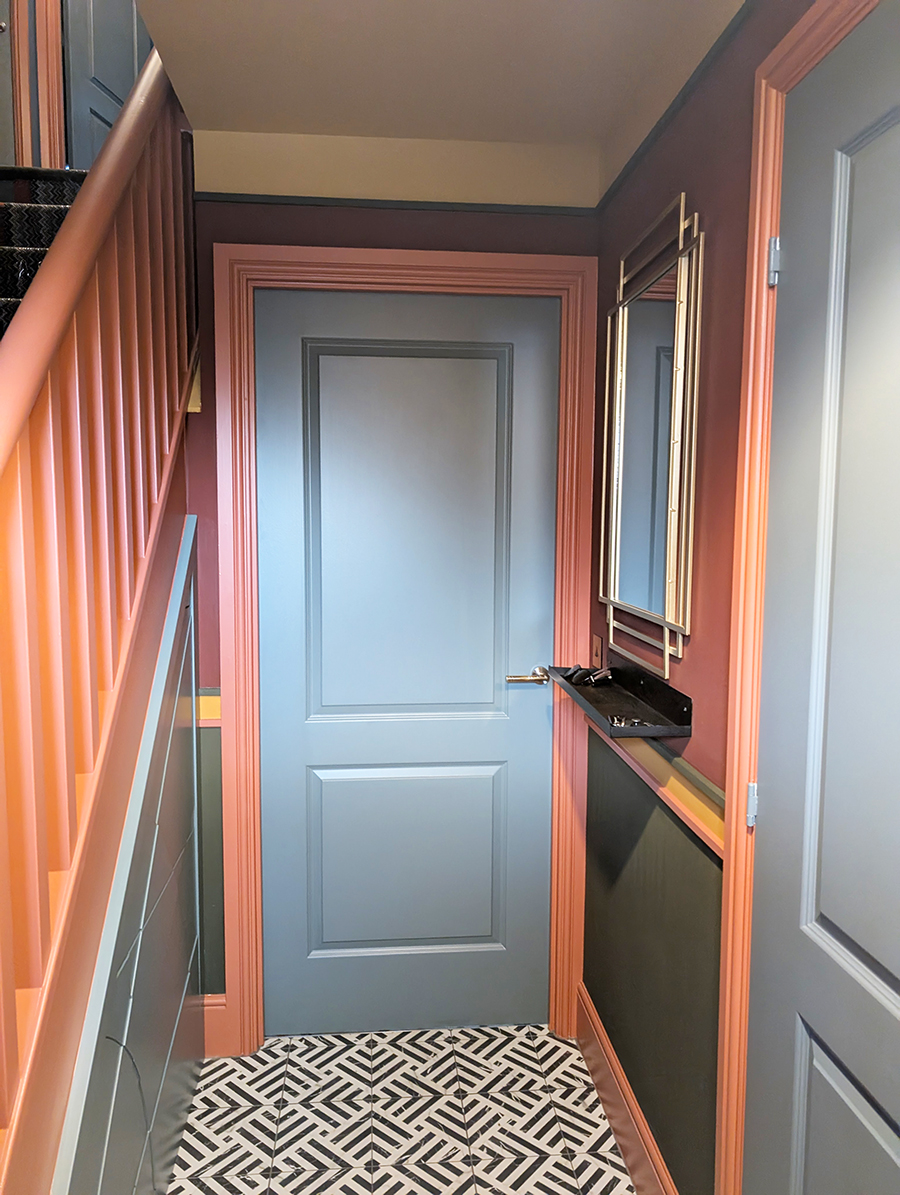
When the carpenter has these drawings, he can then quote for building and installing the pieces. Up until that point, it would be very hard for him to quote, as without the drawings, he can’t see exactly what he’s building and what materials are being used. When the quote has been given the okay by our clients, the next stage is to make sure the site is ready for the carpenter to take his own check measurements and start building. Usually (but not always), he needs the finished floor to be laid and the decorating to be done. If a piece is sitting on the floor, the floor being installed is especially important, as he’ll work from there upwards. It's also important that the decorating is done first, as it is much easier for the decorator to touch up some paintwork if it is scratched when the carpenter is installing, than it would be for him to try to repair cabinets damaged by a decorator’s knife or to remove paint from them. Once the check measure is done, it’s then back to the workshop to build everything. Our carpenter usually builds each piece separately and puts it together to make sure it all fits properly, then takes it apart to be oiled or sprayed. If we are looking for a painted finish (the drawer fronts in this case), they are taken off to be professionally spray painted in a booth. This gives the smoothest and most hardwearing finish, rather than being painted by hand. The internal pieces are then hand finished with a wax or oil to protect them. All the finished pieces are then reassembled and brought to the site to be installed. Installation usually takes a few days to a week, with the carpenter installing end and filler pieces and scribing around things like skirting boards to make everything fit perfectly. Here is the finished hallway: |
|||
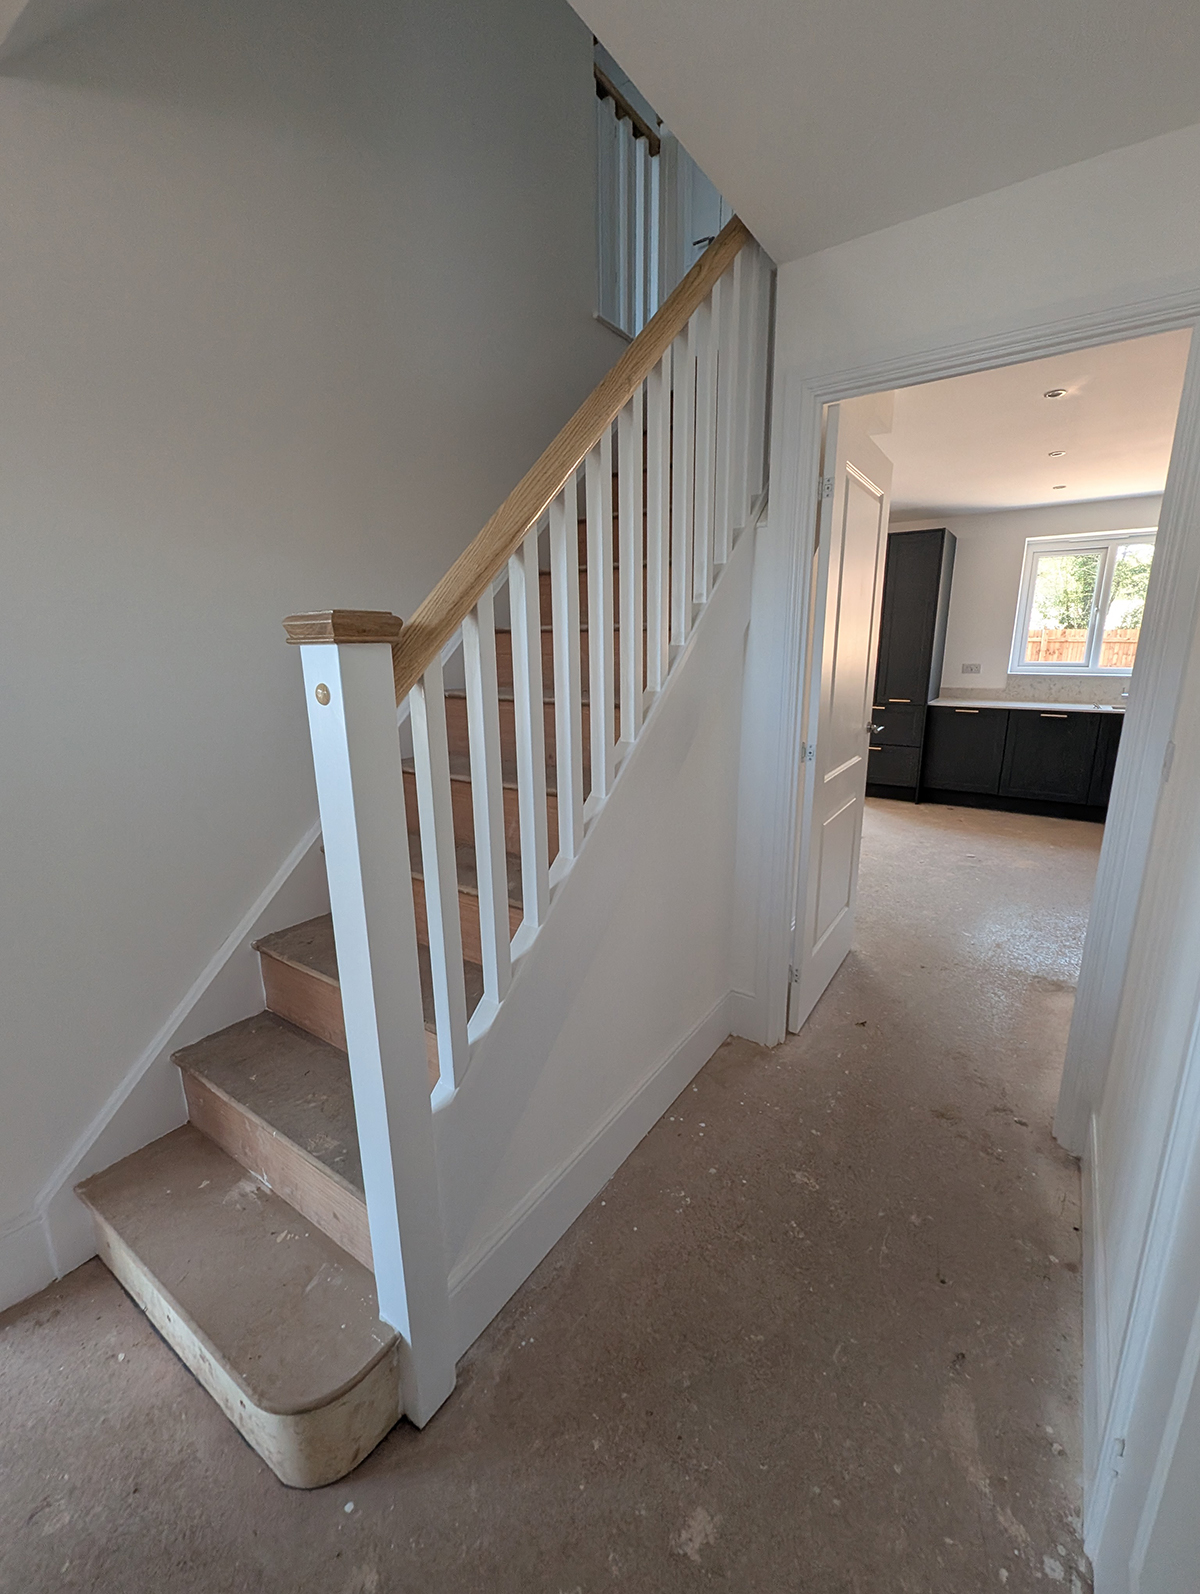
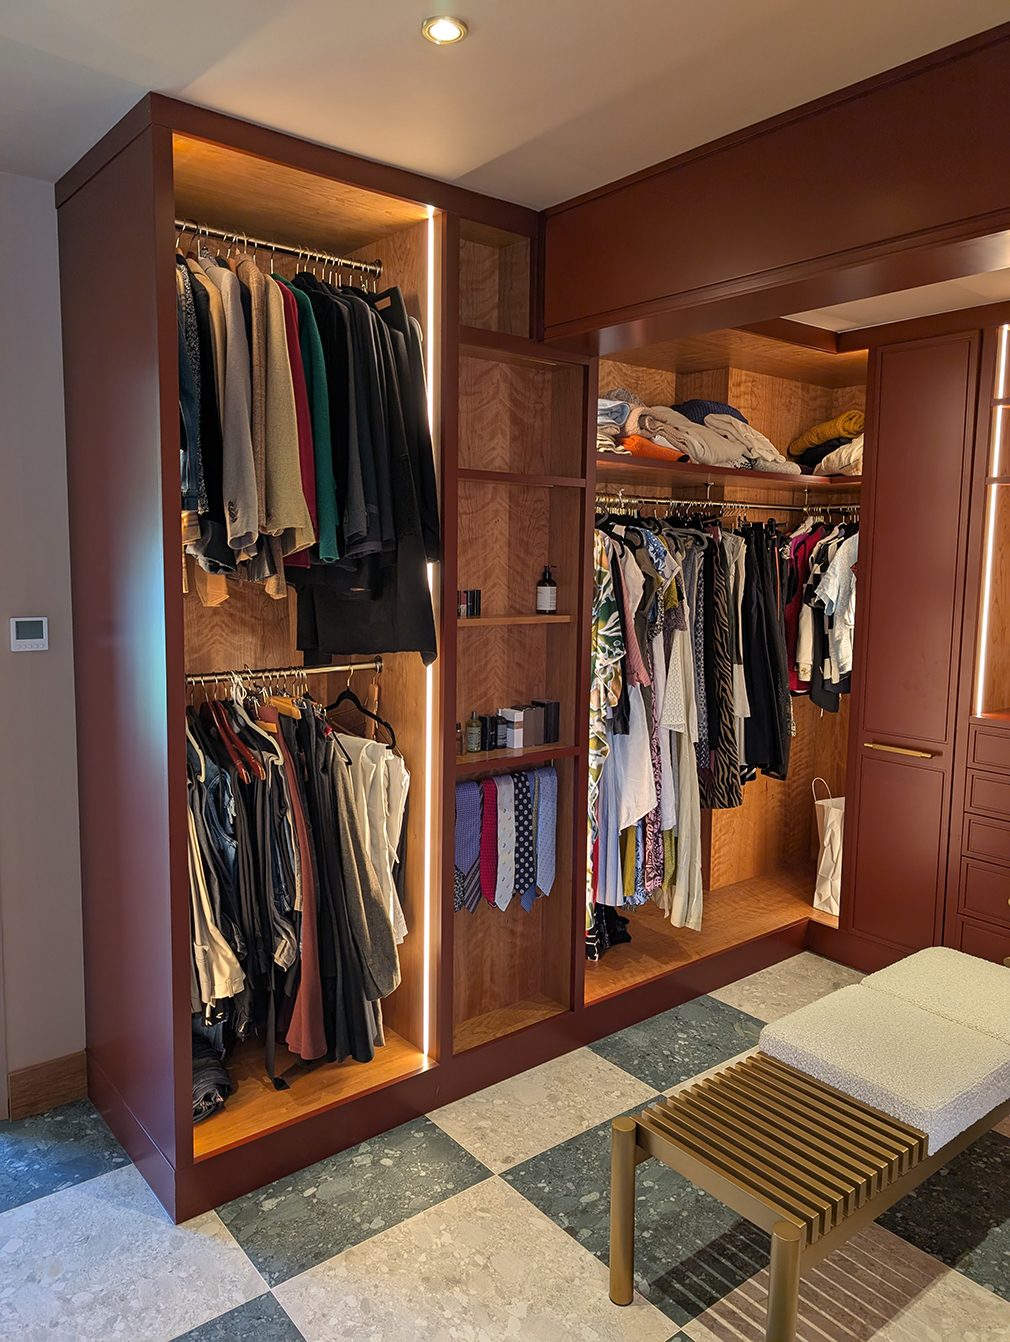
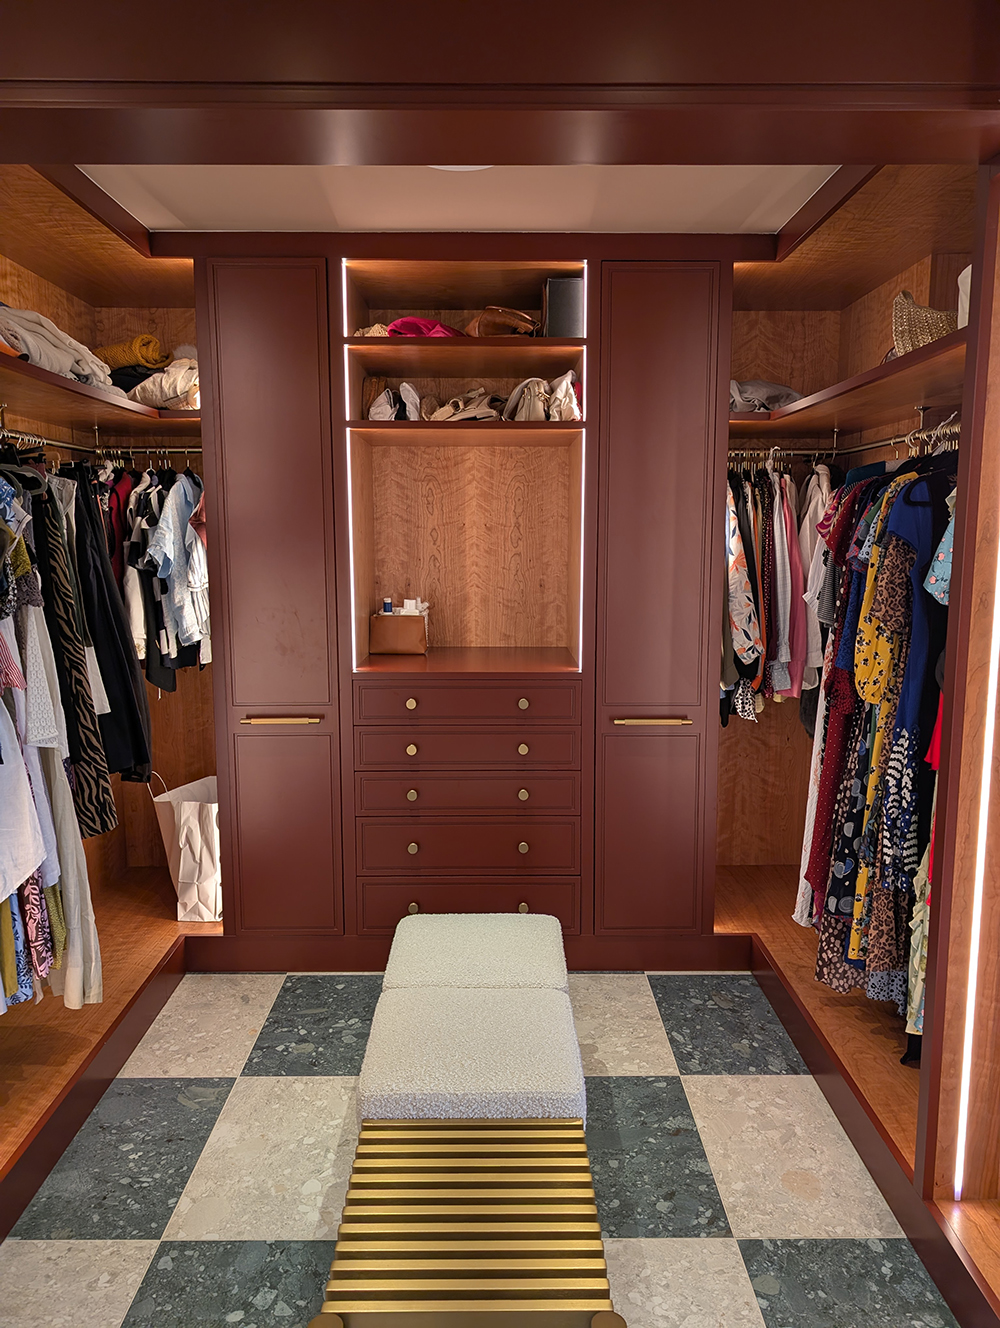
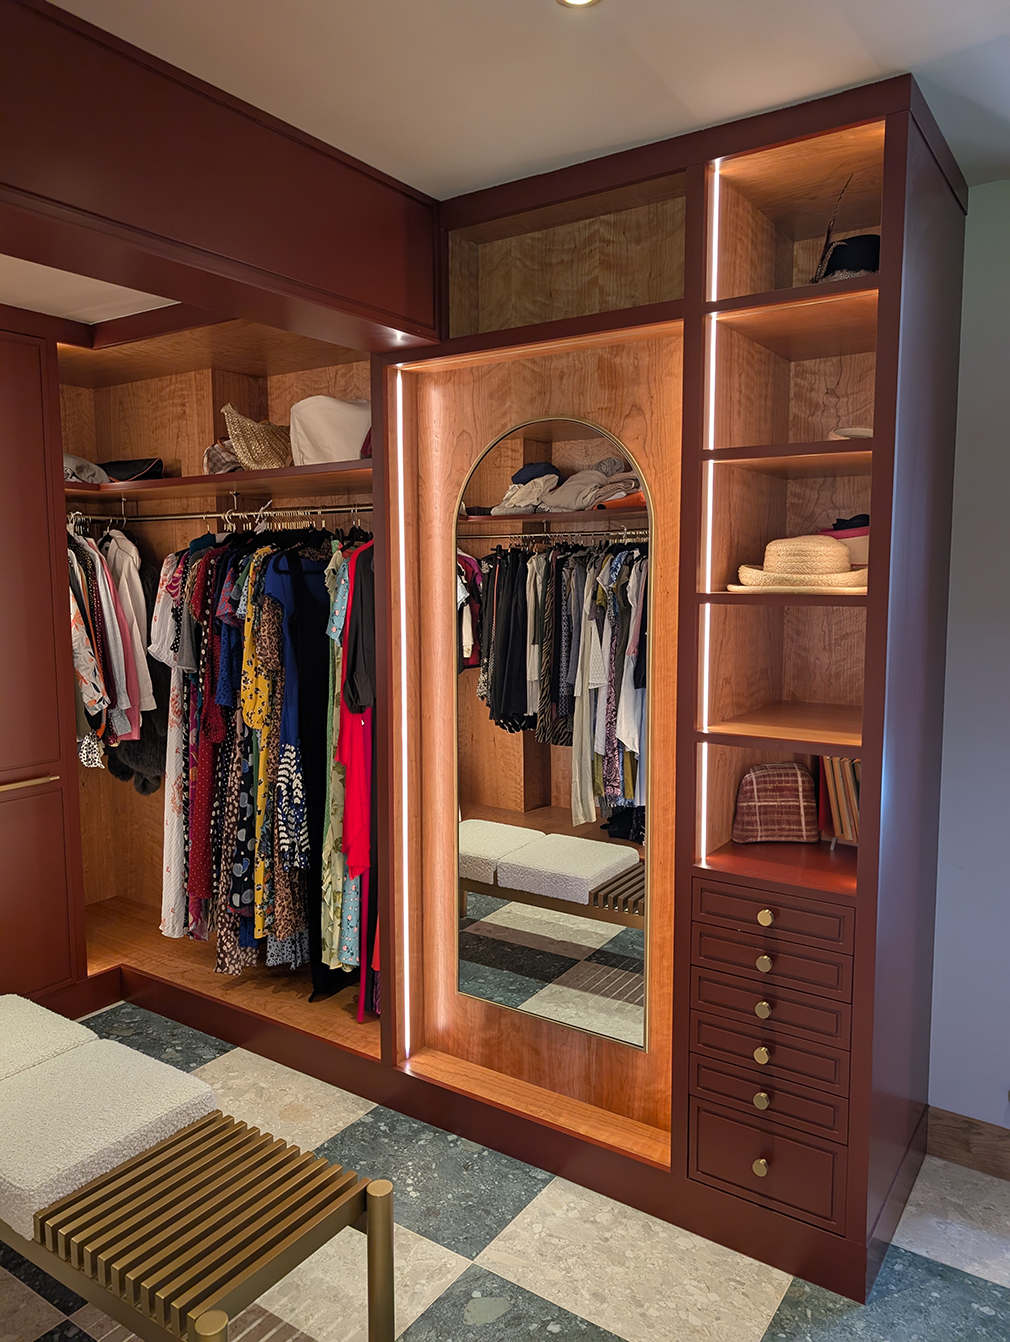
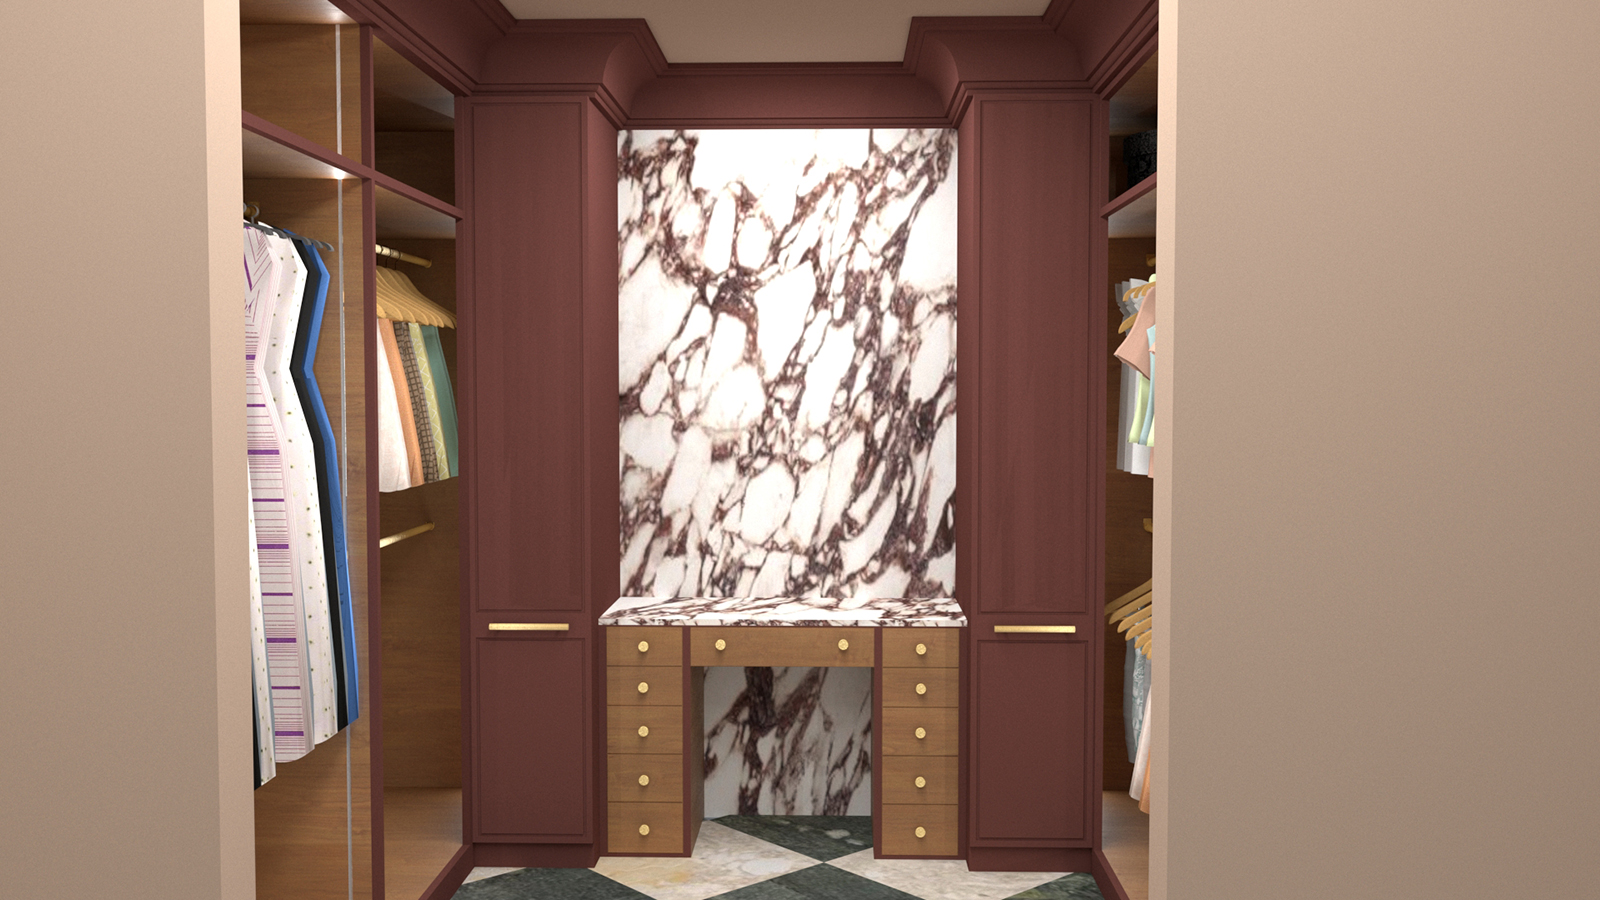
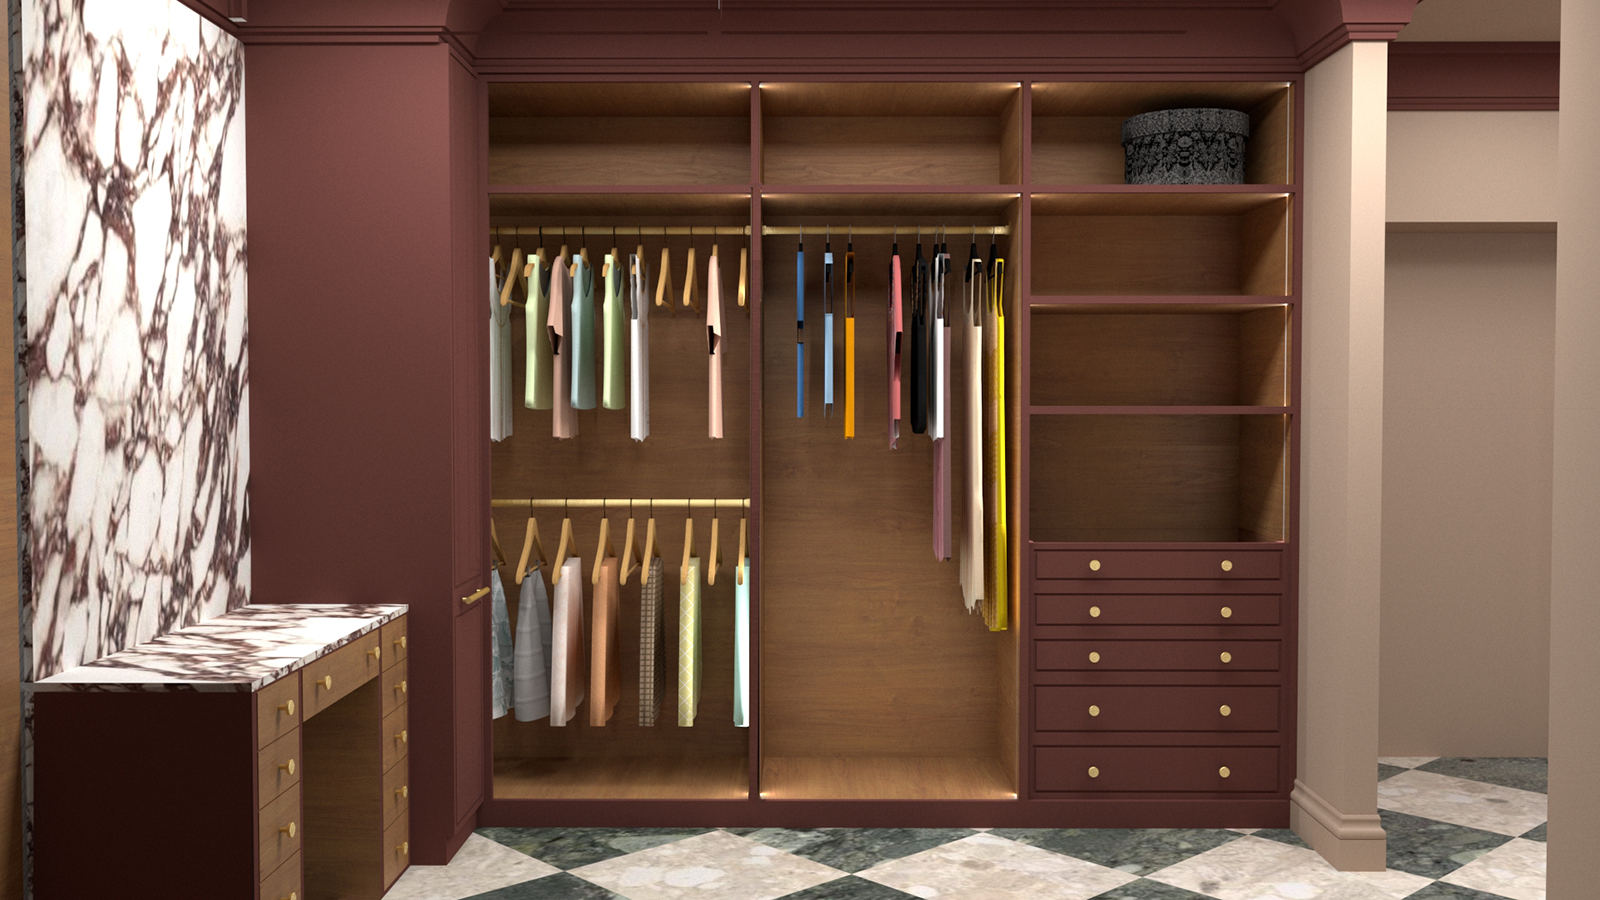
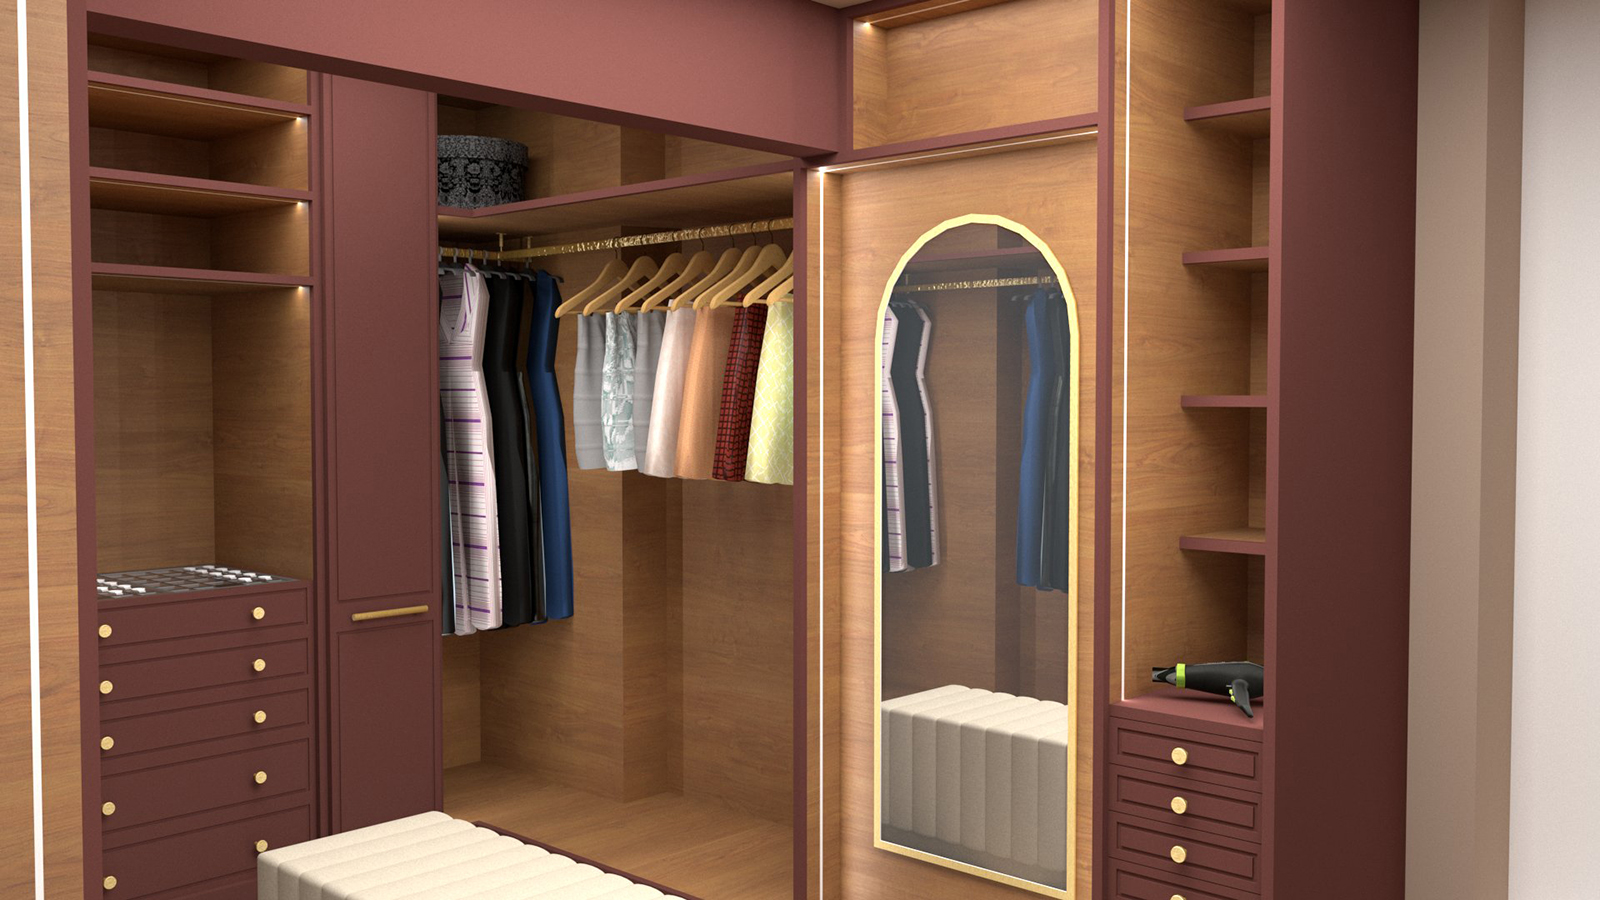
The finished storage is beautiful and functional and fits their shoes perfectly - just what our clients wanted, and the whole point of a bespoke piece. However, there is also another good reason to have bespoke storage designed just for you - when the unexpected happens on a renovation (and it happens more often than you’d think), the design can be altered to make the best of a difficult situation. On another project we completed last year, we had designed a walk-in wardrobe to fit our client’s needs and wishes perfectly, the design had been approved, and everything was ready to go. The wardrobe was to be part of a new first floor extension, which was being built as we were designing. We had taken measurements when the extension was nearly ready and before the builder knocked through from the existing house to the new extension. Here is our design for the walk-in wardrobe: |
|||
 |
|||
 |
|||
|
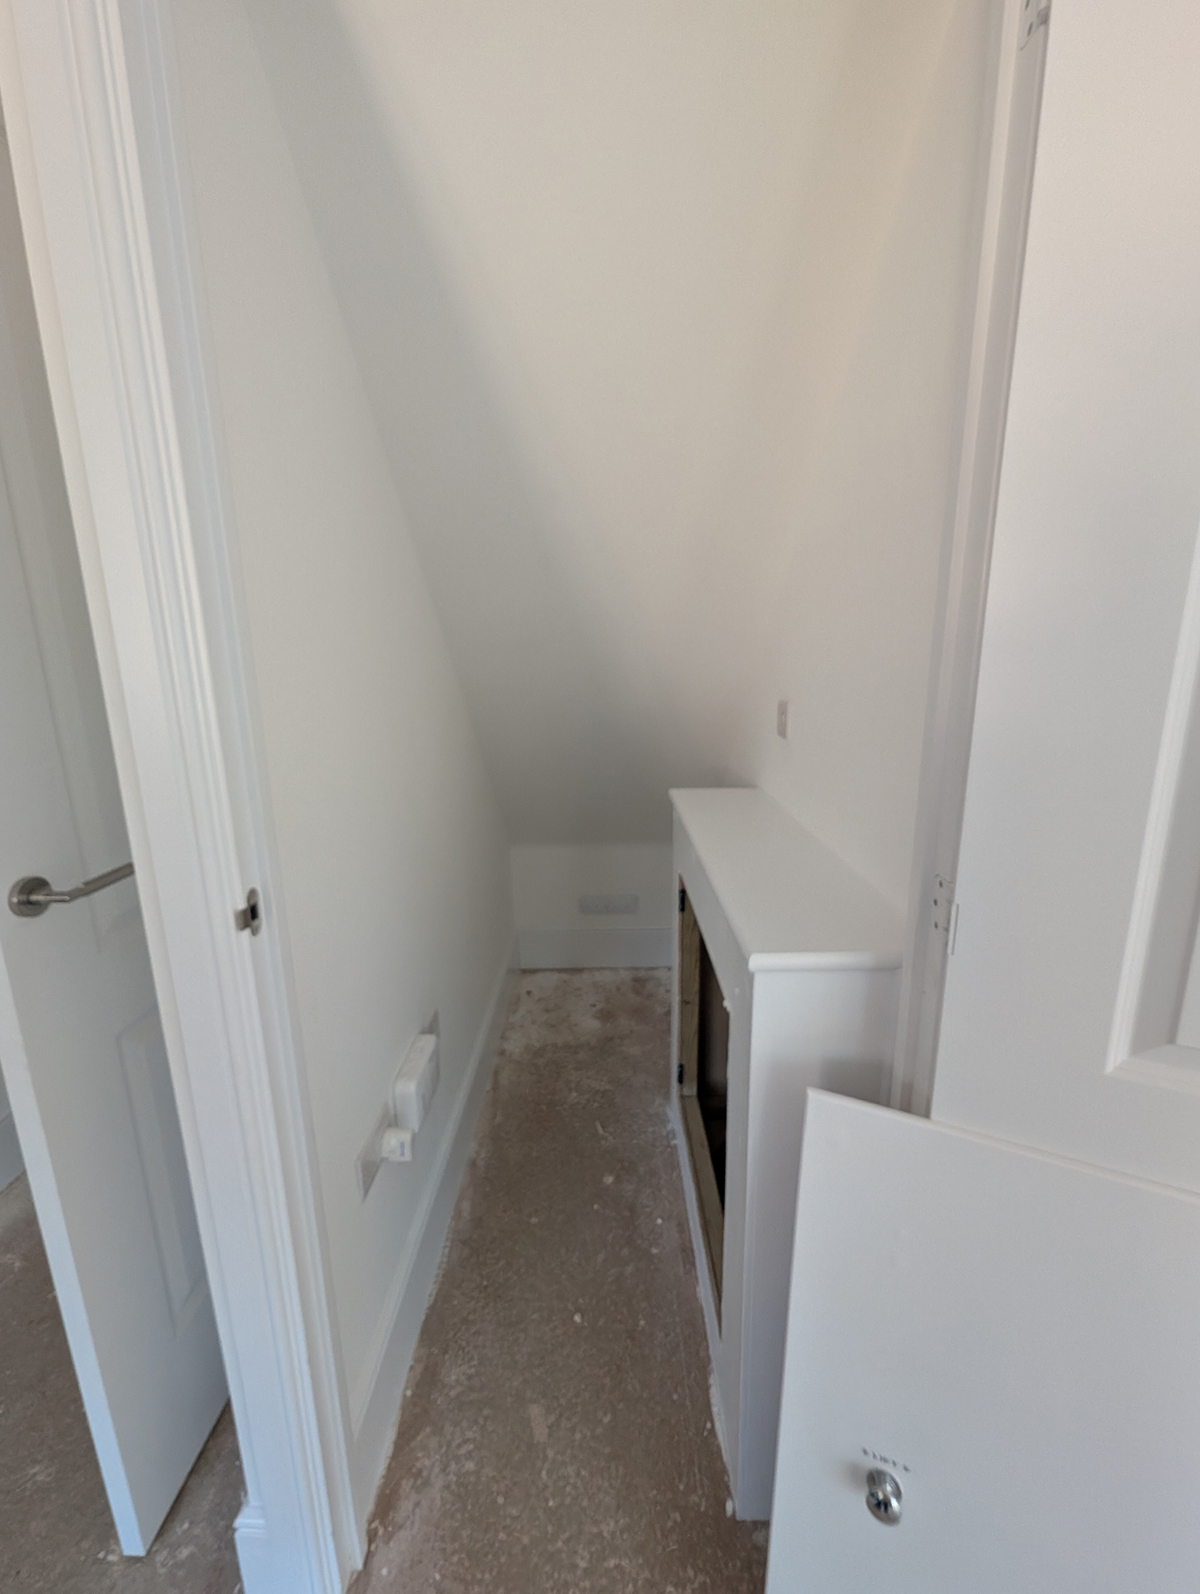
We had worked from the architect’s plans in this case, and taken measurements of the existing spaces. What nobody had realised, including the architect and the homeowners, was that several steel beams and pillars supporting the house couldn’t be moved. They were smack bang in the middle of where the walk-in wardrobes were supposed to go. If our clients had ordered ready made wardrobes for this space, they wouldn’t have fit and would have had to be returned. But we were able to pivot to accommodate the new information, remeasure once the steels were exposed and tweak the design to work around the pillars and beams. We made the bespoke wardrobes not only fit in the space but also still meet our client’s storage needs. Here is the second, reworked version of our design: |
|||
 |
|||
 |
|||
|
The carpenter was able to conceal the beams and pillars with cladding to match the wardrobe finishes, and our design makes it look like they are meant to be there. There is still a large amount of storage for our client’s items, and we managed to keep the pull out shoe cupboards which our clients had asked for. The end result is beautiful, practical and fits in the space perfectly - something which could only have been achieved with a bespoke design. |
|||
|
|||
|
If you take a closer look at our projects, most of them have some form of bespoke carpentry in them, and this isn’t just because we enjoy designing it. It's there to solve a problem (or several problems at once) and because we truly believe it is the best way to make the most of the space you have. We are very thankful to have found a talented and dedicated carpenter to work with, who understands our vision and executes it perfectly every time, and we know we can trust him to follow the design to the letter. Bespoke storage has so many benefits over off the shelf furniture, we feel certain you won’t regret having a ‘designed for you’ piece in your home. |
Welcome to the design blog, where you'll see posts about anything from the projects we are working on, to the latest fabric and wallpaper collections, and all things interiors related. We love colour, pattern, architecture and old buildings, and we love to share our finds with you.
Happy reading!