
Design Reveal - The new build home
 |
||
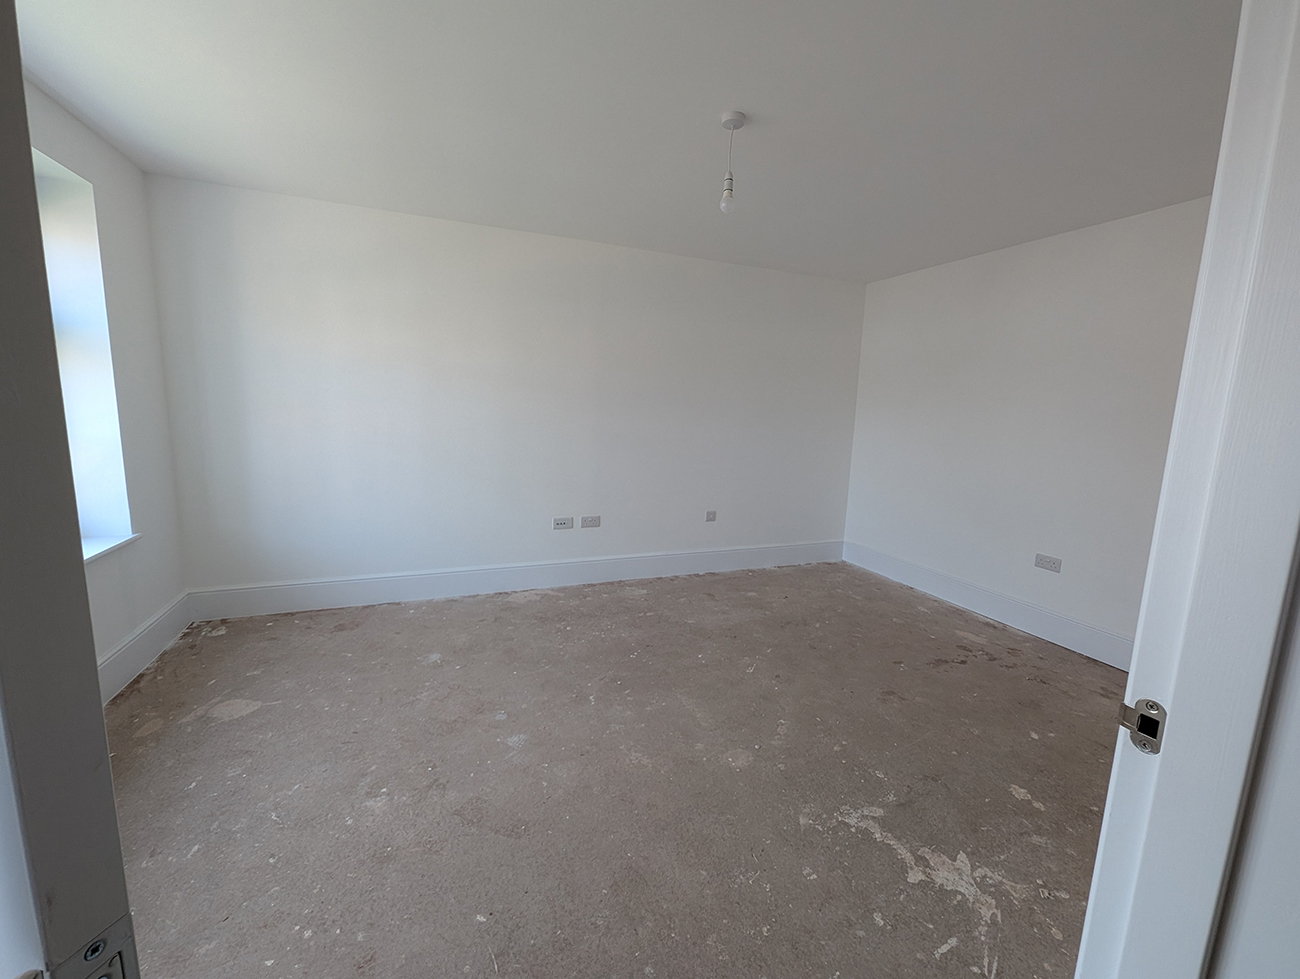
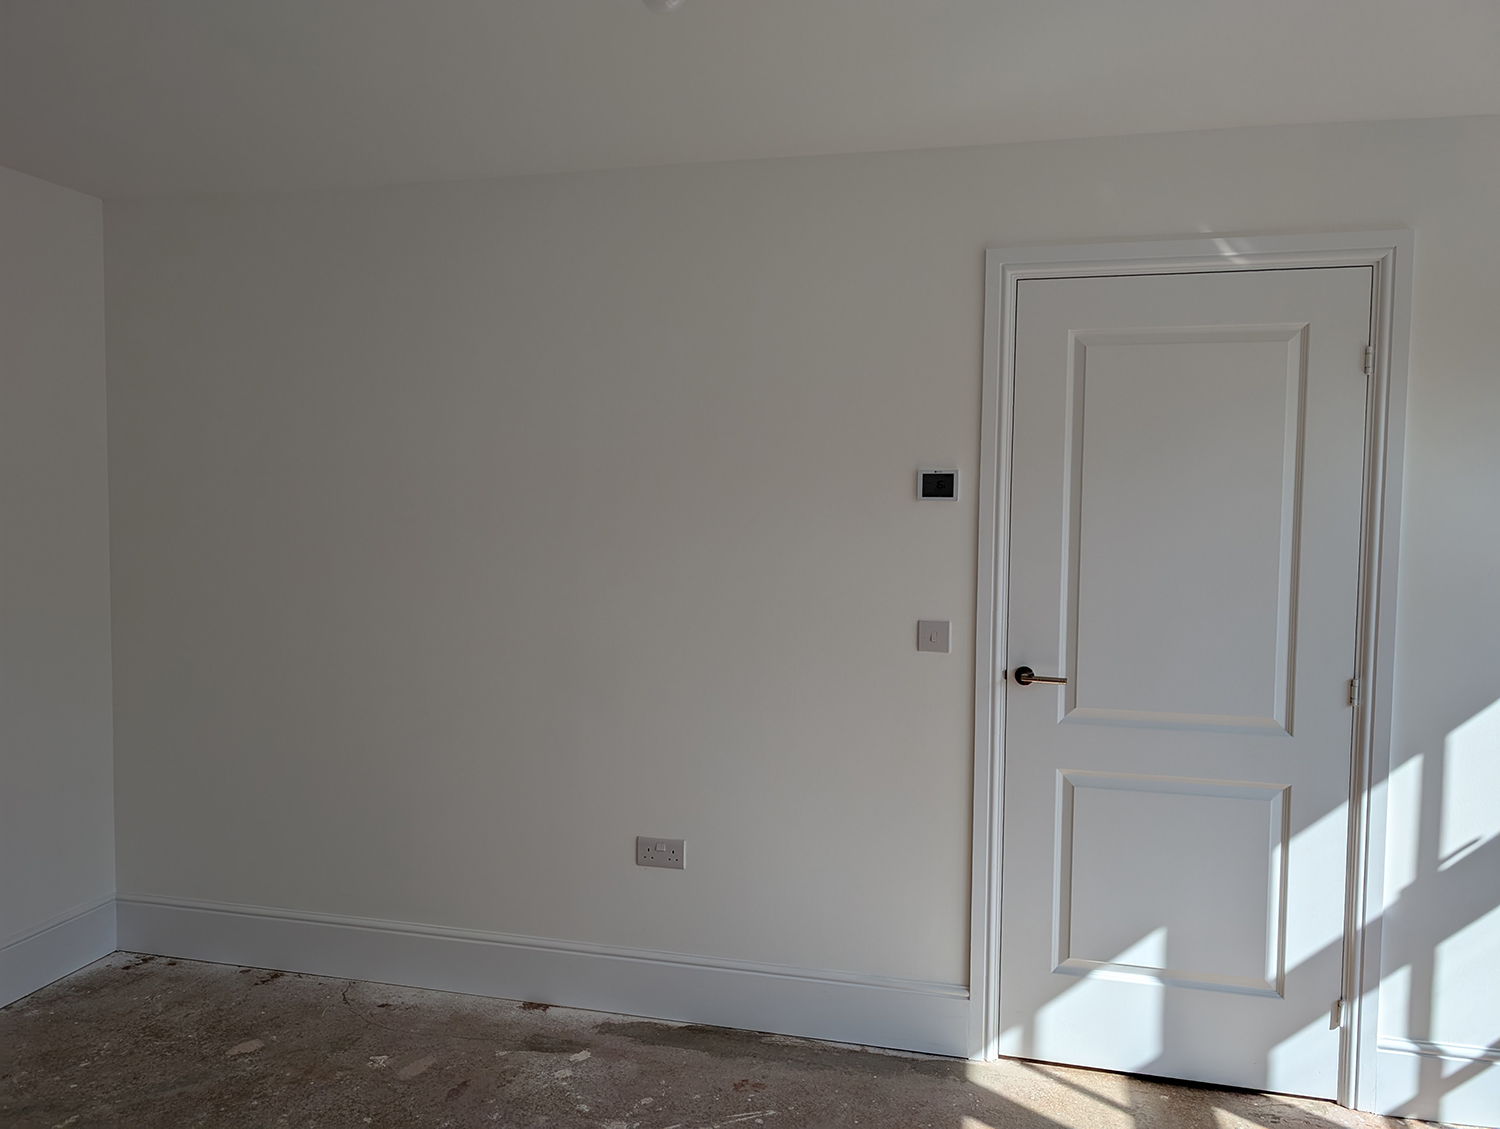
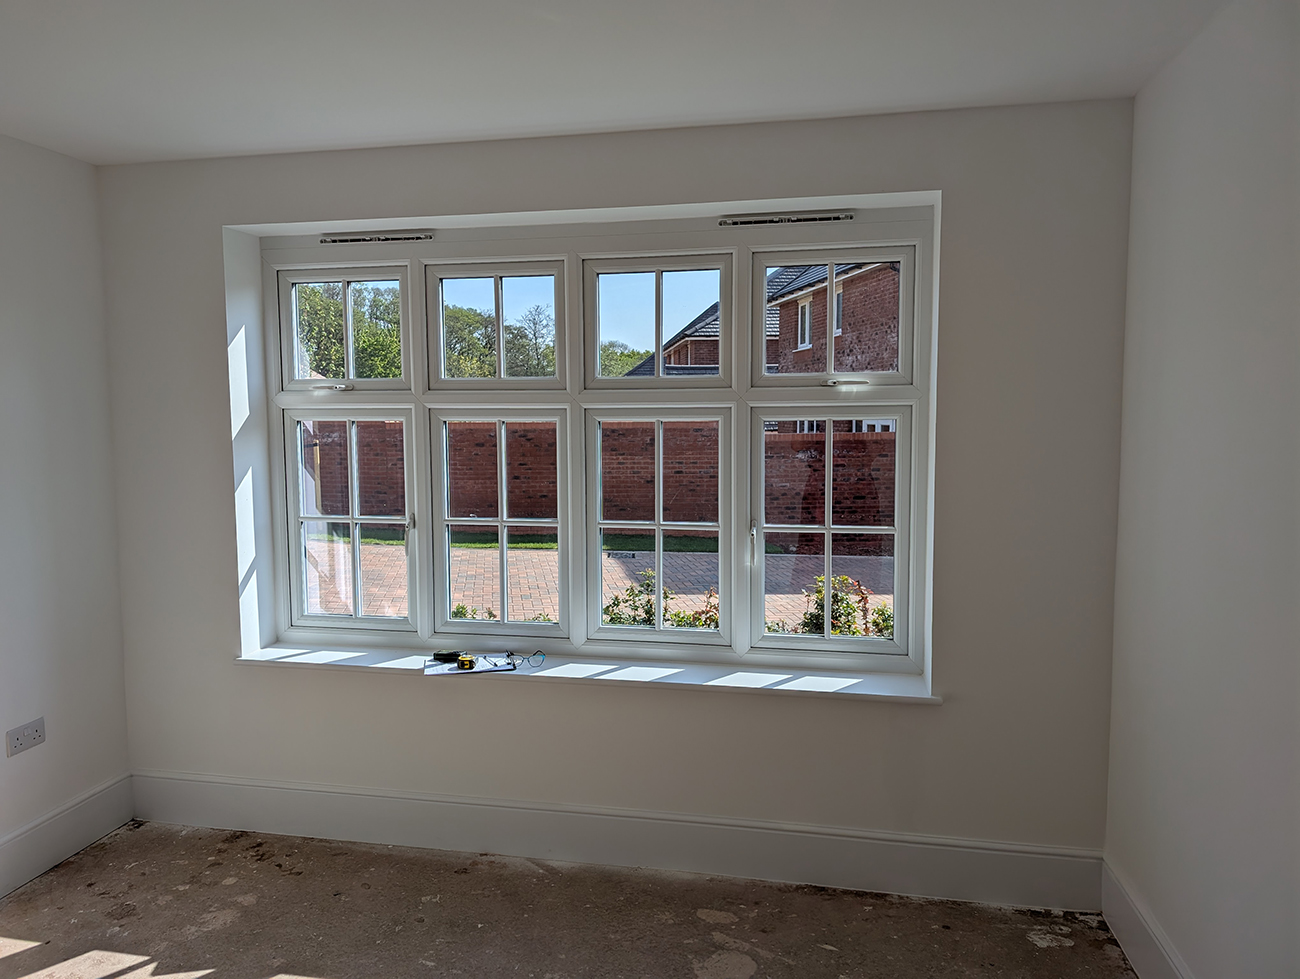
| You may have seen our recent blog posts explaining that we have been busy designing and renovating a new build home this year. This has been an exciting process, and it has been great to reimagine a totally blank canvas with white walls in every room, no flooring and bare bulbs. We have been implementing our designs over the past couple of months and things are almost complete, and we’d like to share our progress on this home. Things have really changed from the first day we saw the house, and it’s certainly unrecognisable from that first look. Let’s tour the house room by room. | ||
|
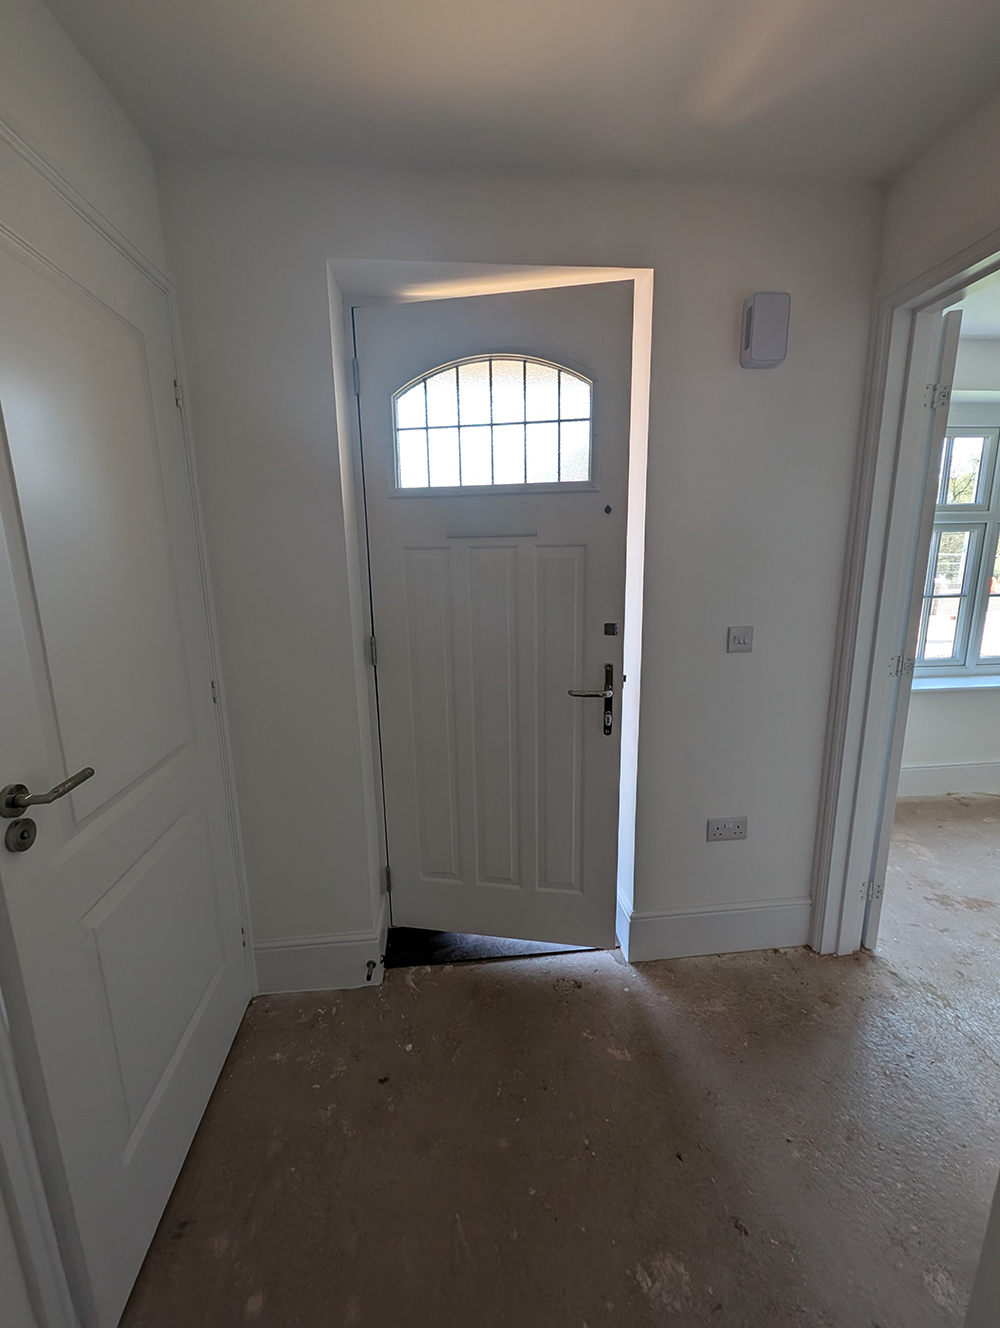
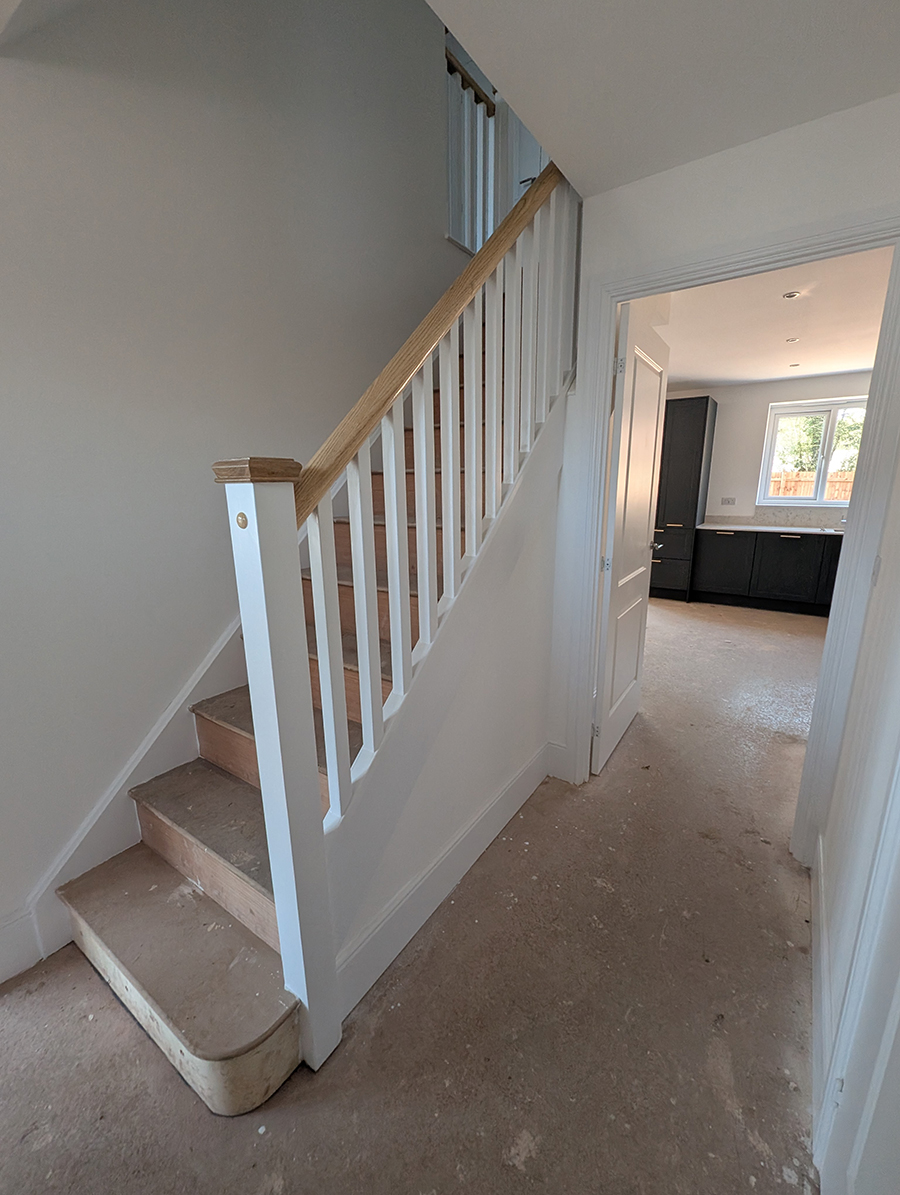
Here is the first room you enter - the hallway: |
||
   |
||
|
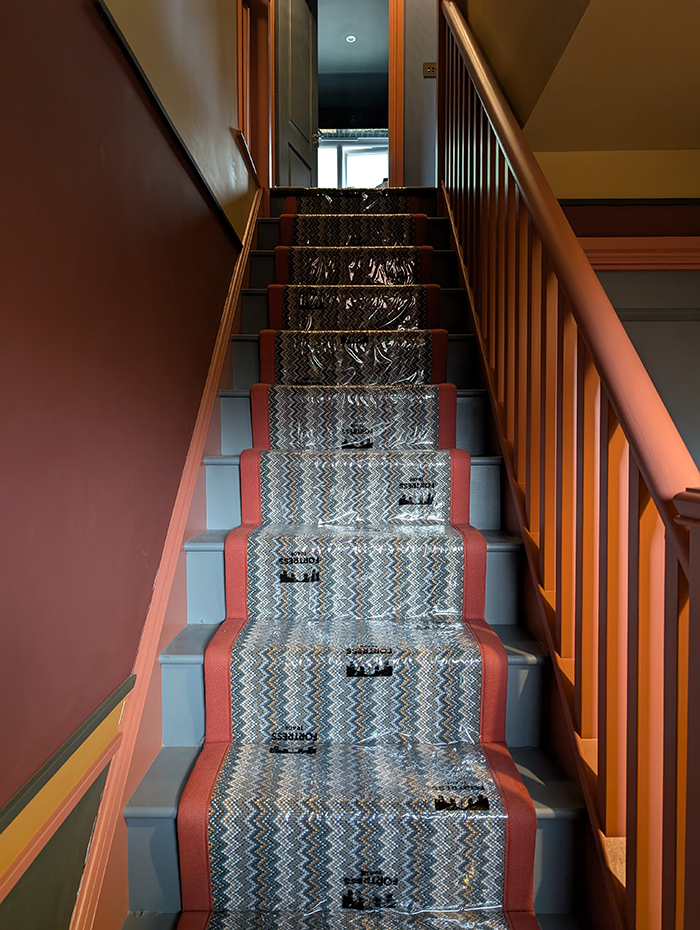
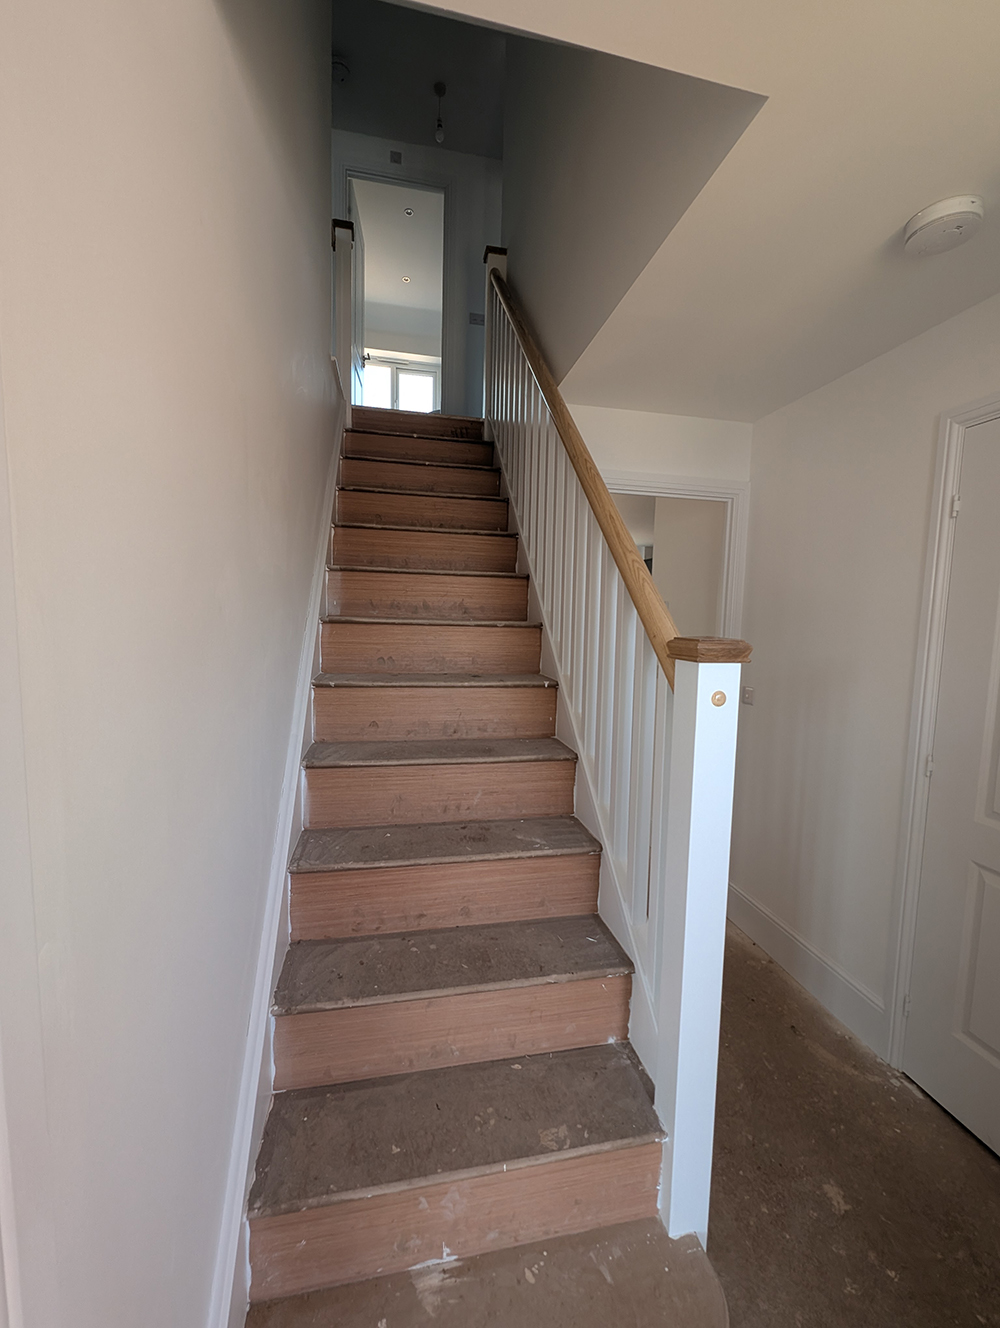
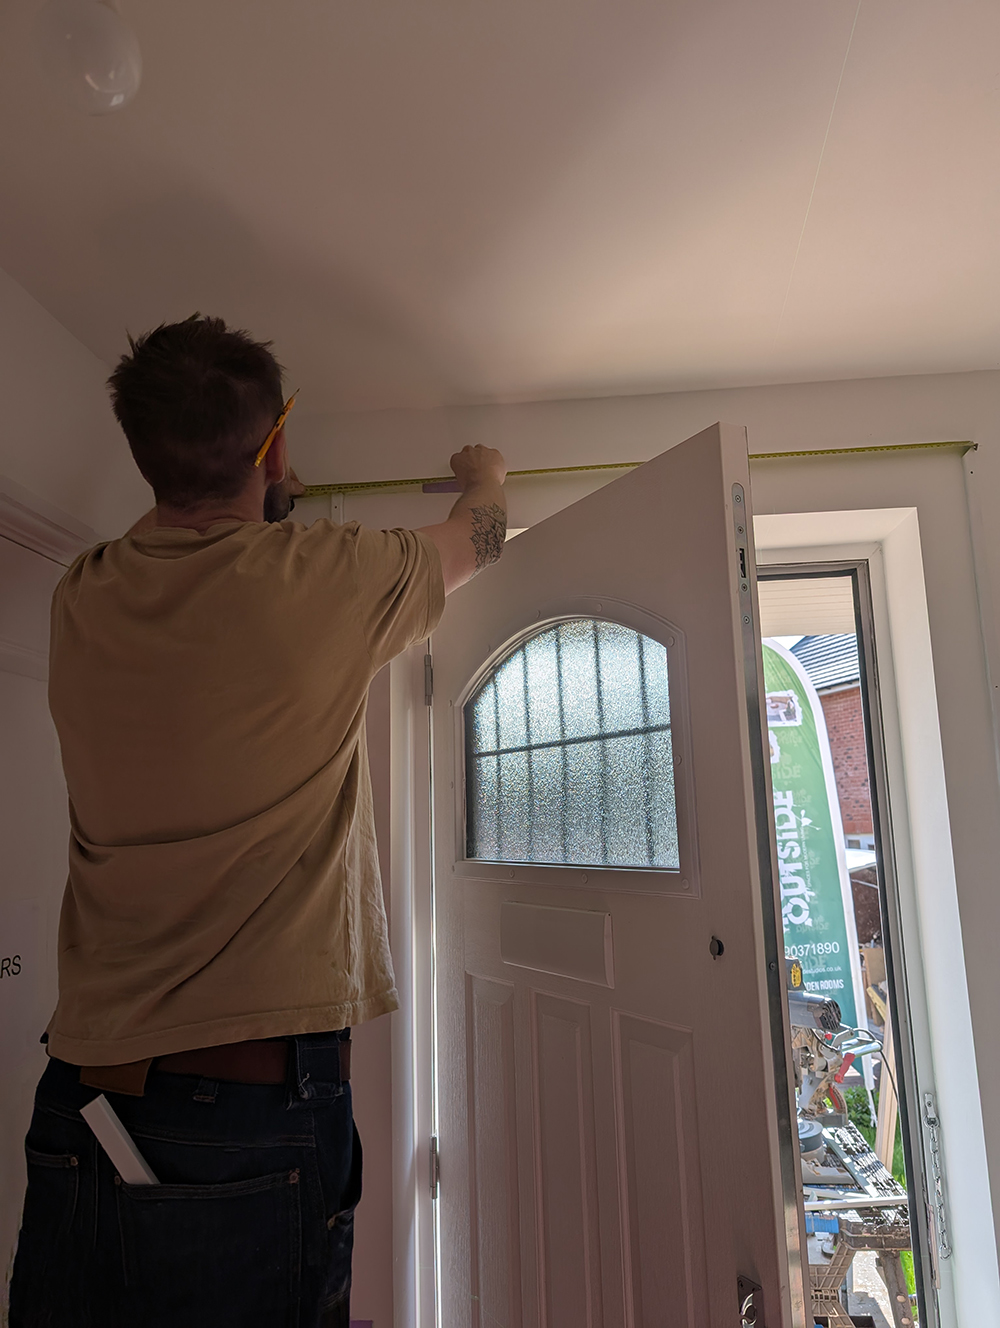
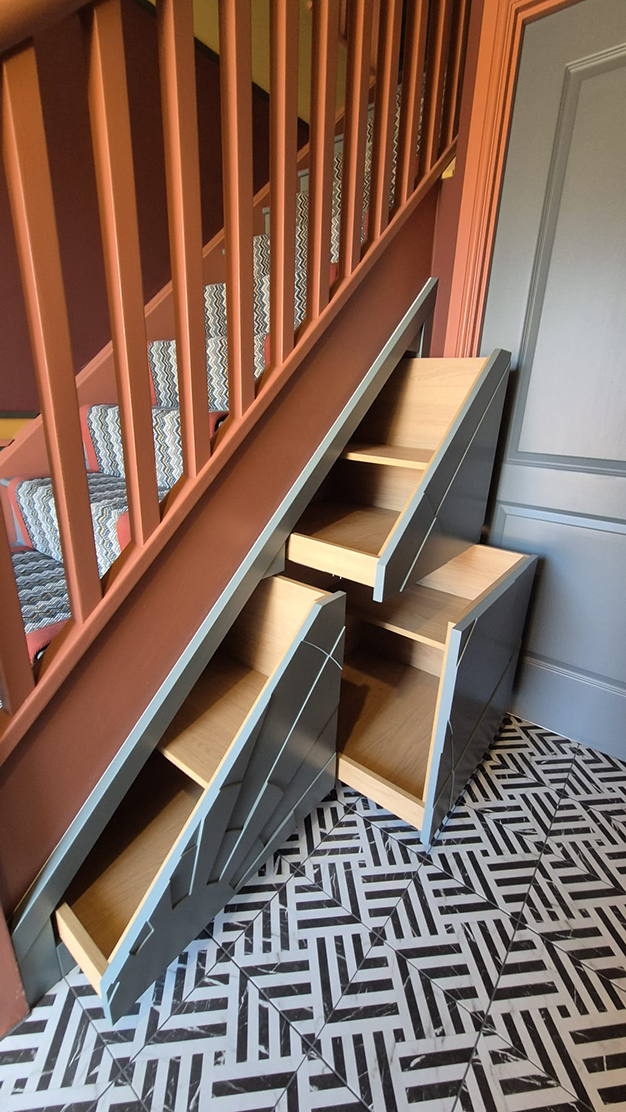
In the before pictures, you can see that the flooring hasn’t been laid. This is because we asked the developer to leave the floors unfinished so we could add our choice of carpets and tiles. The selections available from the developer were either beige or grey, and not in line with either our own or the client’s design vision for this house, as we wanted to add something much more exciting. You can also see in these photos of the hallway that the space under the stairs is a blank wall - we had decided during our design meetings to turn this into a shoe storage cupboard, and give it a special design twist. The walls in the hallway would also be getting a dramatic and colourful treatment - we chose to add slim wooden beading around the hall and over the front door, allowing us to transition from one paint colour to another. Here’s a photo of our carpenter adding the primed beading, ready to be painted by the decorator: |
||
 |
||
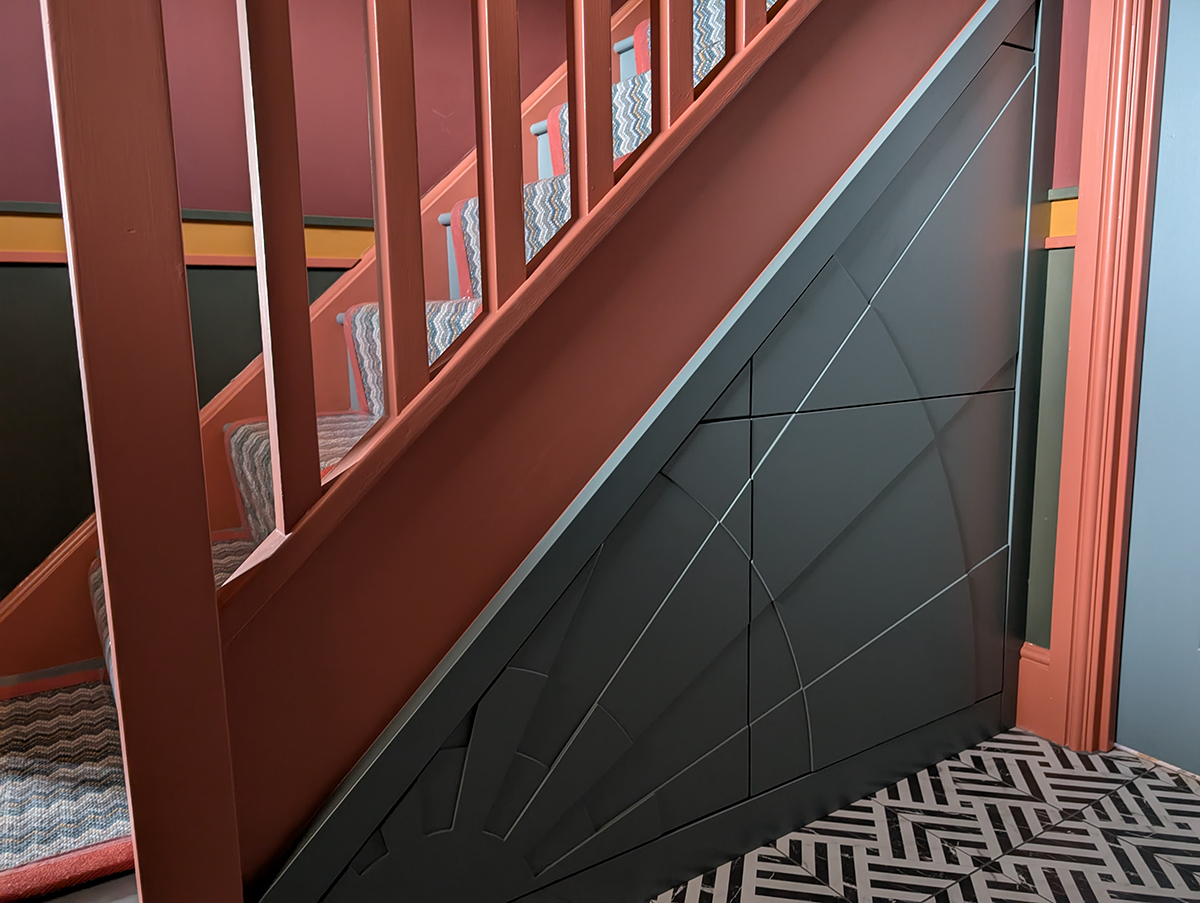
| You can see the in the later photos that the transformation is nearly complete, with a powerfully patterned zig zag runner on the now painted stairs (with plastic over the runner to protect it), a colourful arch over the front door, and an under-stairs cupboard with a classic 1930s sunburst relief design on the doors. Those walls are definitely interesting now! | ||
|
|
||
 |
||
 |
||
|
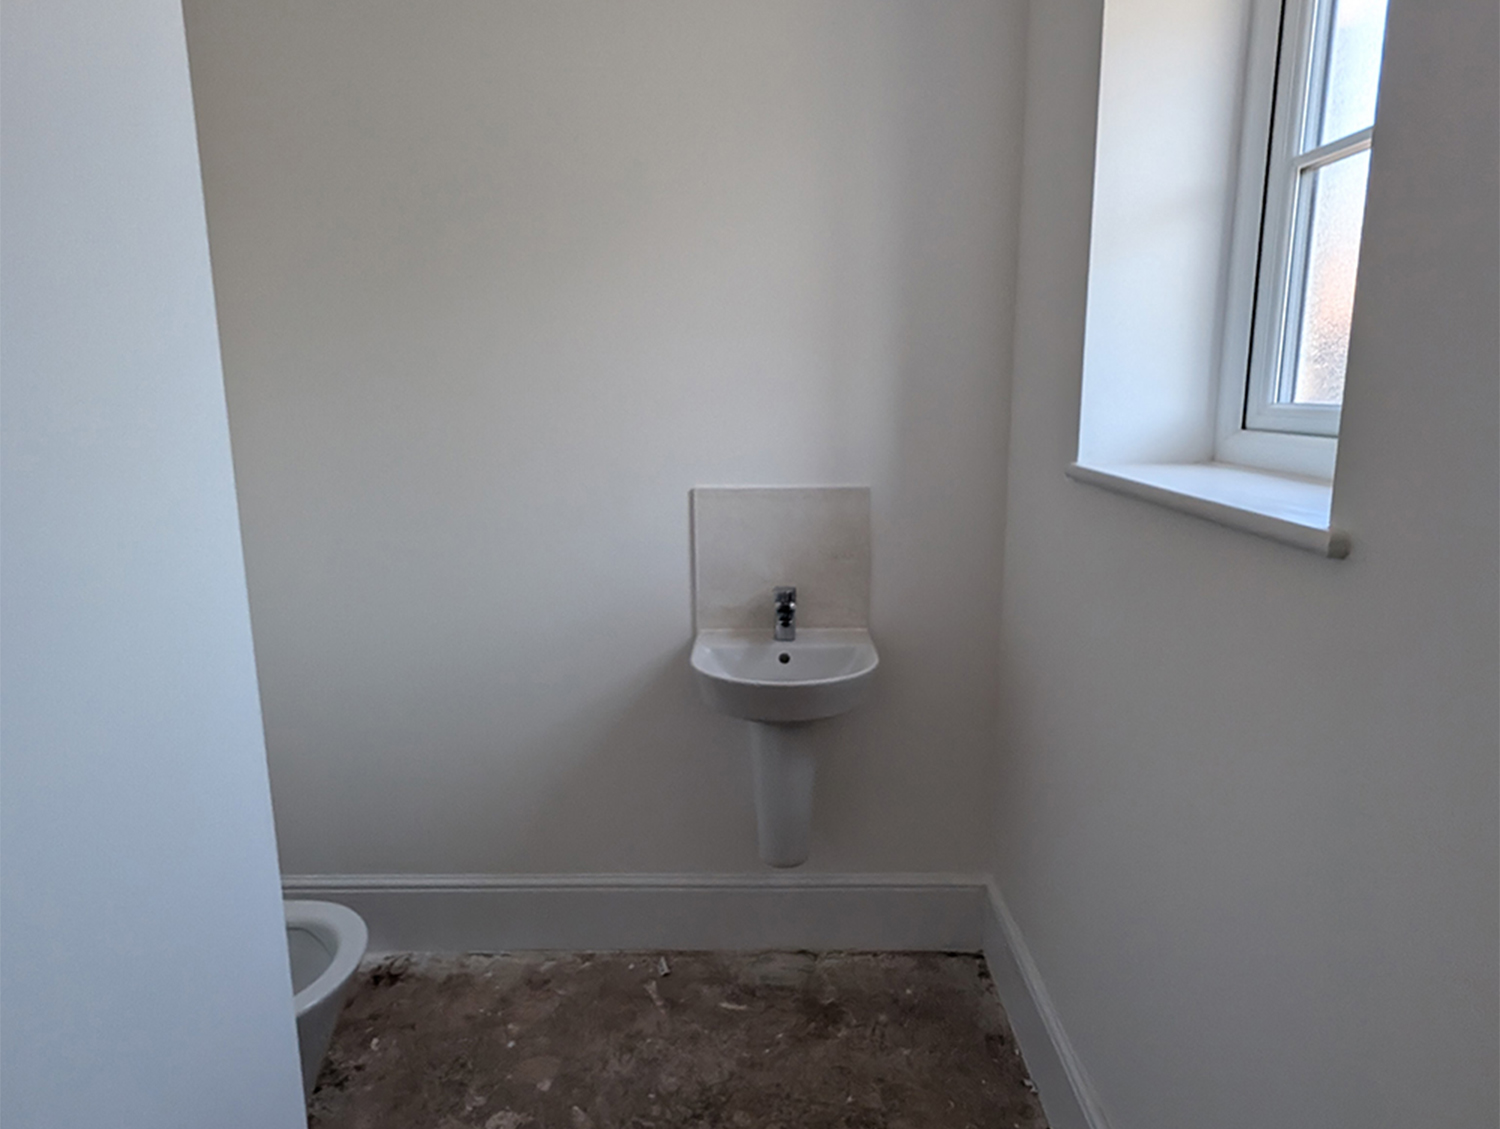
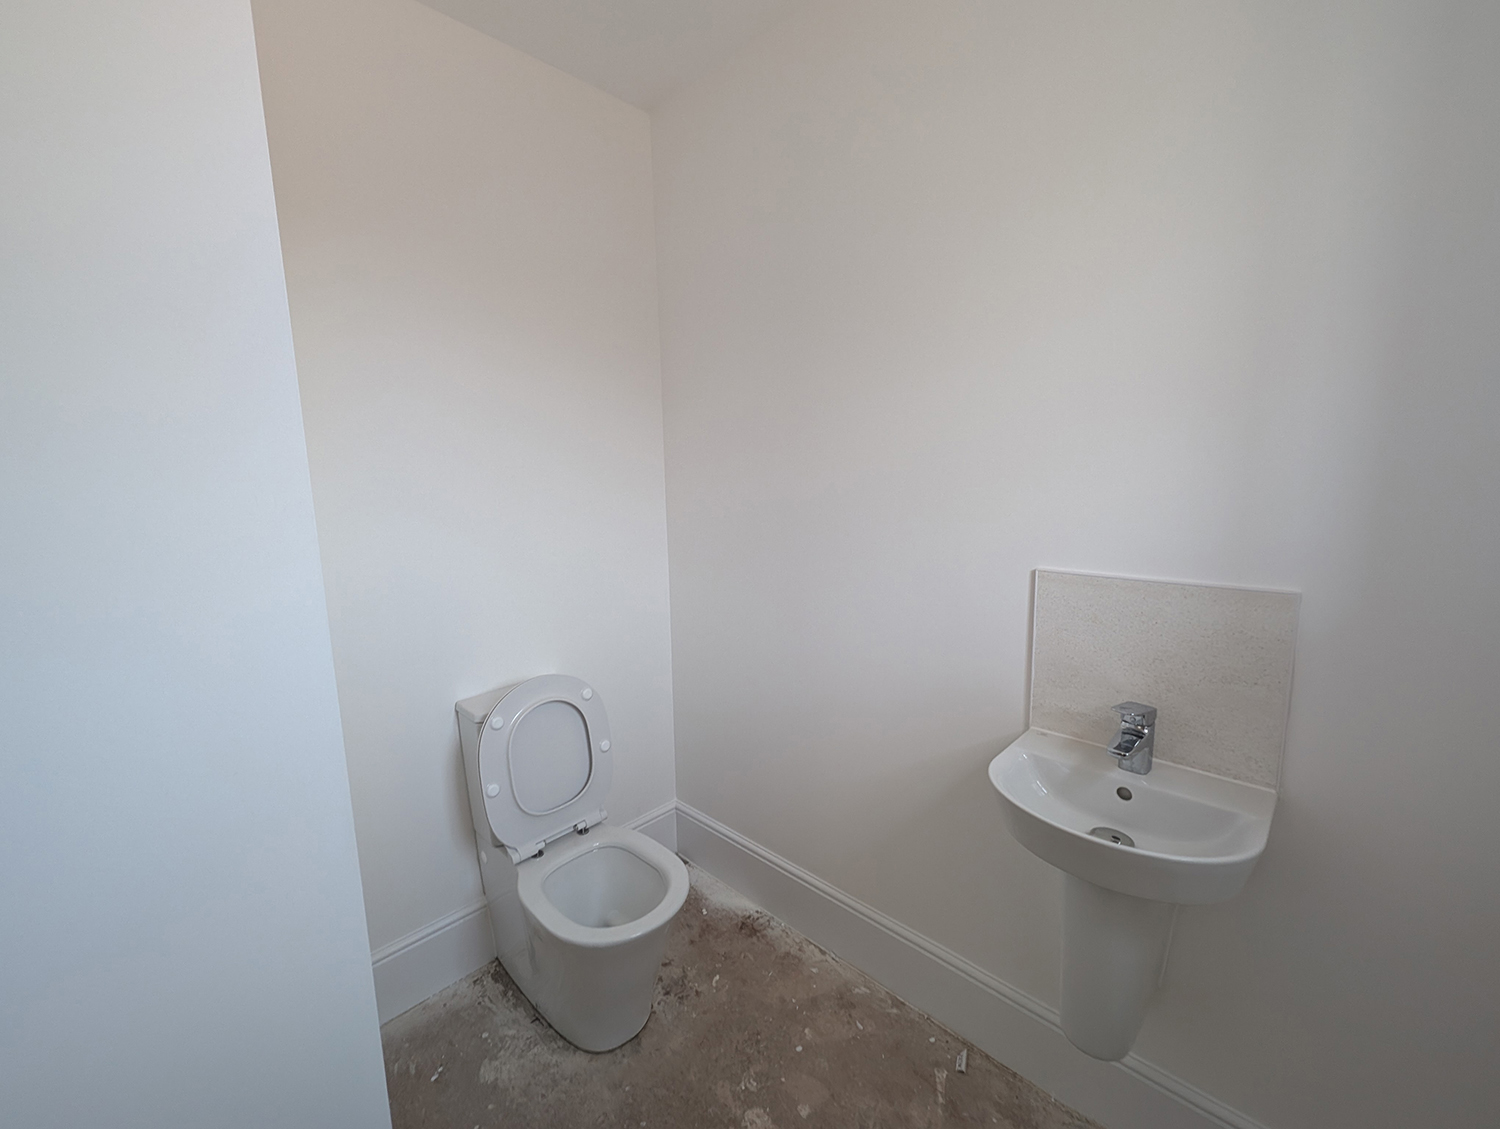
Moving on to the next room in the house, the room just off the hallway on the right is a spacious downstairs loo. Again, the walls were white, and no flooring had been fitted, as we would be carrying the tiles from the hallway into this room. We had asked for minimal tiling around the sink in here so we could add some gorgeous tiles of our own. We would be keeping the white sanitary ware, but removing it to tile before refitting. Here’s what the downstairs loo looked like when we first saw it: |
||
  |
||
|
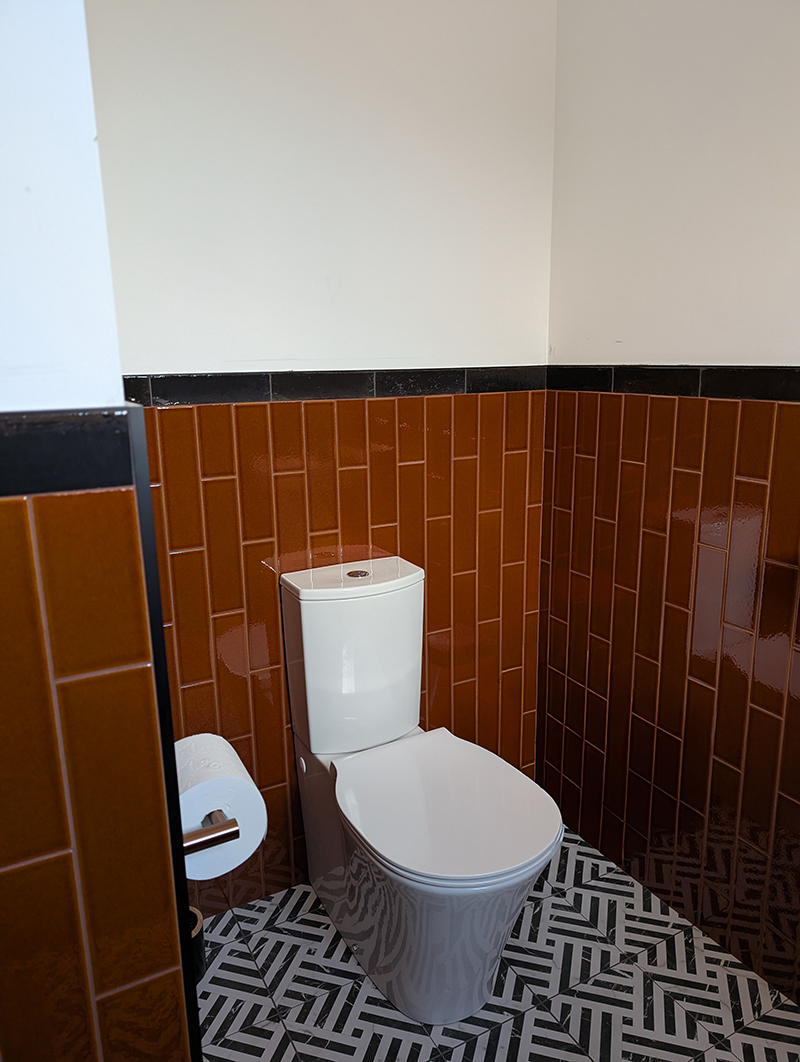
The beautiful, amber glossy tiling on the walls is now finished, the sanitary ware has been put back in, and we’ve changed the ceiling light - it already looks 1000 times better. |
||
  |
||
| All that’s left to do in this room is wallpaper - we have chosen all the wallpapers for the house but are waiting until October to finish off this part of the decorating. We are letting the newly built house settle to see if any cracks appear - it’s easier to fill in the cracks and then wallpaper than it is to repair damaged wallpaper caused by cracked walls. So far, everything has been fine, with only one small line appearing between the main bedroom window and the ceiling. | ||
|
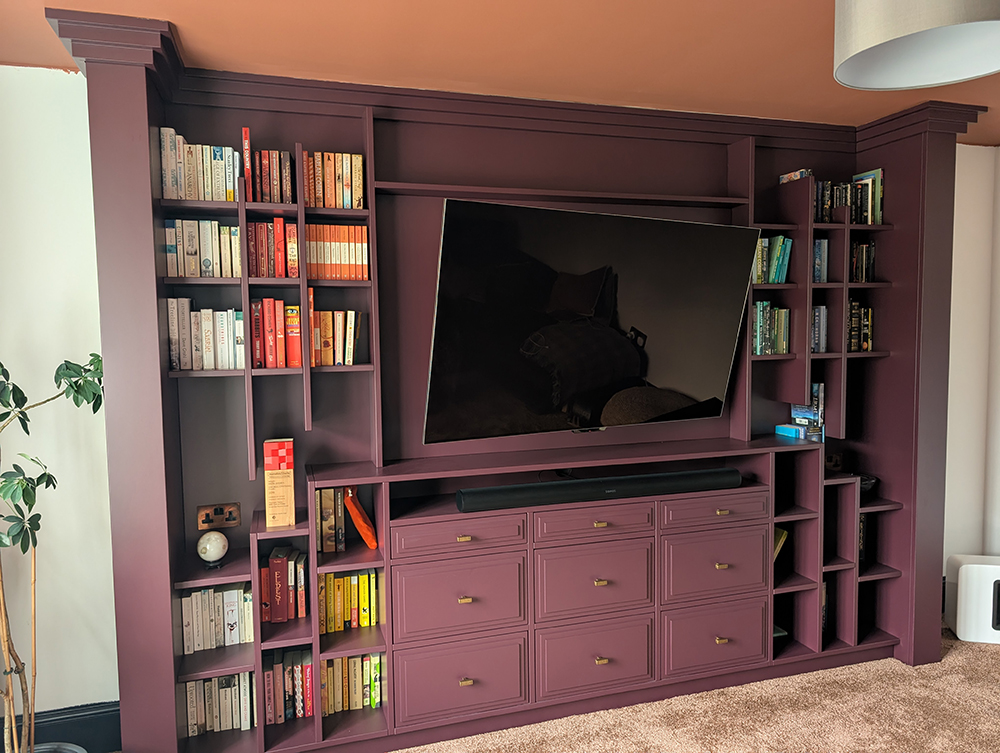
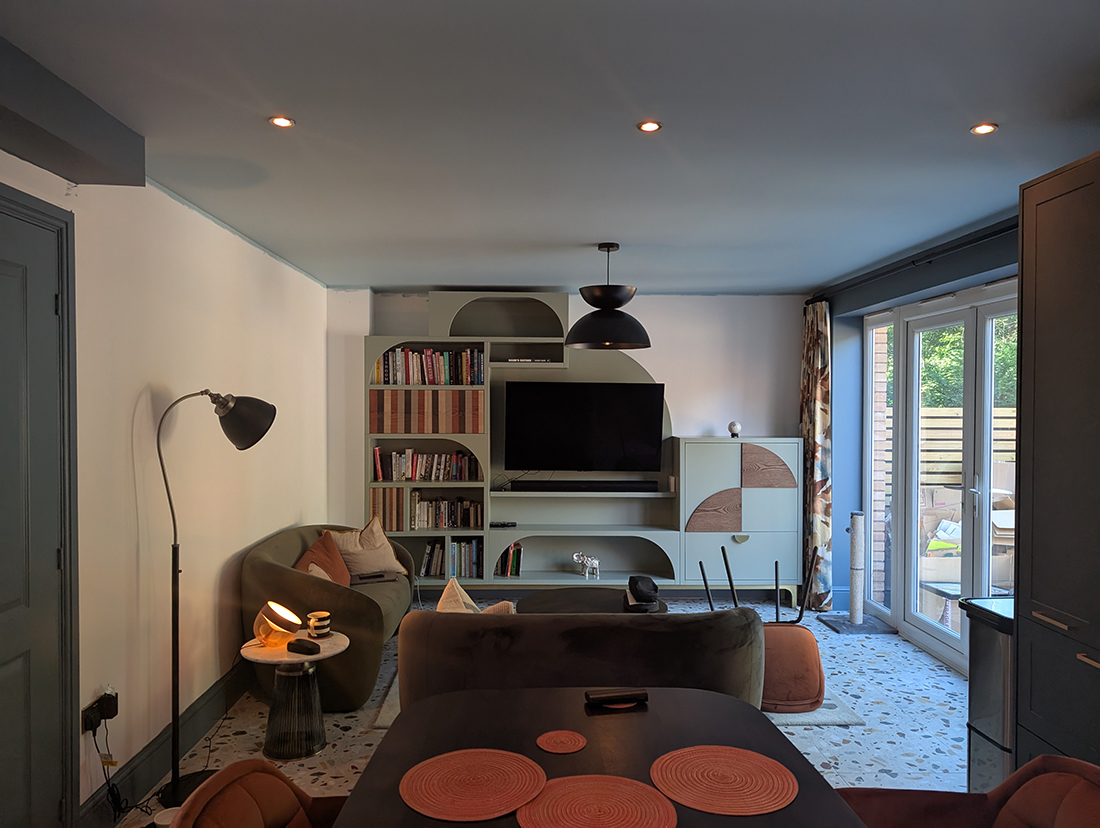
On to the other downstairs rooms now. The door opposite the one to the loo leads us to the large living room. This room has a big window so there is lots of natural light, space for a corner sofa and also a floor to ceiling media wall. The before photos show a blank canvas ready to be transformed with bespoke cabinetry, along with plenty of our signature pattern and colour. |
||
   |
||
|
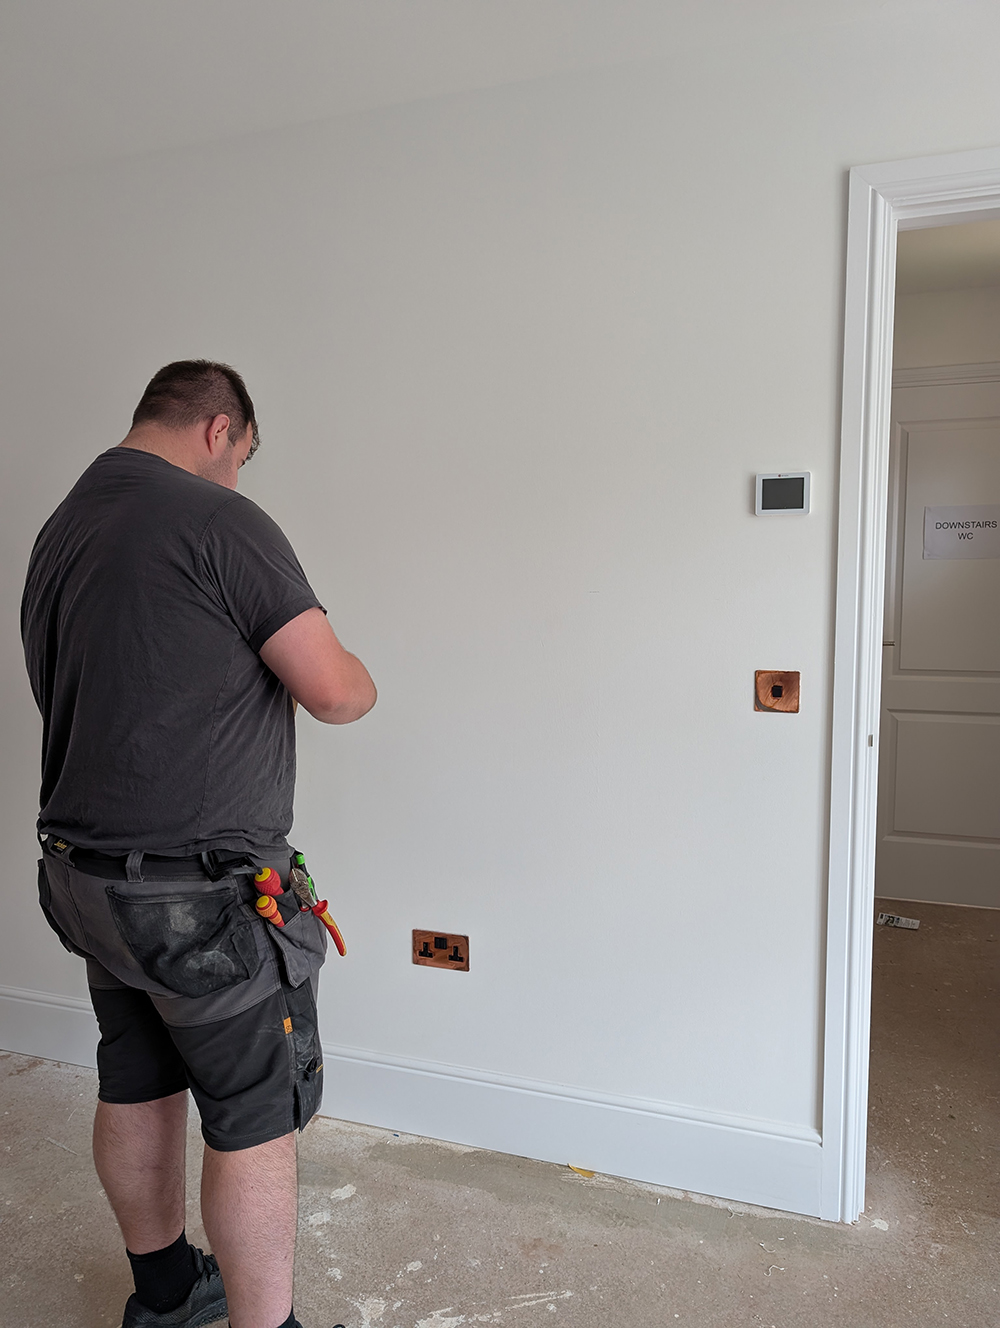
One of the first jobs we completed on this home was to change all the plug sockets and switches from standard builder white plastic to various brasses, coppers and black finished ones. The clients felt that this would elevate the whole home, and they were right. Items you touch every day (such as light switches and door handles) will have a great impact on how you feel about your home overall, and although this can be a relatively expensive process, it is really worth it and goes a long way to making a new build home feel anything but standard. |
||
| We also installed new light fittings throughout the house, with most of them controlled by the Hue system. We chose to do this before the decorating started, as the decorator could fill any small gaps left by changing them over, and would also be masking off the new switches to protect them from paint. Here’s one of the electrical team changing the sockets in the living room: | ||
 |
||
|
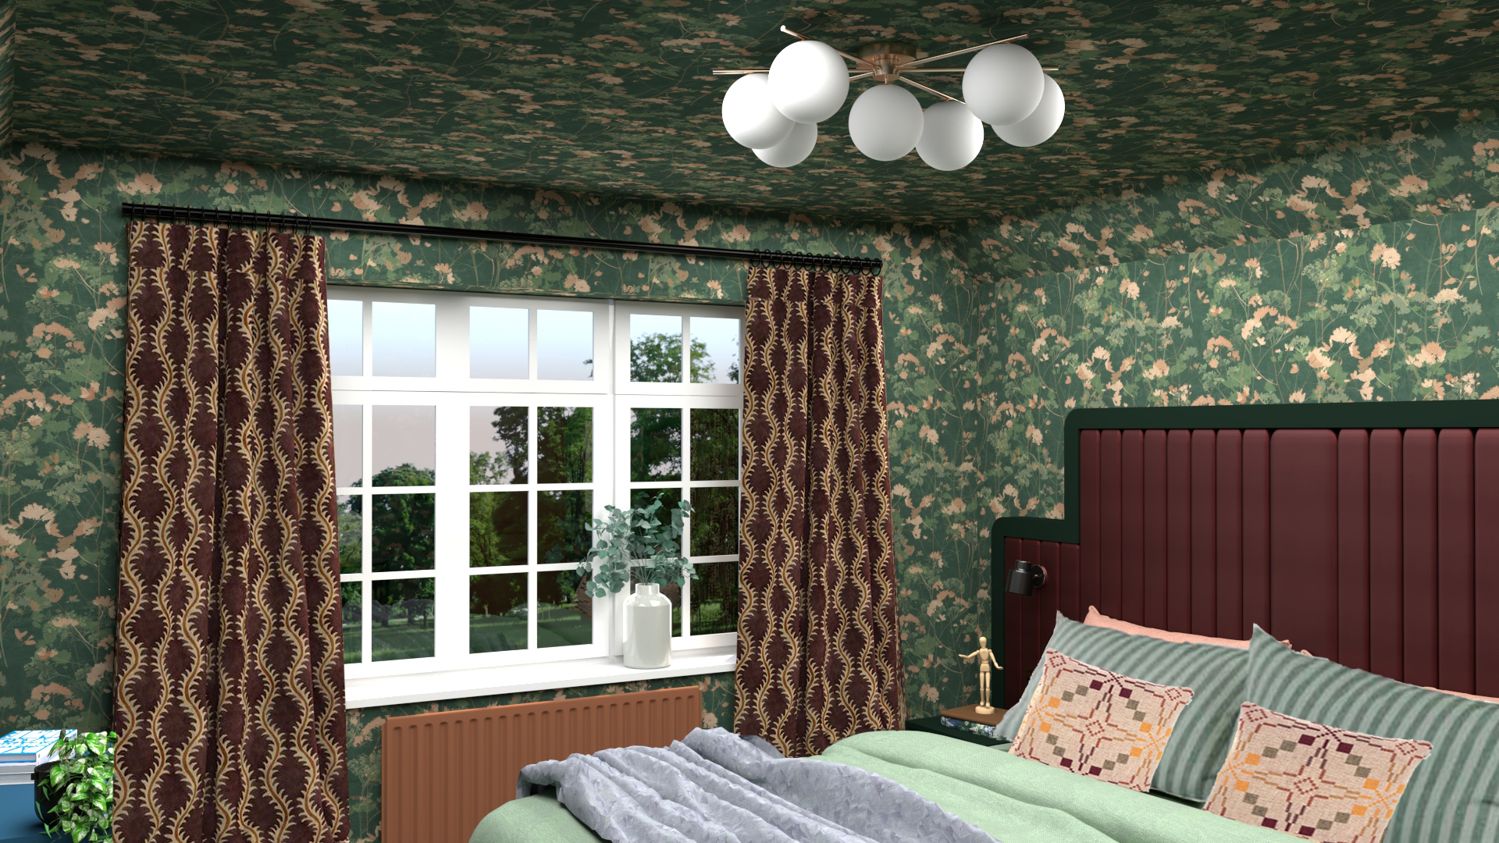
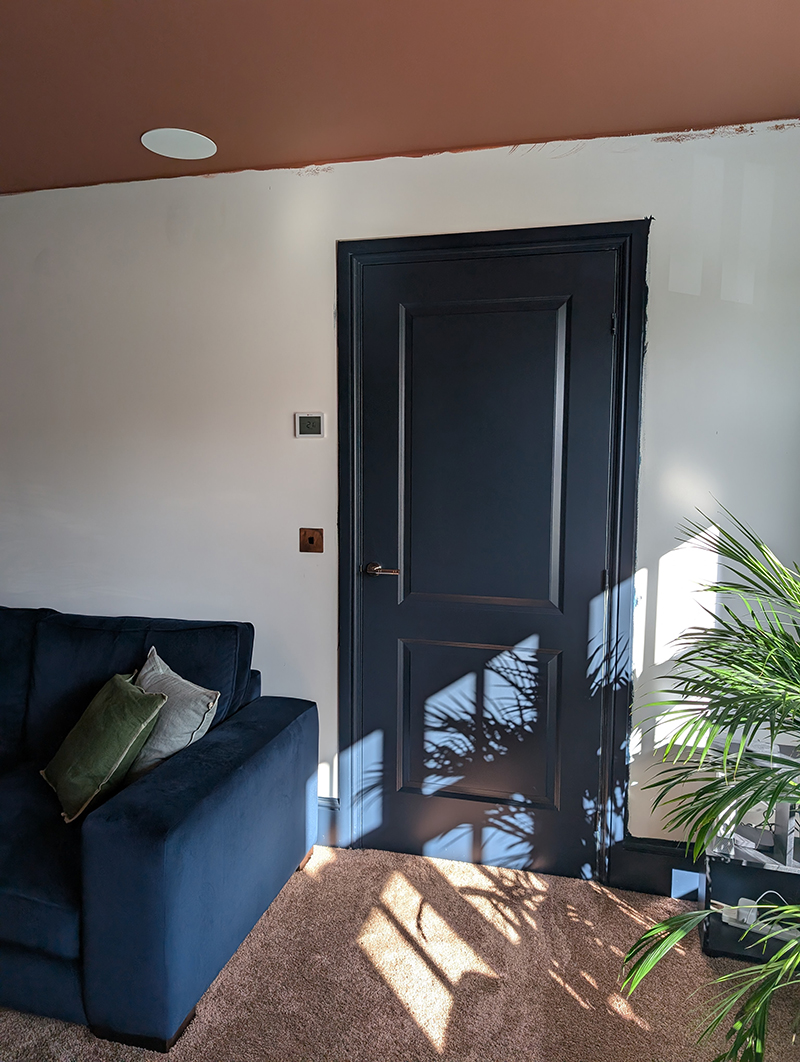
You can see that this room’s switches were changed from white to a distressed/swirled/etched finish in copper, which is just beautiful. We will be wallpapering all the walls in here, so for now, we have painted the door and all the woodwork, along with adding a gorgeous, rich copper tone on the ceiling. We can’t wait for the wallpaper to go up in here, as it picks up the copper tones with swirls running through a navy background. We’ve also added the bespoke carpentry in here - a truly dramatic piece which is a real show stopper. |
||
 |
||
|
||
|
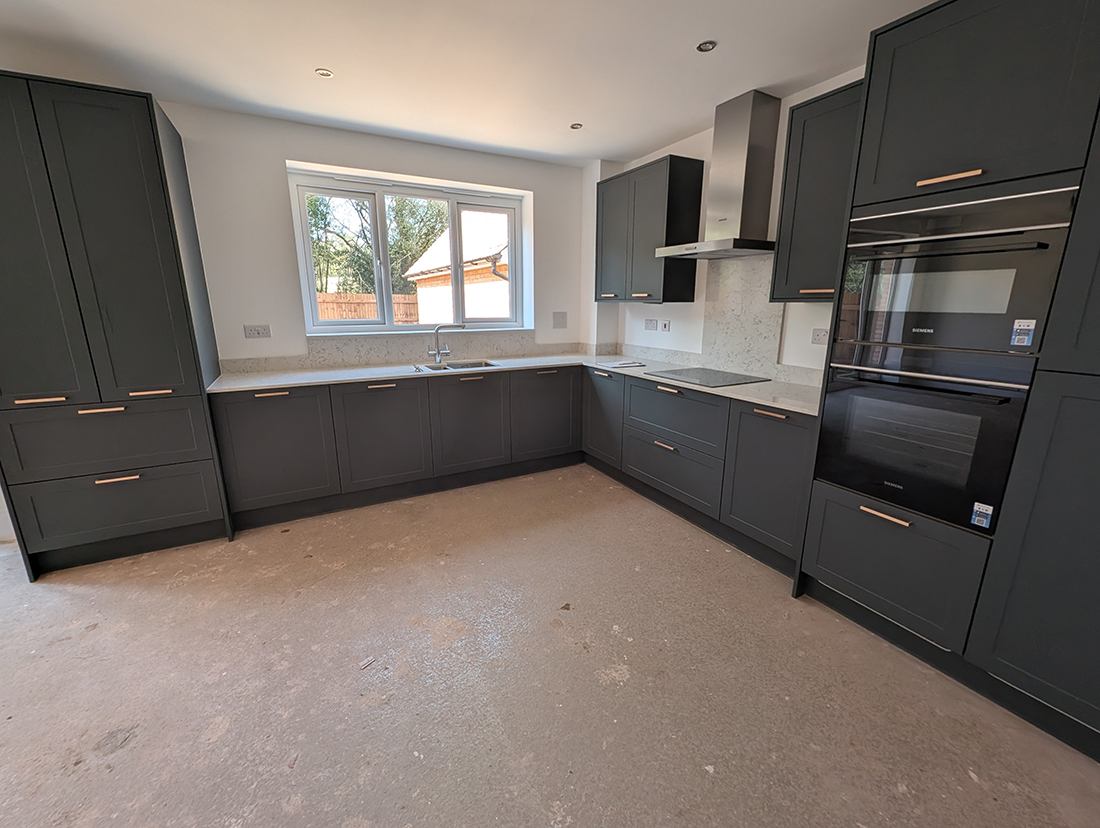
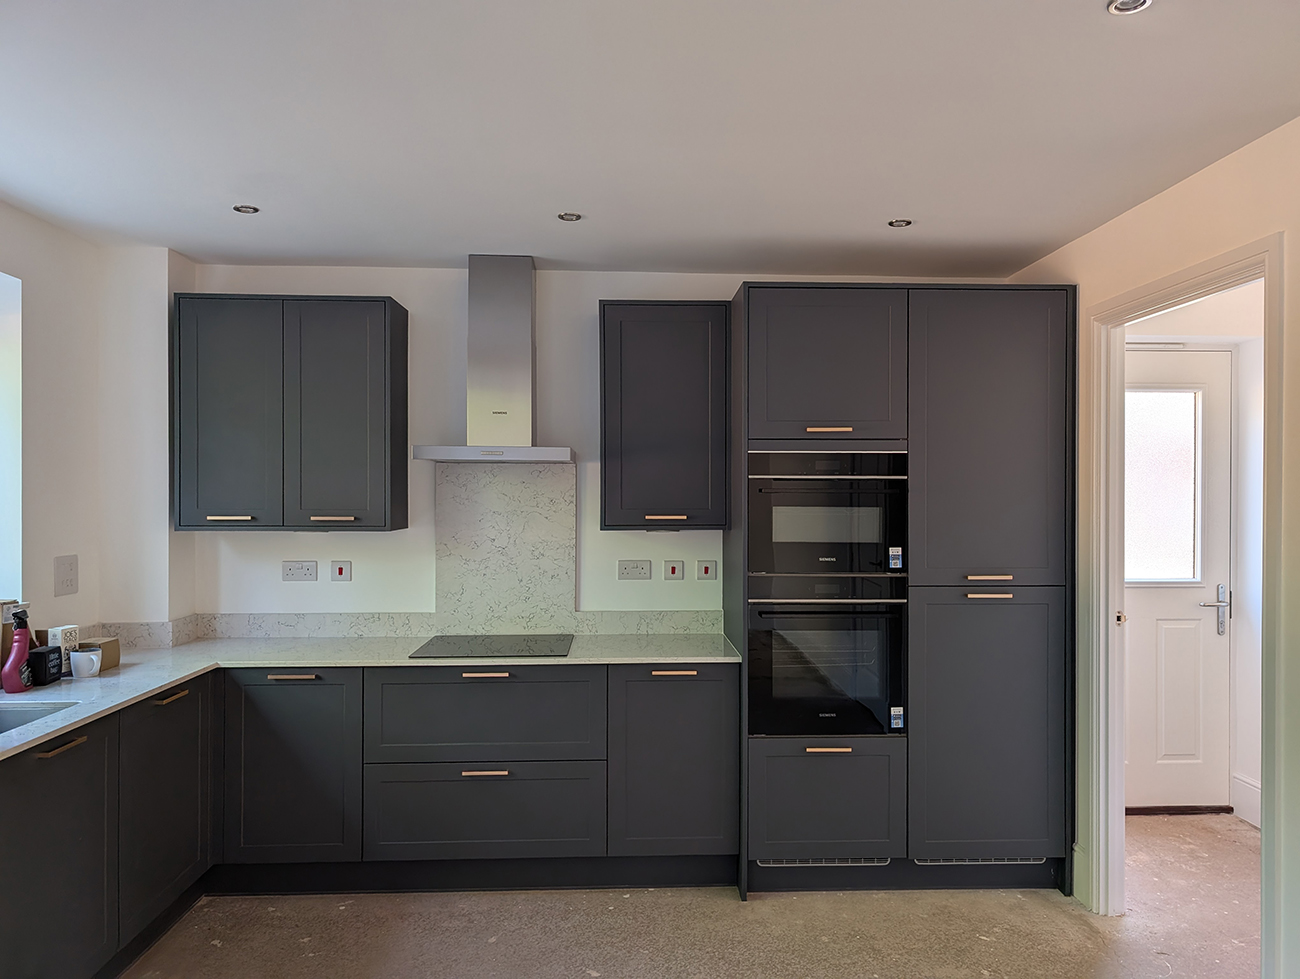
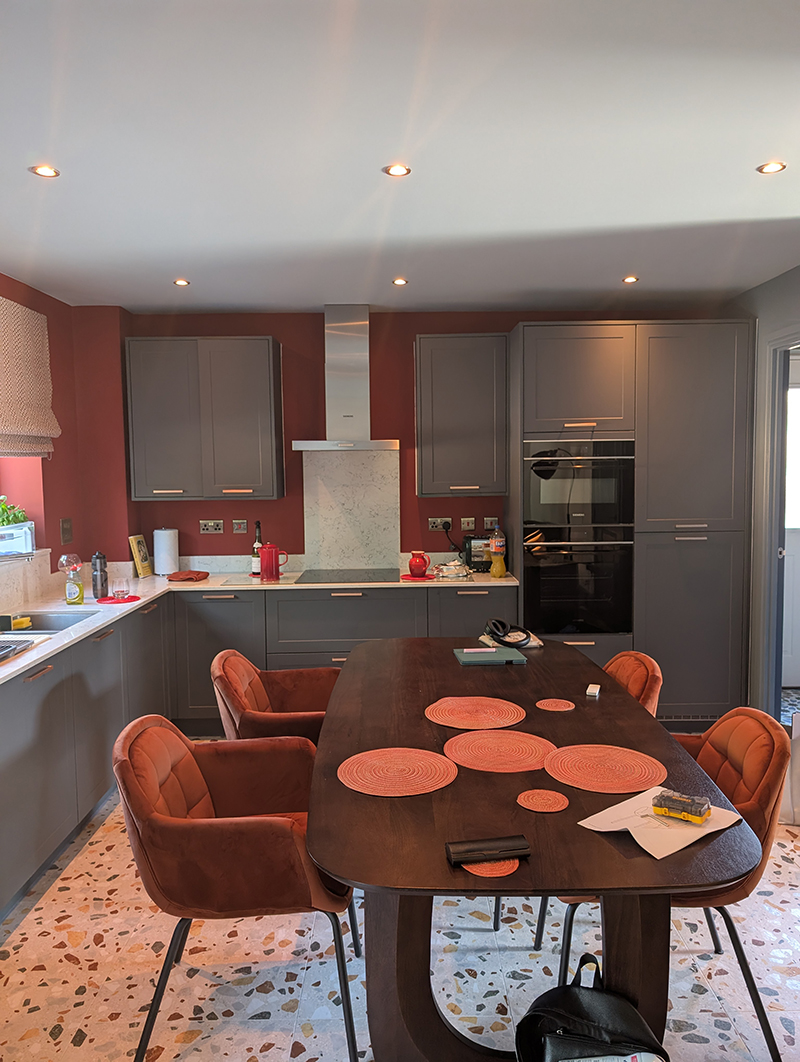
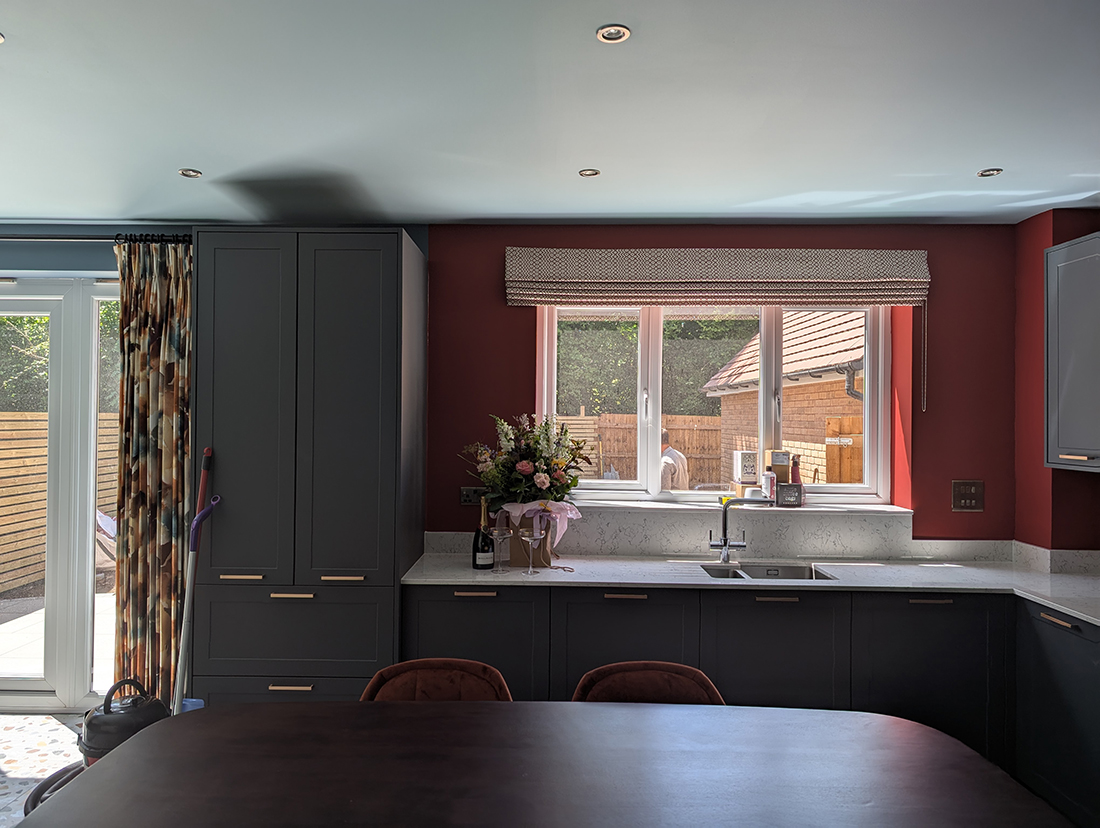
The next room in the house is the kitchen/diner. This room needed to function as a comfortable living/dining/cooking/workspace, and our clients wanted another unique media wall in here too. We helped our clients select the cabinet and handle style and colour, along with the worktop, from the developer's options. We chose a handsome dark green for the cabinets, along with brushed gold handles, which really bring a warmth to the room. They are complemented by a cream based Silestone worktop with a delicate pale grey veining, which adds interest without being overwhelming. When the keys to the house were handed over, the kitchen had already been installed, but the floors were bare, ready for tiling. |
||
   |
||
|
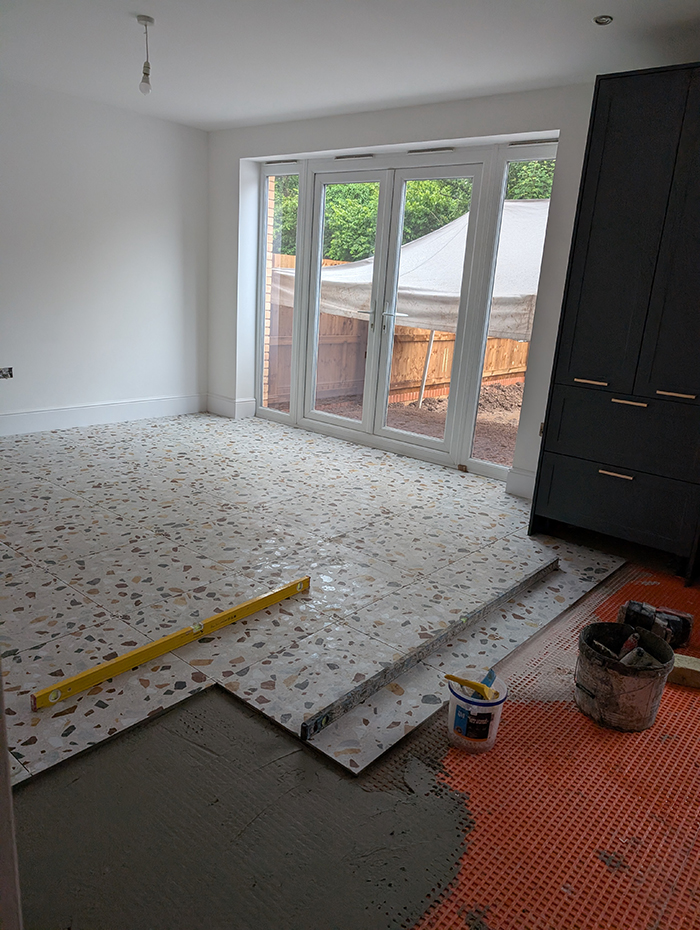
We started by tiling the floor with a beautiful multi coloured terrazzo style tile, which really lifted the feel of the whole room. The sockets became antique brass in here, and we designed another standout, curved media wall. The two large walls will be wallpapered in a design which brings out the rust and blue tones in the full length curtains, and carries through the copper tones from the living room. |
||
|
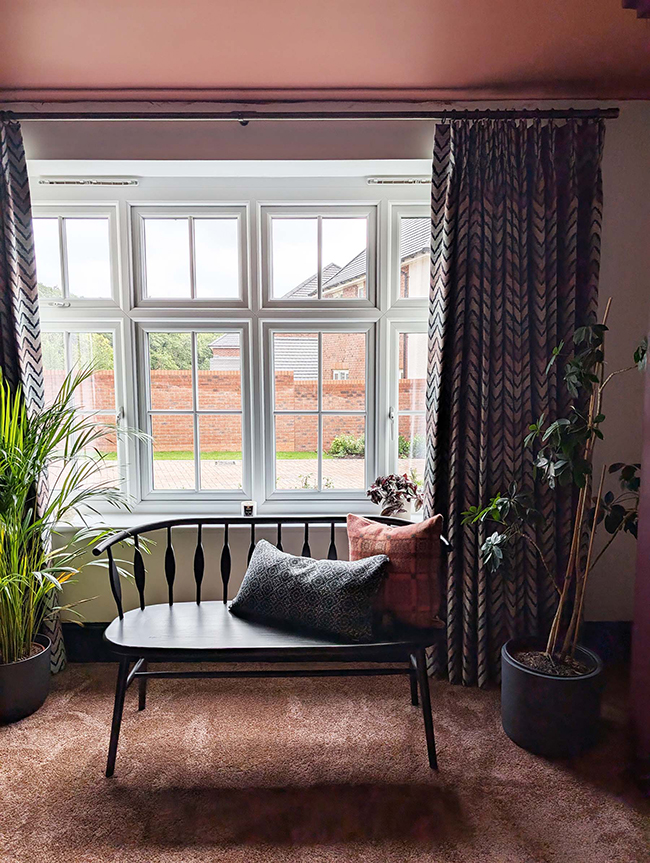
You can see from these and some of the other photos that we installed the curtains and blinds fairly early on in the process. Measuring for these was one of the first jobs to be completed once we had the keys, as we needed to give our curtain maker time to make everything from scratch. We wanted the curtains and blinds installed, ready for our clients to move in, so although they look a little strange without the finished decorating, there was method in our madness. |
||
  |
||
  |
||
|
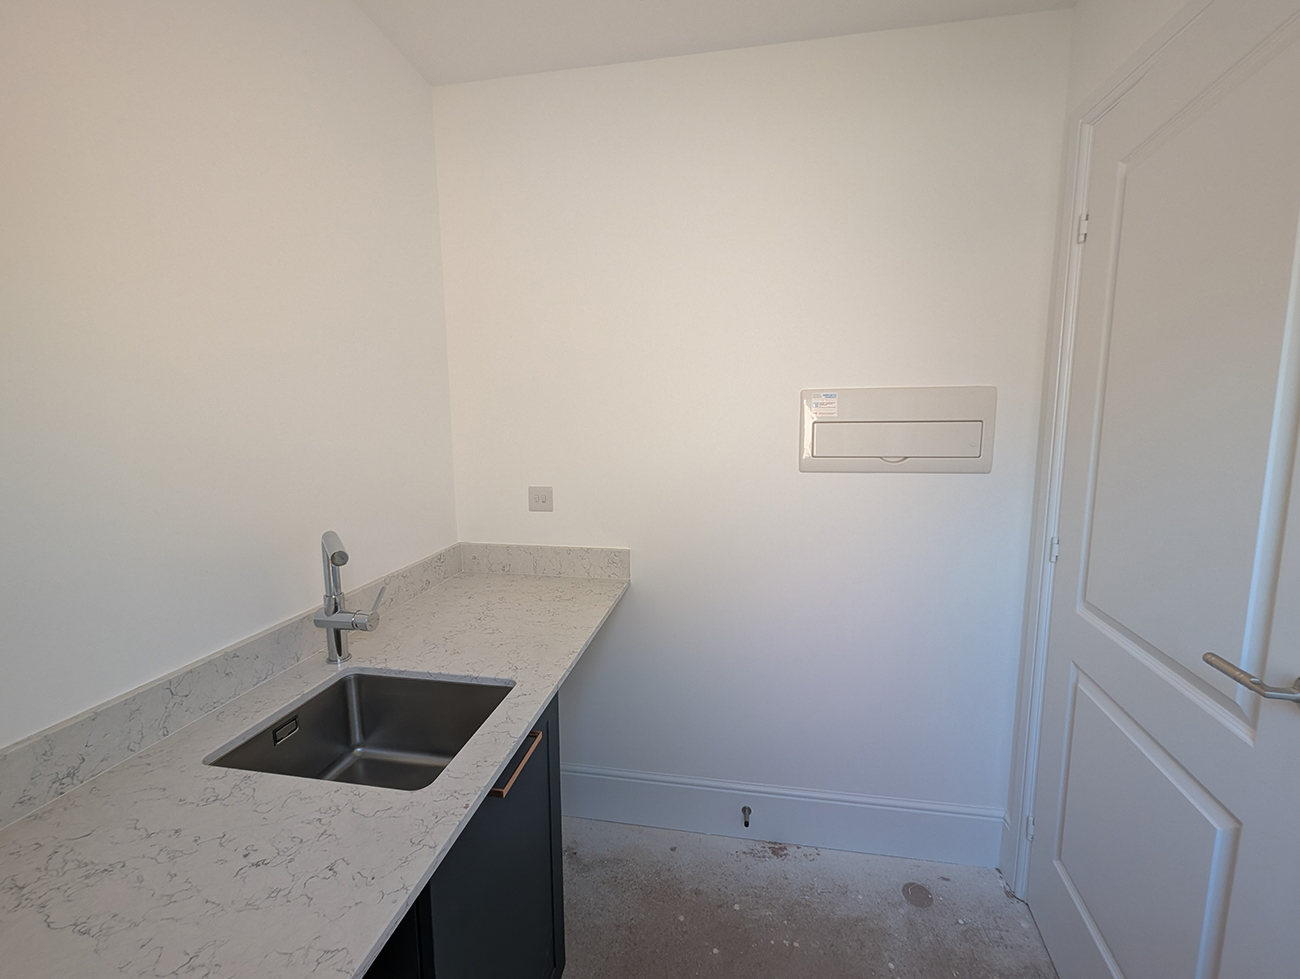
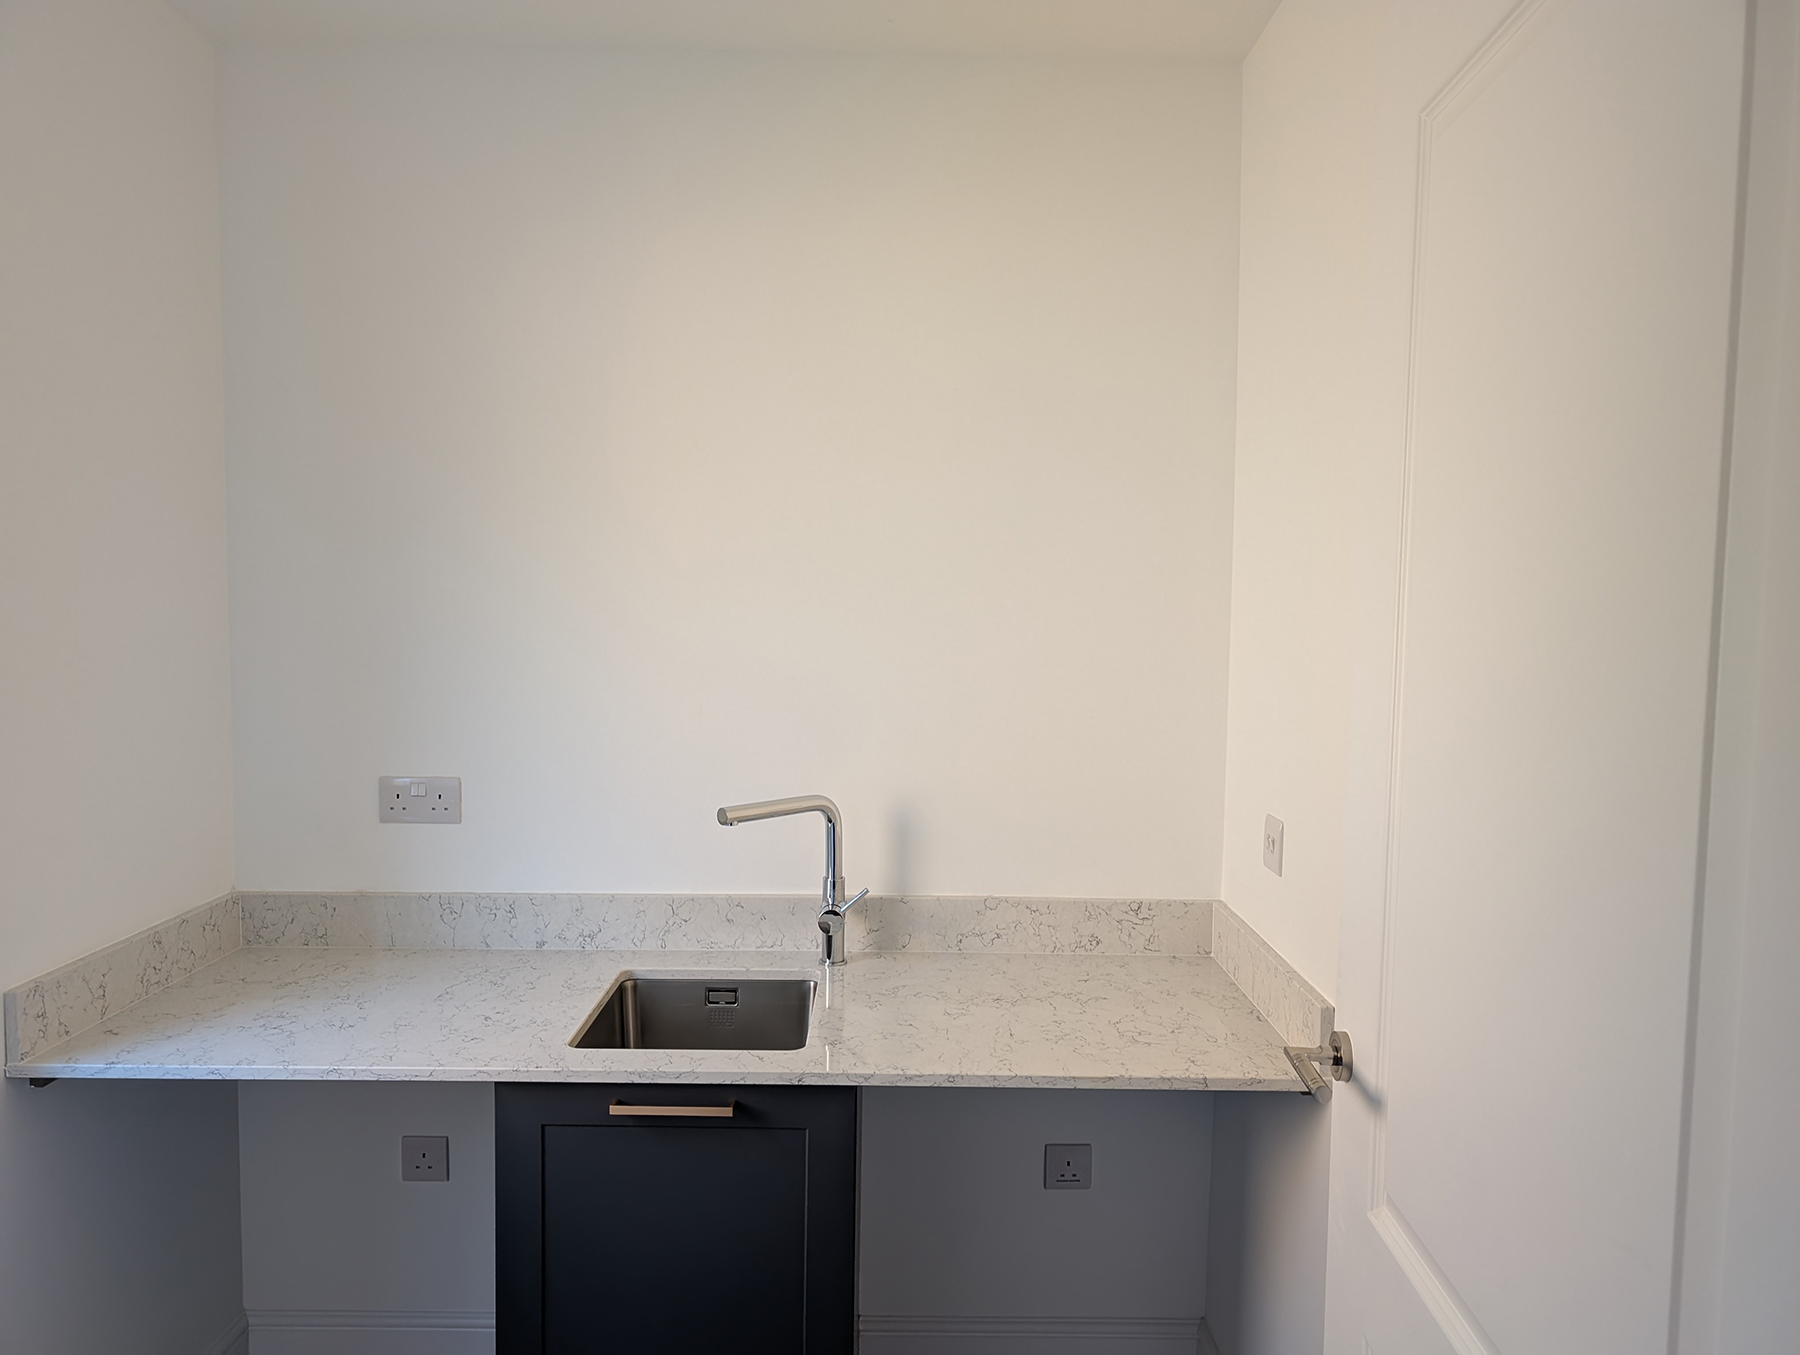
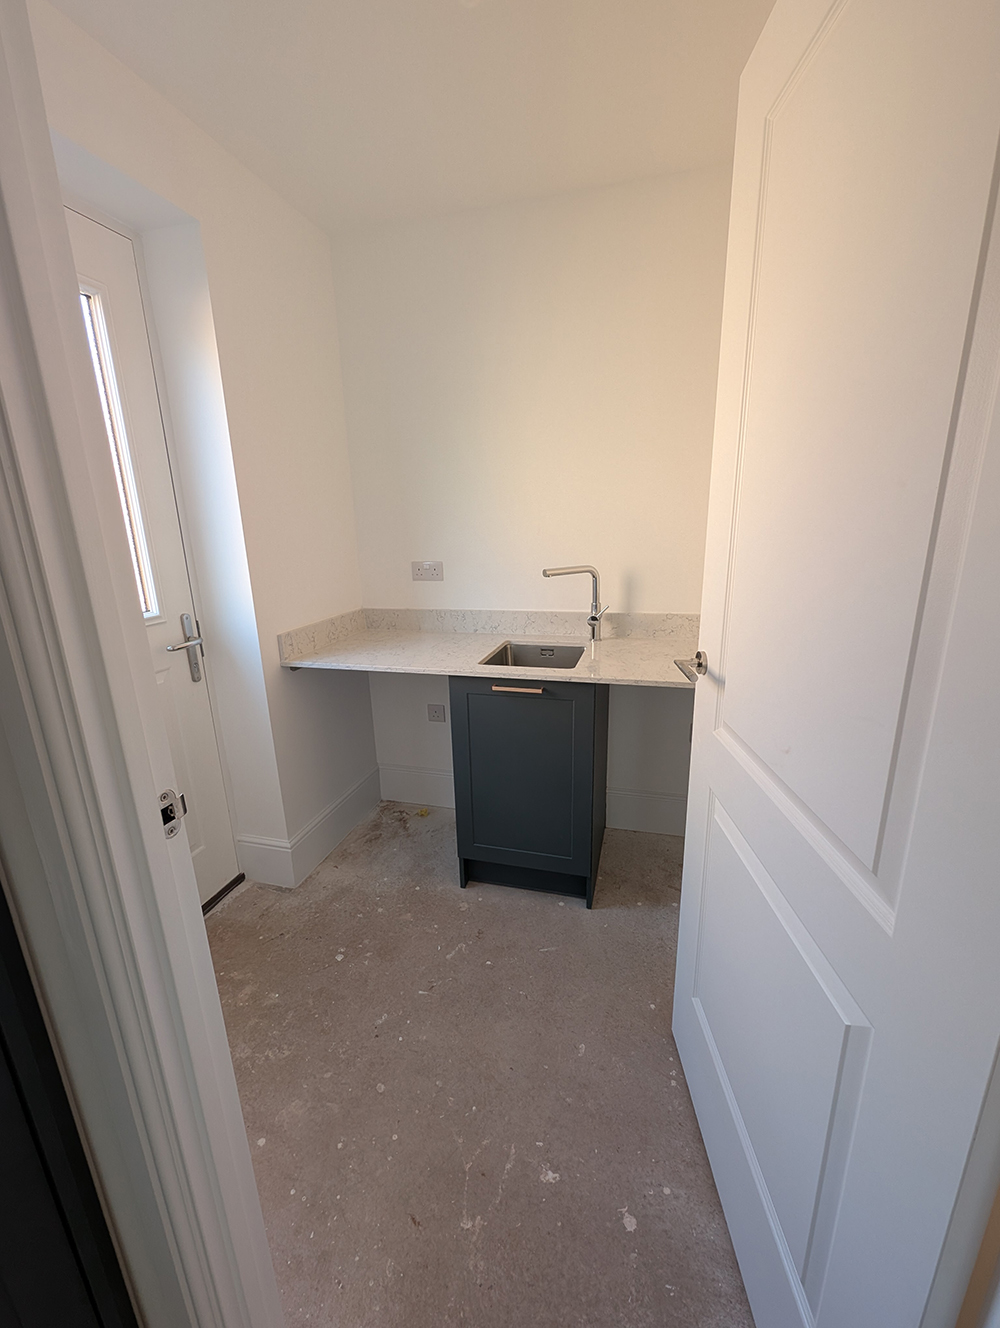
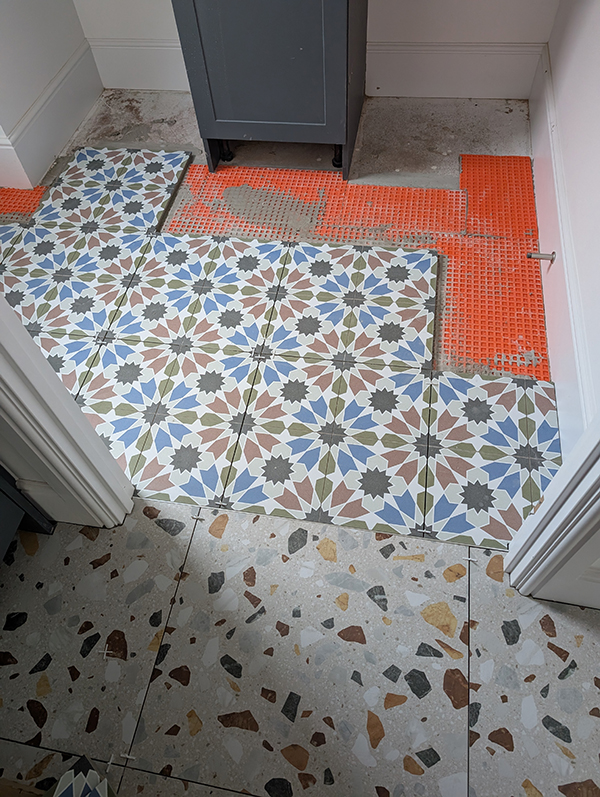
The final room downstairs is the utility room, which is also the way out to the side of the house. We’d agreed with our client that the developer would install the same worktop and cabinet we’d chosen in the kitchen, as this room is directly off the kitchen, and again leave the floors bare. |
||
  |
||
 |
||
|
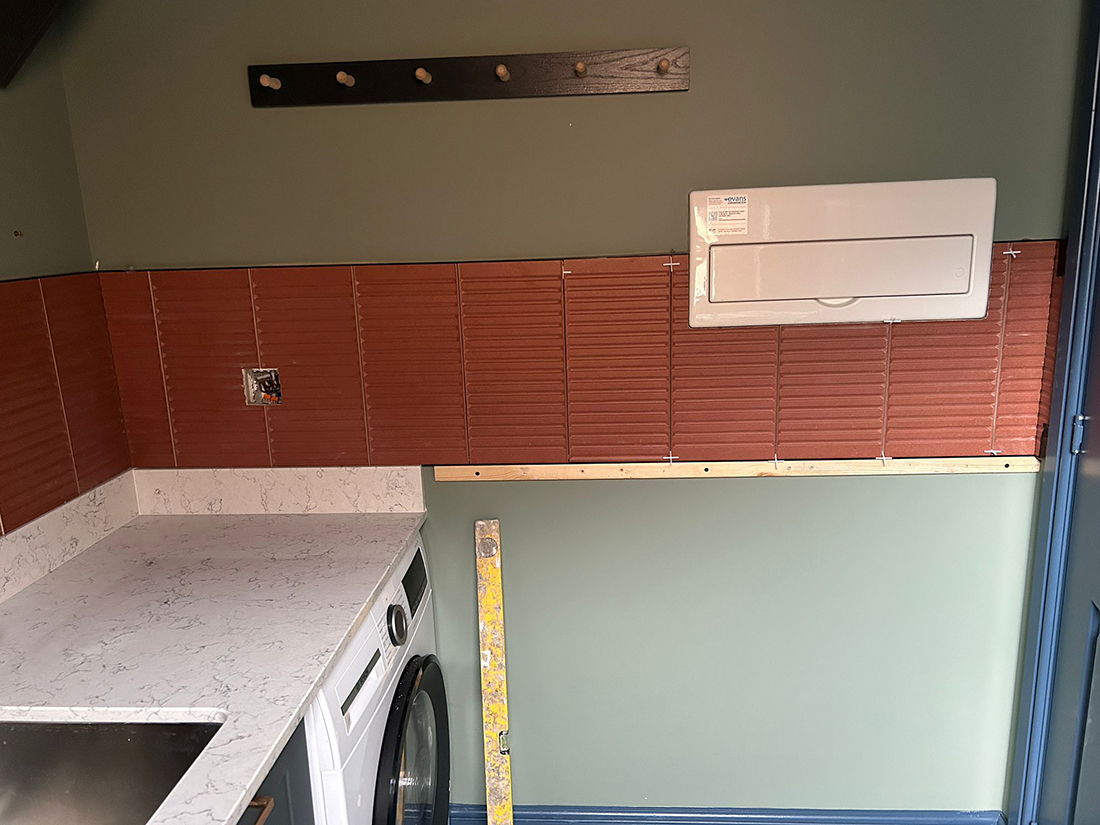
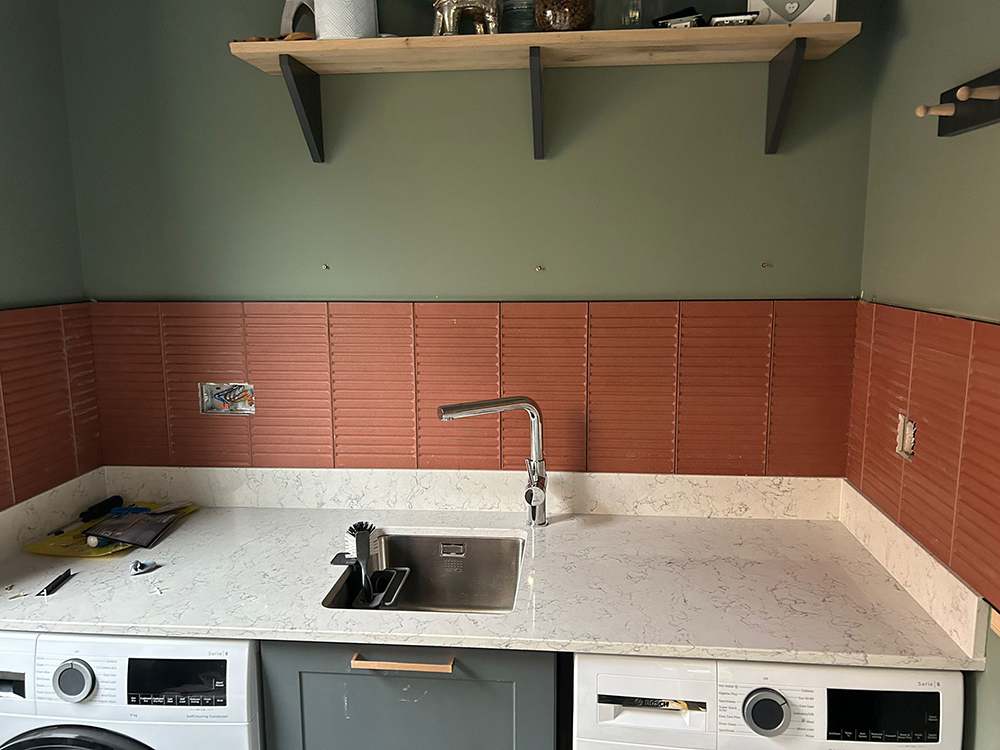
You can see from the photos of the flooring that we decided not to use the same tile from the kitchen in the utility room. This was partly a practical decision as the tiles in the kitchen were a large format which would have looked strange in a much smaller room, but it was also an aesthetic decision. Floors are a great opportunity to add colour and pattern, and the tiles we chose definitely did both of those things. We also chose to add a strip of tile around the whole room above the worktop to serve as an extra splashback and to add a layer of texture to some otherwise flat walls. |
||
  |
||
 |
||
|
You can see that, even though this project is not quite over the finish line, it looks very different from the white box which was presented to us to work with. The addition of layers of colour, pattern, texture and light have reshaped an uninspiring space into a real, relaxed, welcoming and beautiful house, and more importantly, a home. |
Welcome to the design blog, where you'll see posts about anything from the projects we are working on, to the latest fabric and wallpaper collections, and all things interiors related. We love colour, pattern, architecture and old buildings, and we love to share our finds with you.
Happy reading!