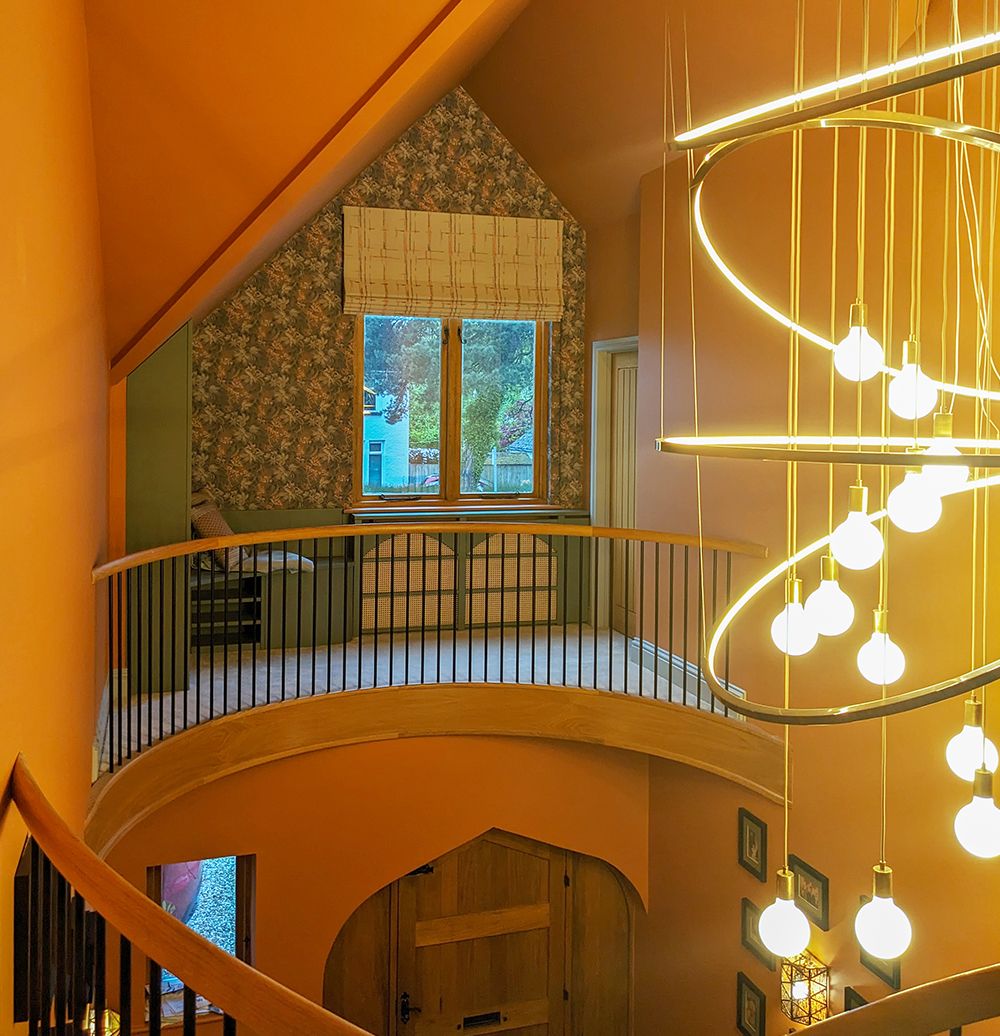

Work in Progress - The unique family home
 |
||
|
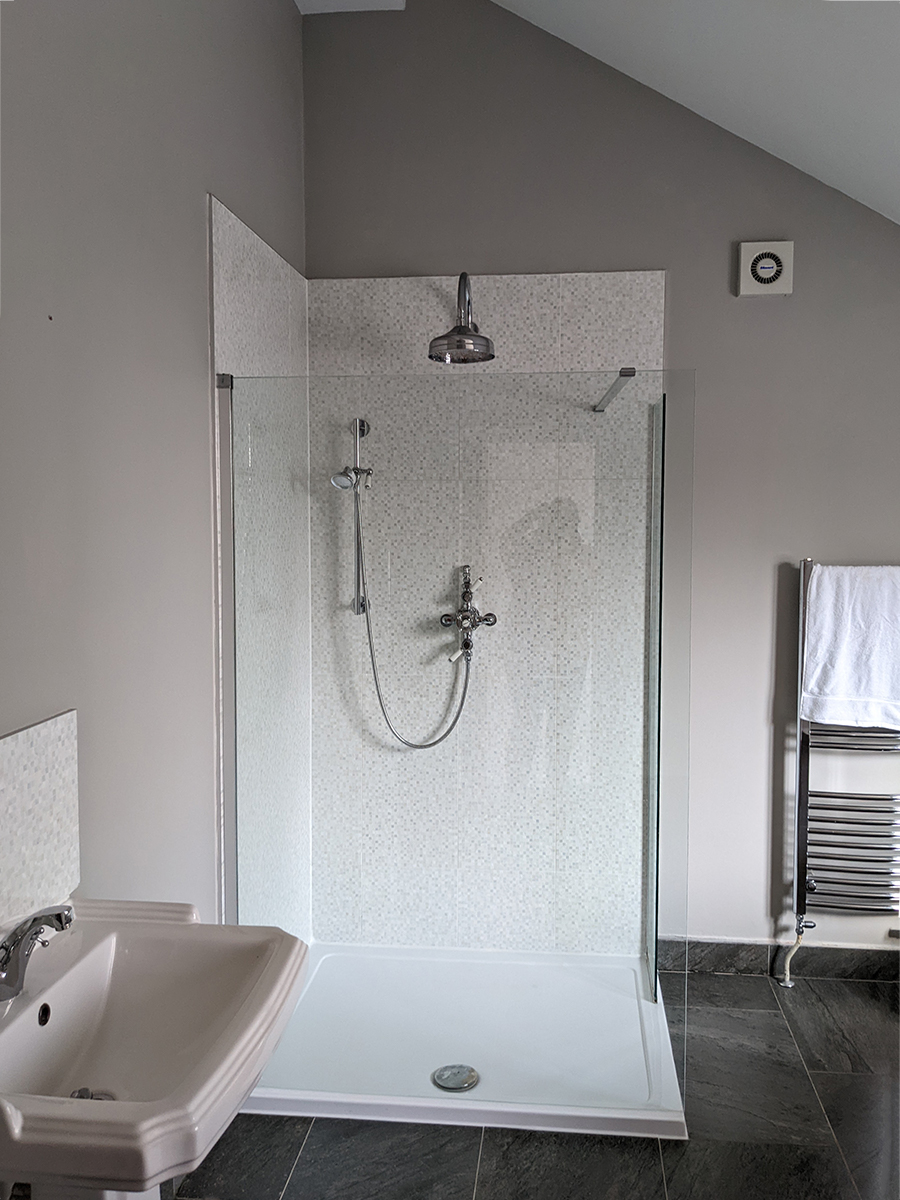
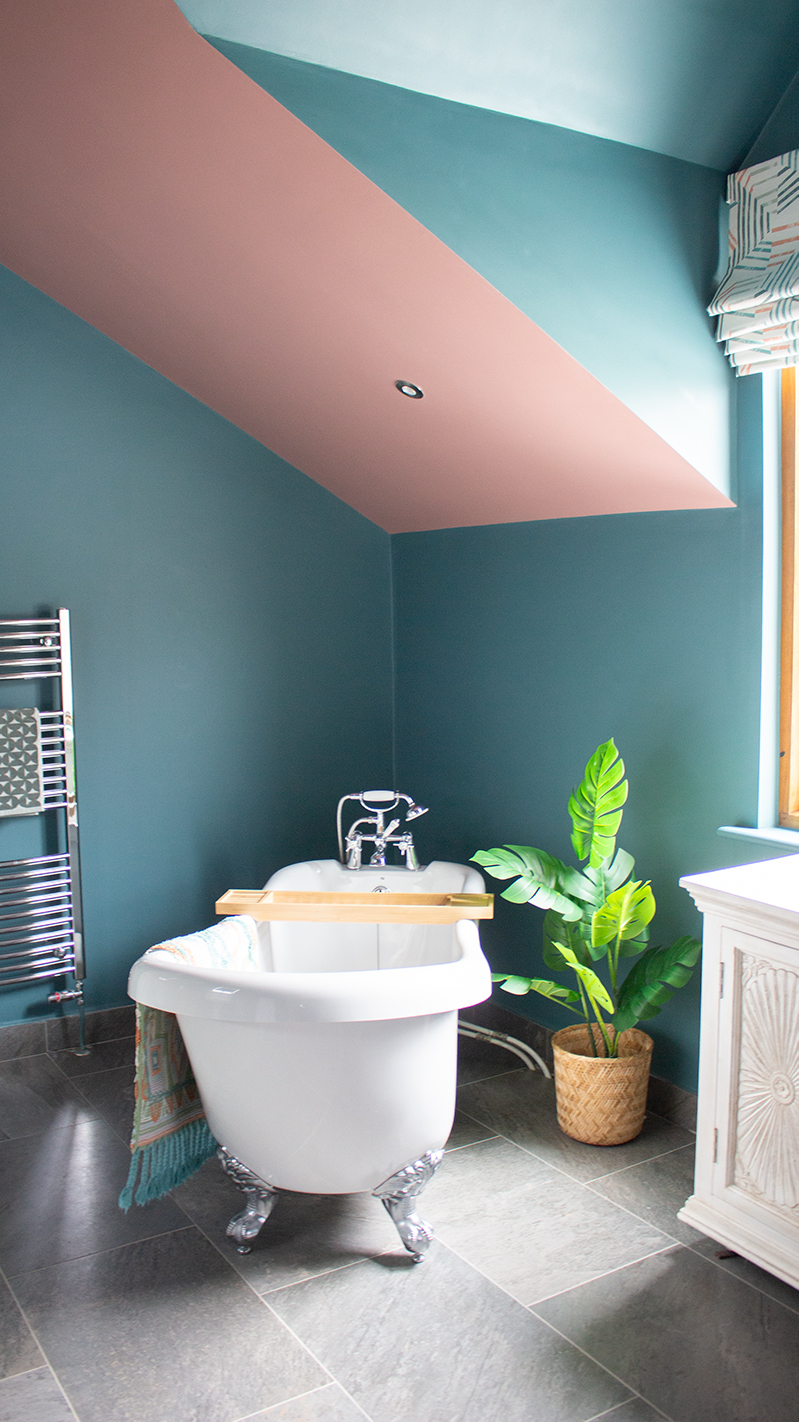
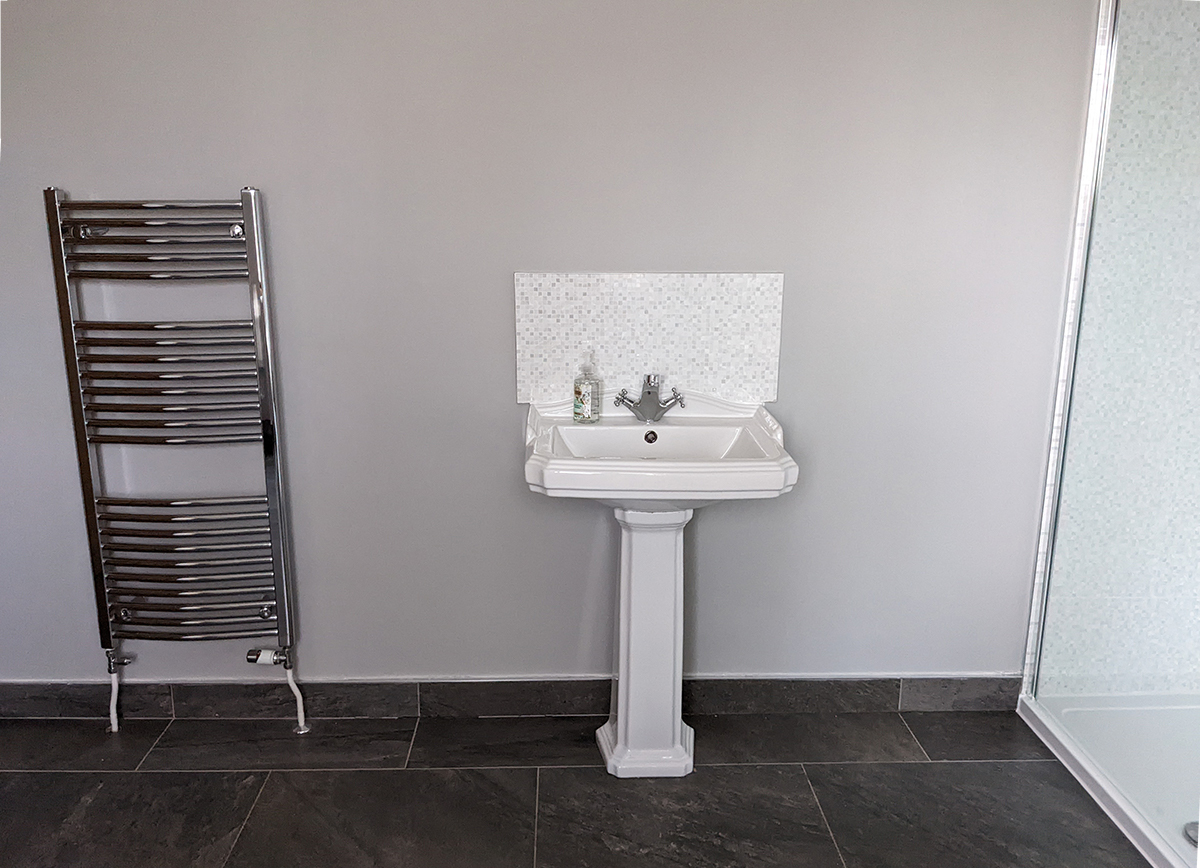
When we first started working on our Unique Family Home project in February 2022, the plan was to get the house ready for the clients to move in and save the larger projects (such as new bathrooms) for later. We decorated and installed blinds and furniture, and then added some bespoke pieces over the next few months. We had the main bedroom’s en suite painted and added some storage, and even though it had a quirky layout which wasted a lot of space, the clients wanted to leave the renovation for a few years and tackle it later. Here's what the bathroom looked like when we first saw it: |
||
 |
||
 |
||
|
||
|
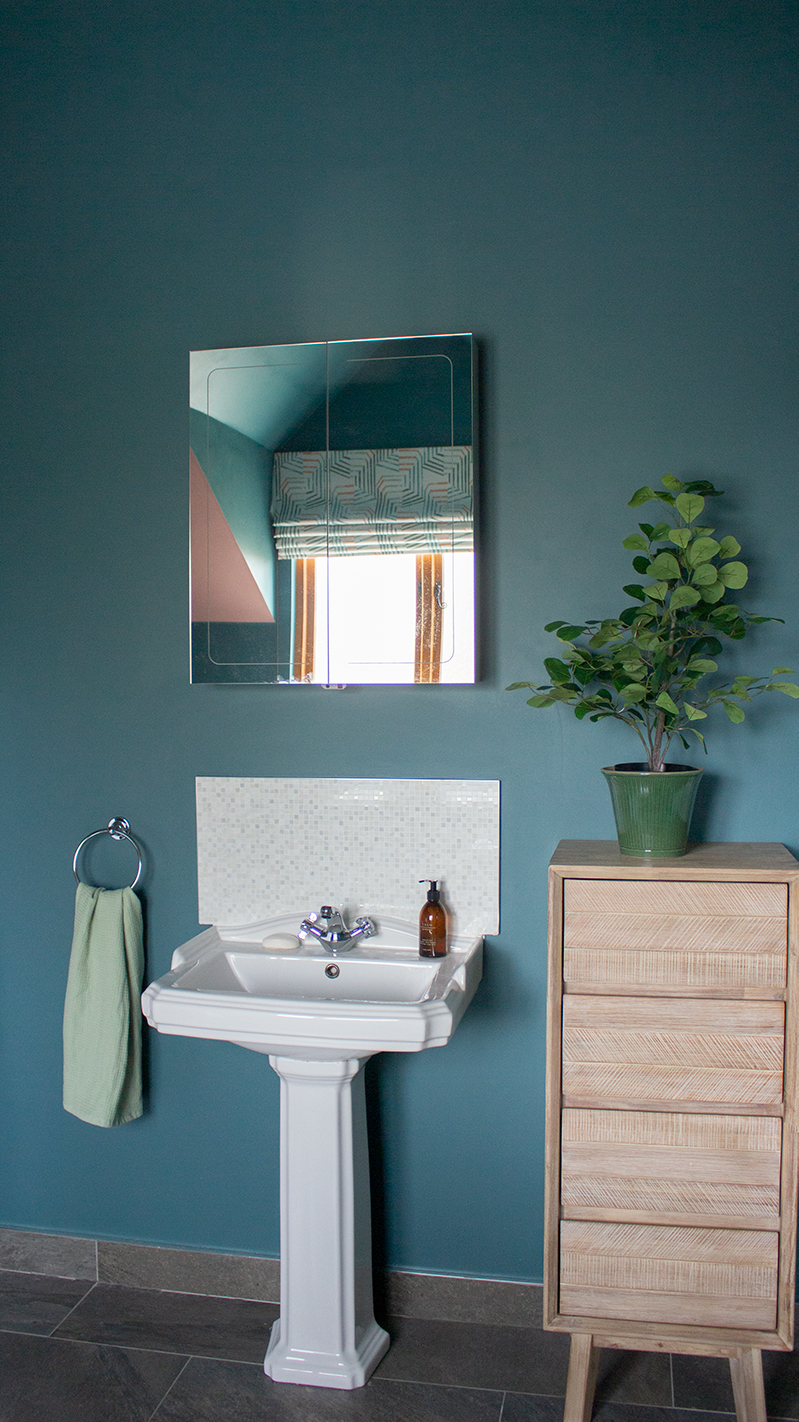
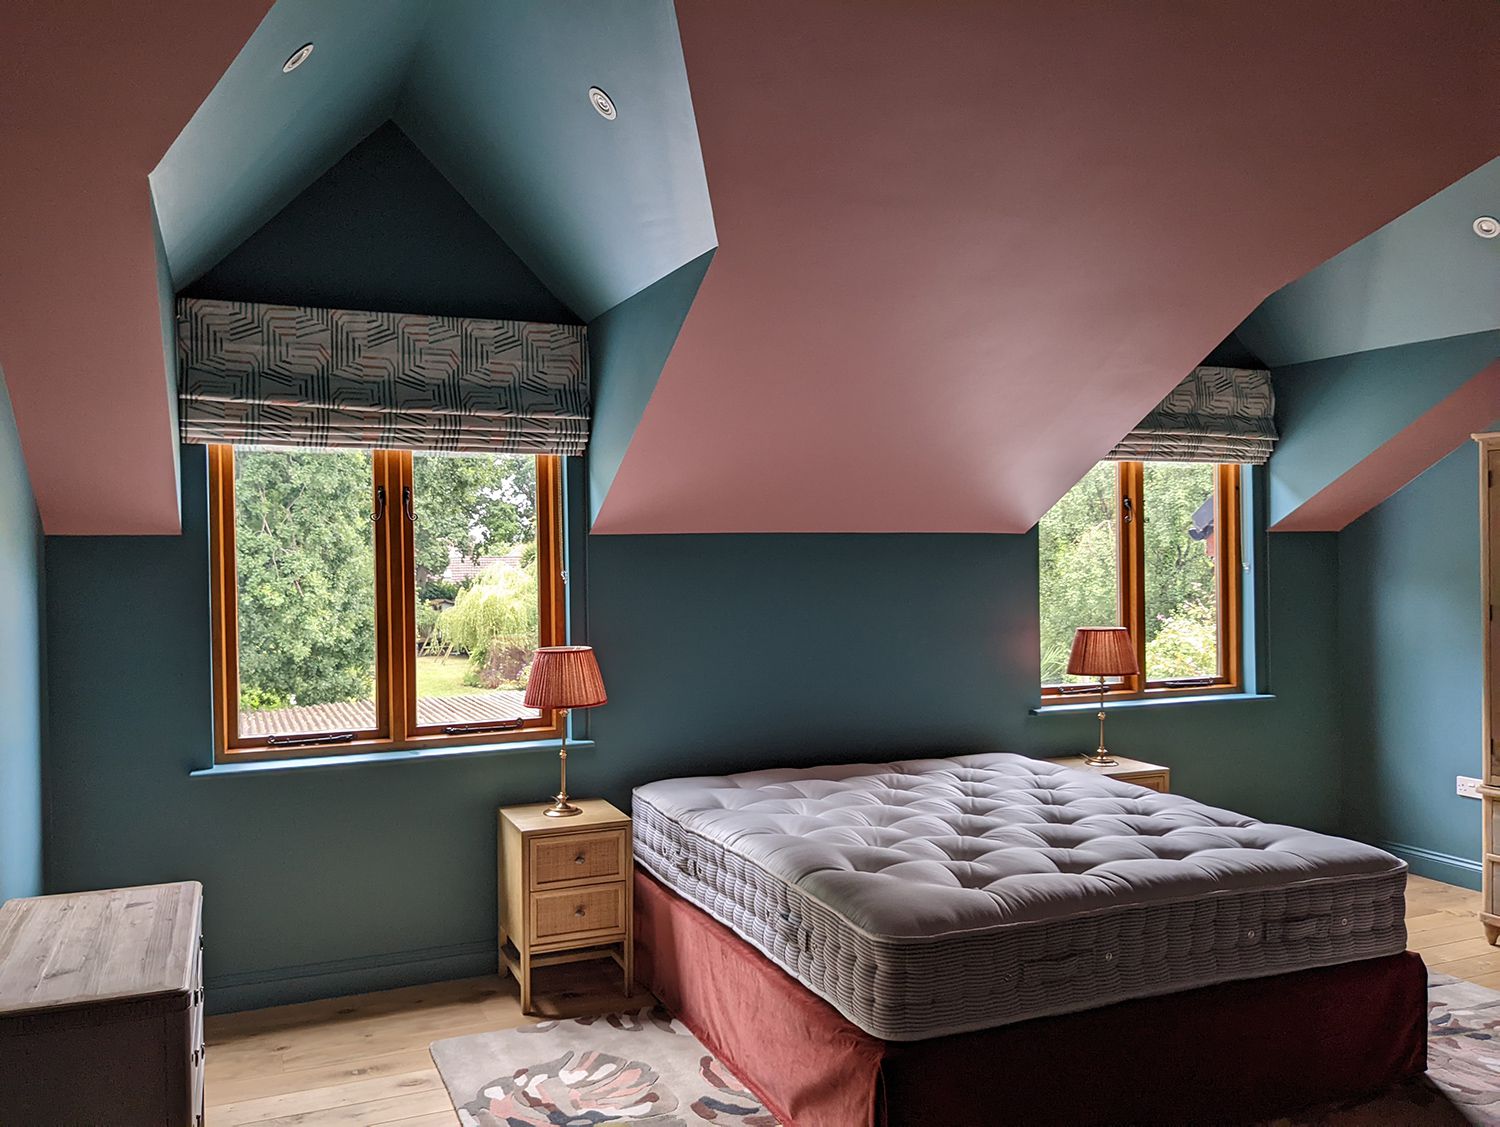
The couple liked the new colour scheme I had chosen for the main bedroom and wanted it to flow through into this room too, with the same Roman blind fabric. This is what it looked like when we had finished decorating and the family moved in: |
||
|
||
|
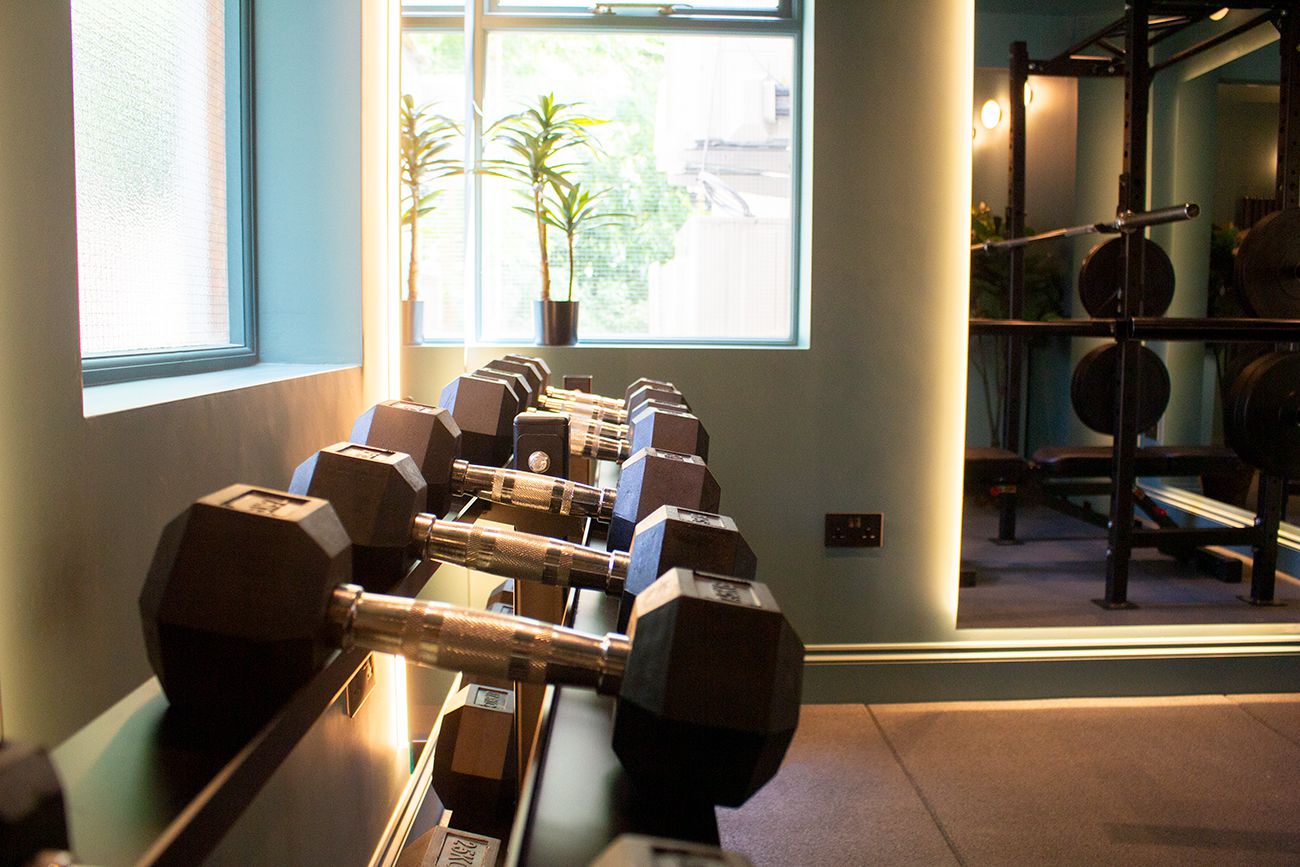
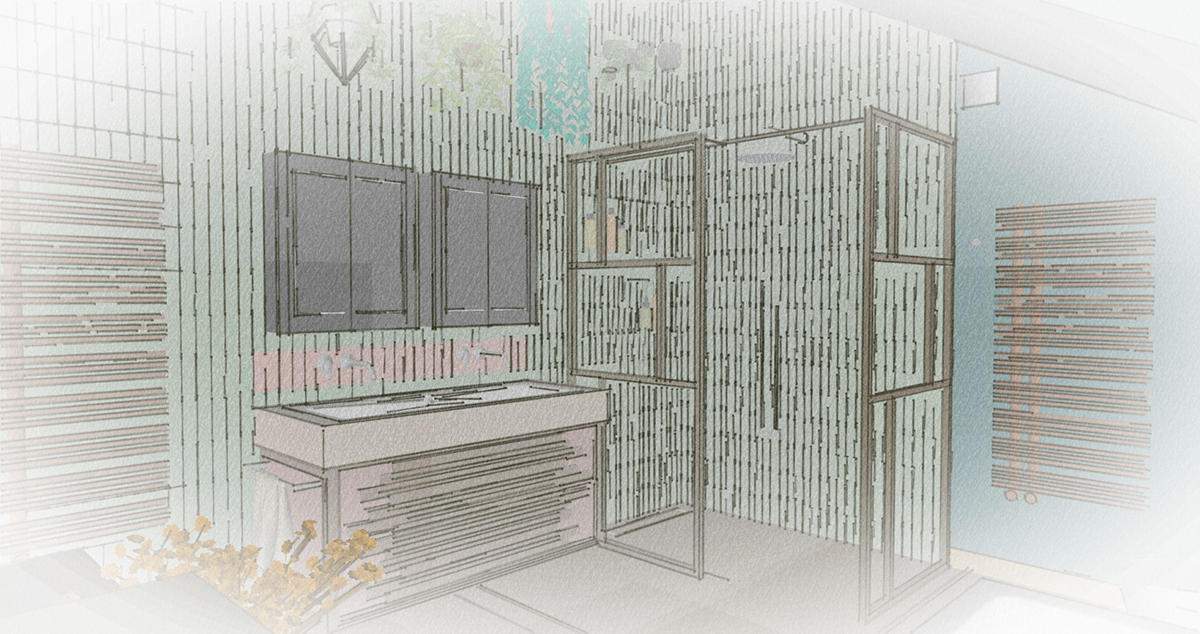
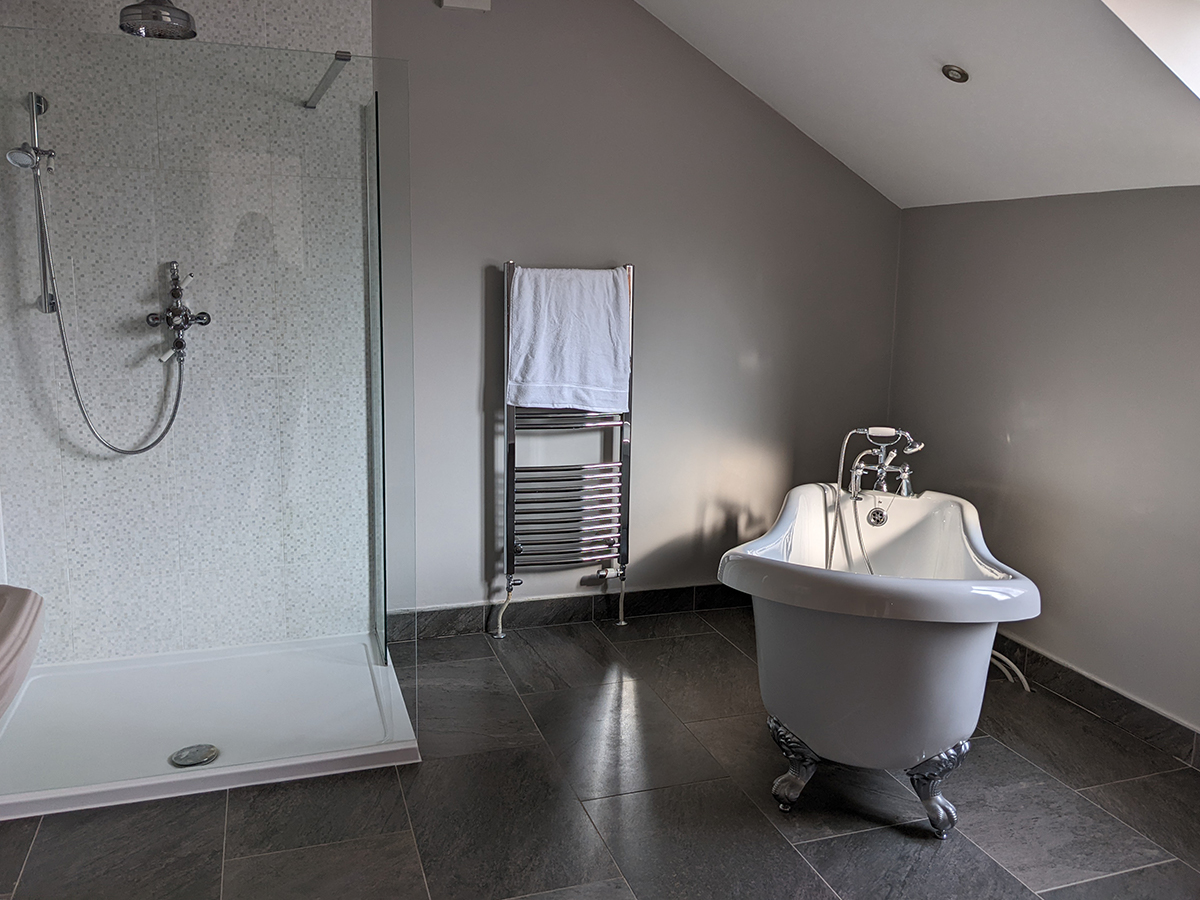
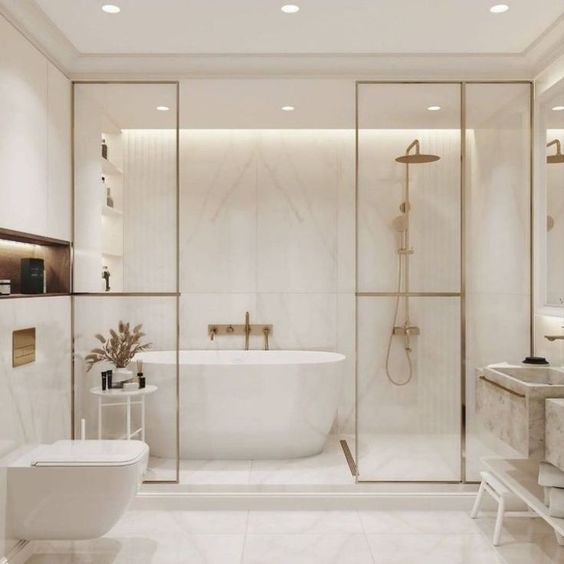
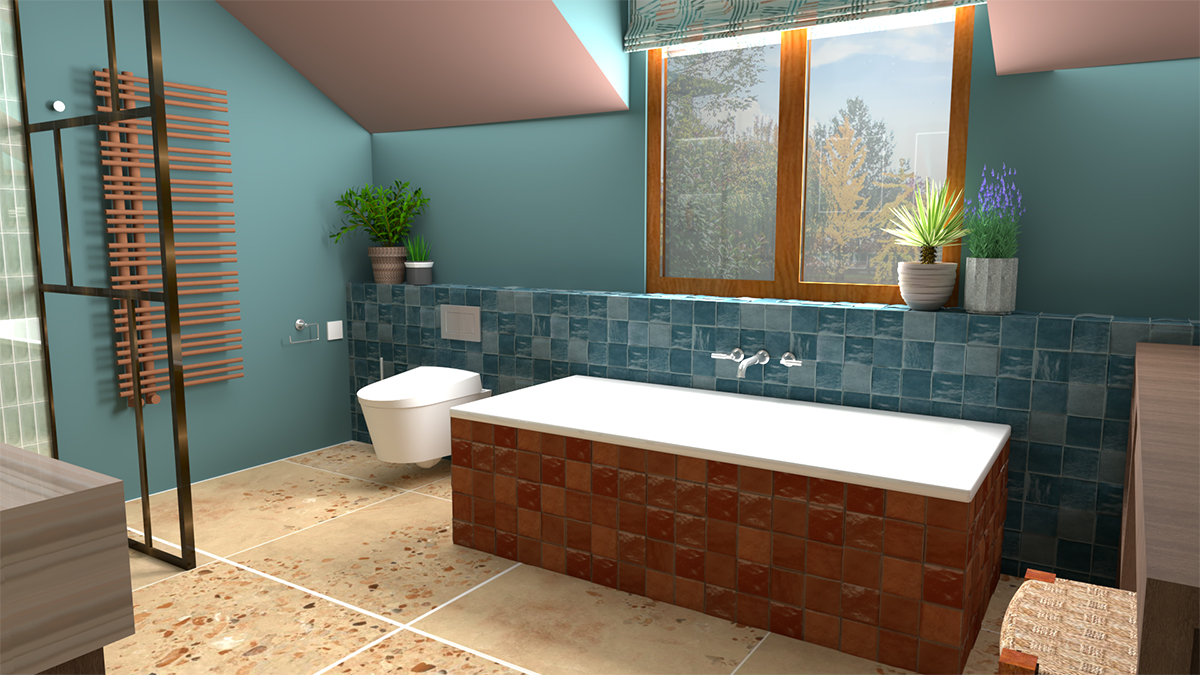
However, once we started work on a new project for these clients - converting the garage into a gym - we noticed a slow drip coming from the room above. We called in the plumber, and found the leak was coming from a cracked shower tray in the en suite, which is above the garage. The crack in the tray was large, so we would have to replace it, which would involve taking up the floor and removing the tiles around the shower. As the previous homeowner had installed the tiles, we didn’t have any leftovers to replace them with, so we would be looking at installing new floor and wall tiles along with a new shower tray. After we discussed the issue with the clients, we decided that now was the time to forge ahead with their plans for a new en suite and give them the bathroom of their dreams. The brief was fairly simple - a larger, walk in, powerful shower with a rainfall shower head, alcoves in the shower area for storing shampoo, a built in bath which is wider than the existing bath, a smart loo with bidet function, a floating sink unit, a dressing table, underfloor heating, and a towel radiator large enough to dry two towels (don’t we all hate those wet towels hanging around?). The couple wanted to keep the new pink and teal colour scheme as it echoed the main bedroom and to use this as a basis for creating a spa like room with personality. Other than that, they were very open to ideas, and as we had been working together for over a year now, they trusted me to come up with the perfect room for them. It was a great brief, and I knew I would enjoy the design process for this room. The layout was the first thing to tackle - for some reason, the existing bath was narrower than a standard one and had been installed at an angle, which wasted lots of space and was awkward to use. The couple shared some layout ideas with me on a Pinterest board, and one of their favourite layouts had the shower and bath at one end of the room in a wet area behind one large shower screen - something like this: |
||
 |
||
|
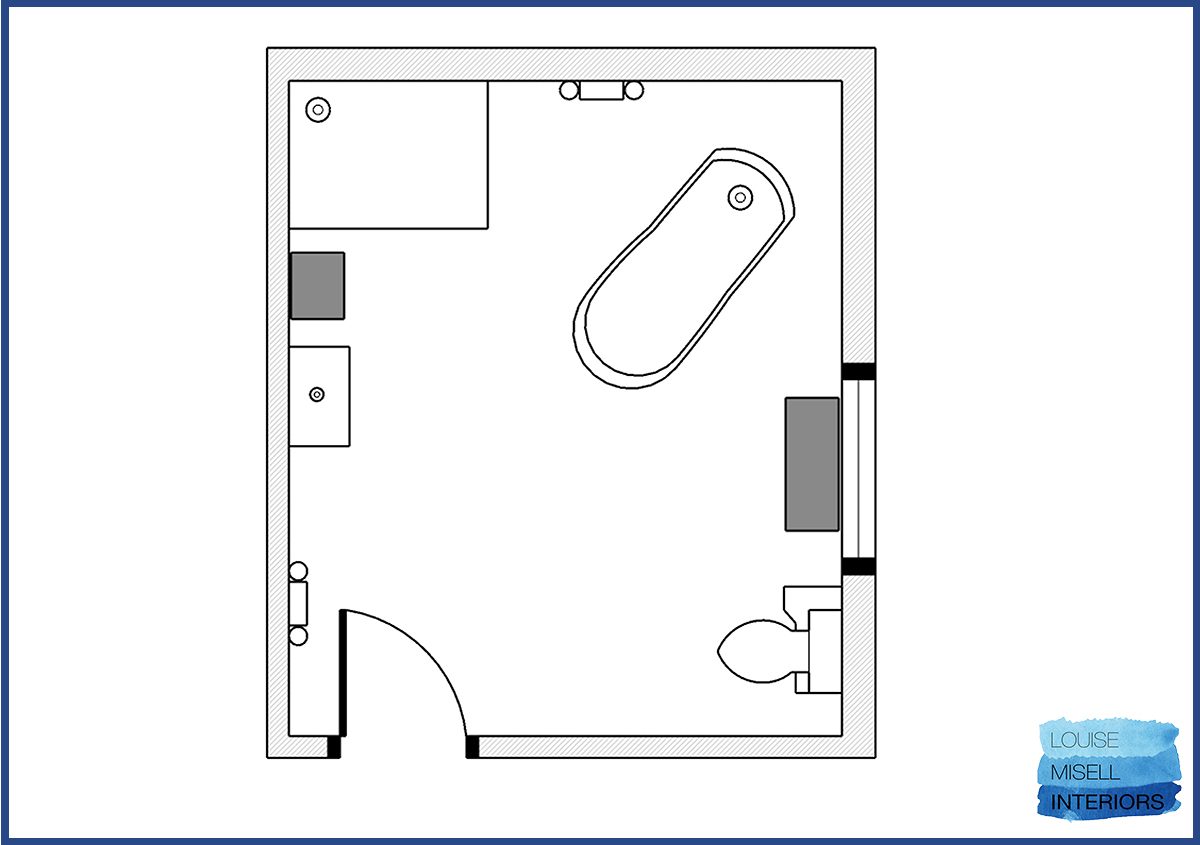
Once we had measured the room and drawn out the floorplan, it became clear that we couldn’t accommodate this layout, as there wasn’t space for the bath and shower to be at the same end of the room - partly because of the sloped ceiling and partly because the couple wanted a larger shower. Because of the sloped ceiling and the placement of windows and doors, the only place the shower could go was its existing location, so I came up with a new layout plan. |
||
 |
||
| the en suite's existing layout | ||
|
I decided to place the bath centrally under the windows with wall-mounted taps to make a real feature of it, and moved the loo to the opposite end of the room. This was easy to do because there are two external walls here, so the soil pipe could be sent down the outside of the building. I designed a low level tiled wall to hide the cistern for the loo which would also double as space to keep toiletries to hand. This tiled wall would run into the dressing table area, and on the wall next to the shower would go the floating sink unit with bathroom cabinets above. We also had enough space for two large heated towel radiators, which were plumbed in and had electric heating elements, so there would be no more wet towels, even in the summer when the heating was switched off. |
||
 |
||
|
the new layout for the en suite |
||
 |
||
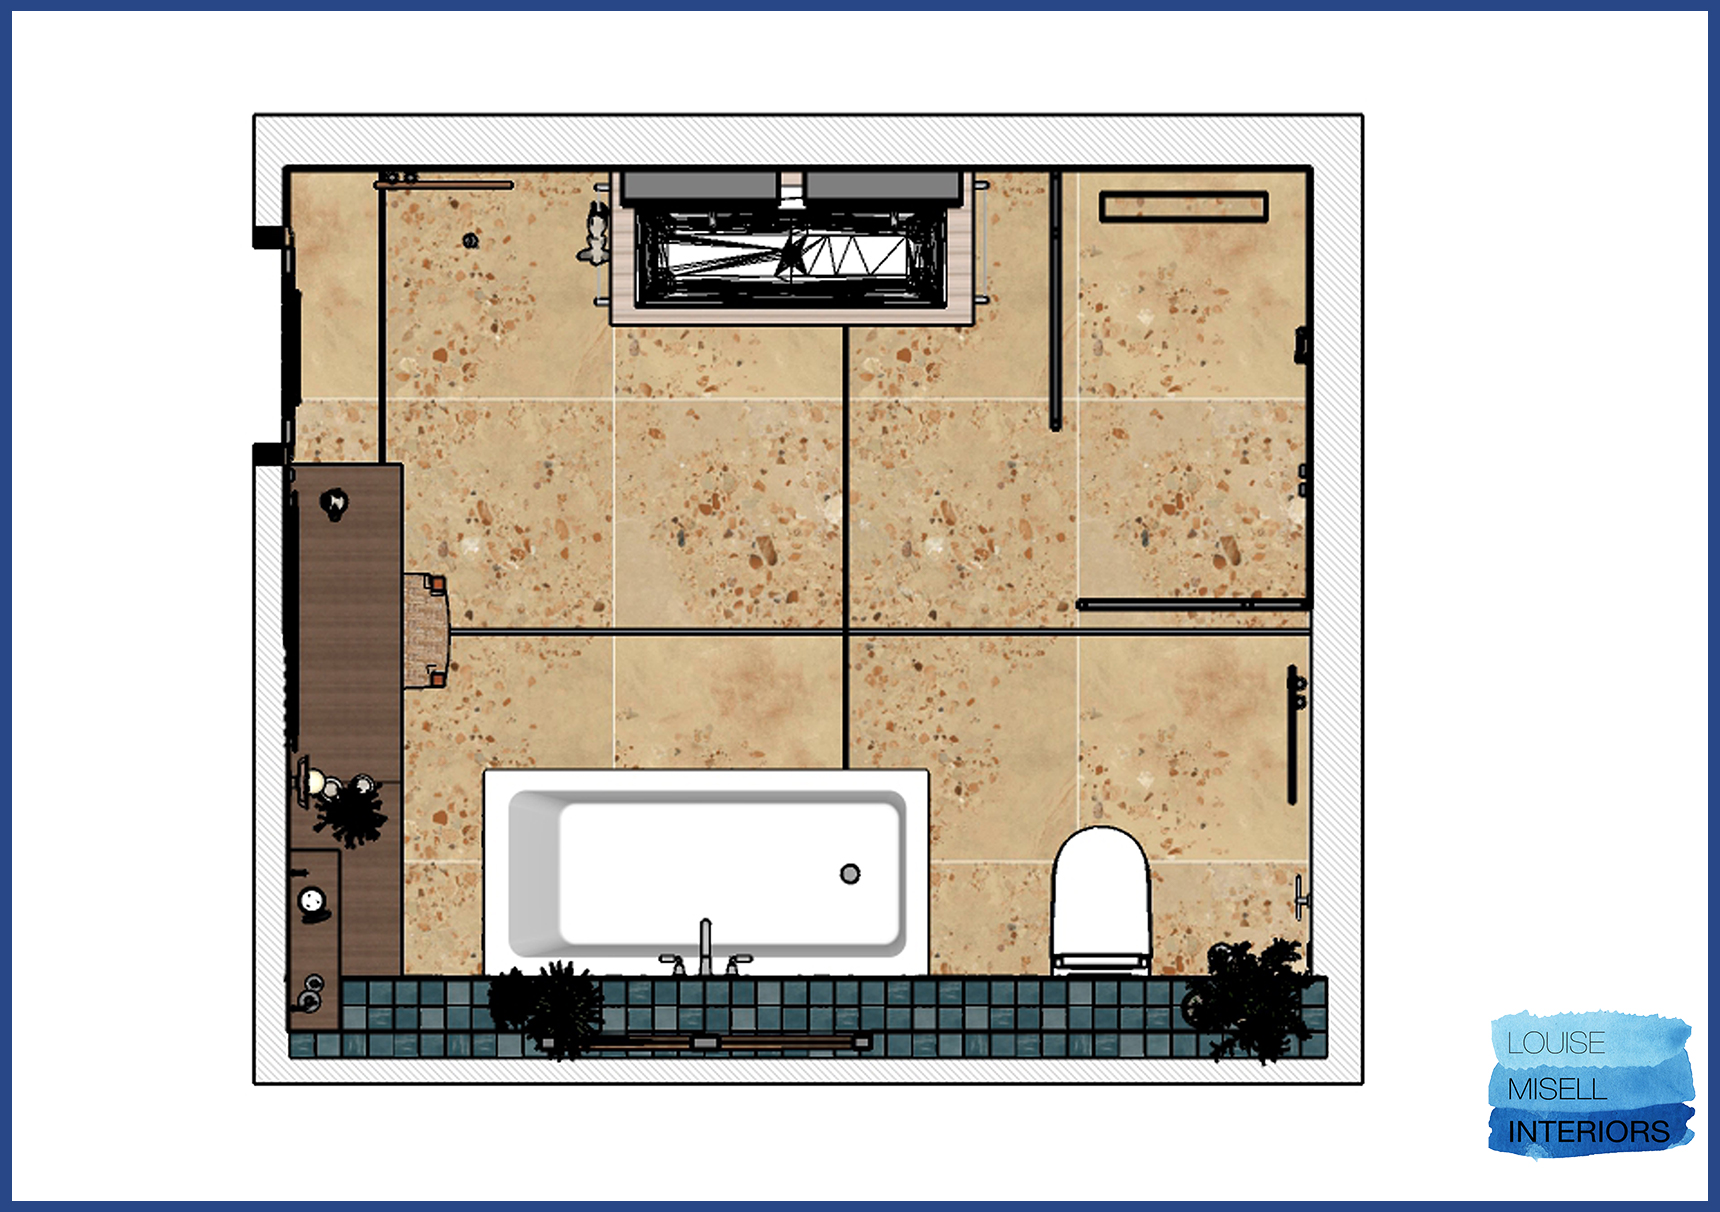
| the 3D model showing where the bath would go | ||
|
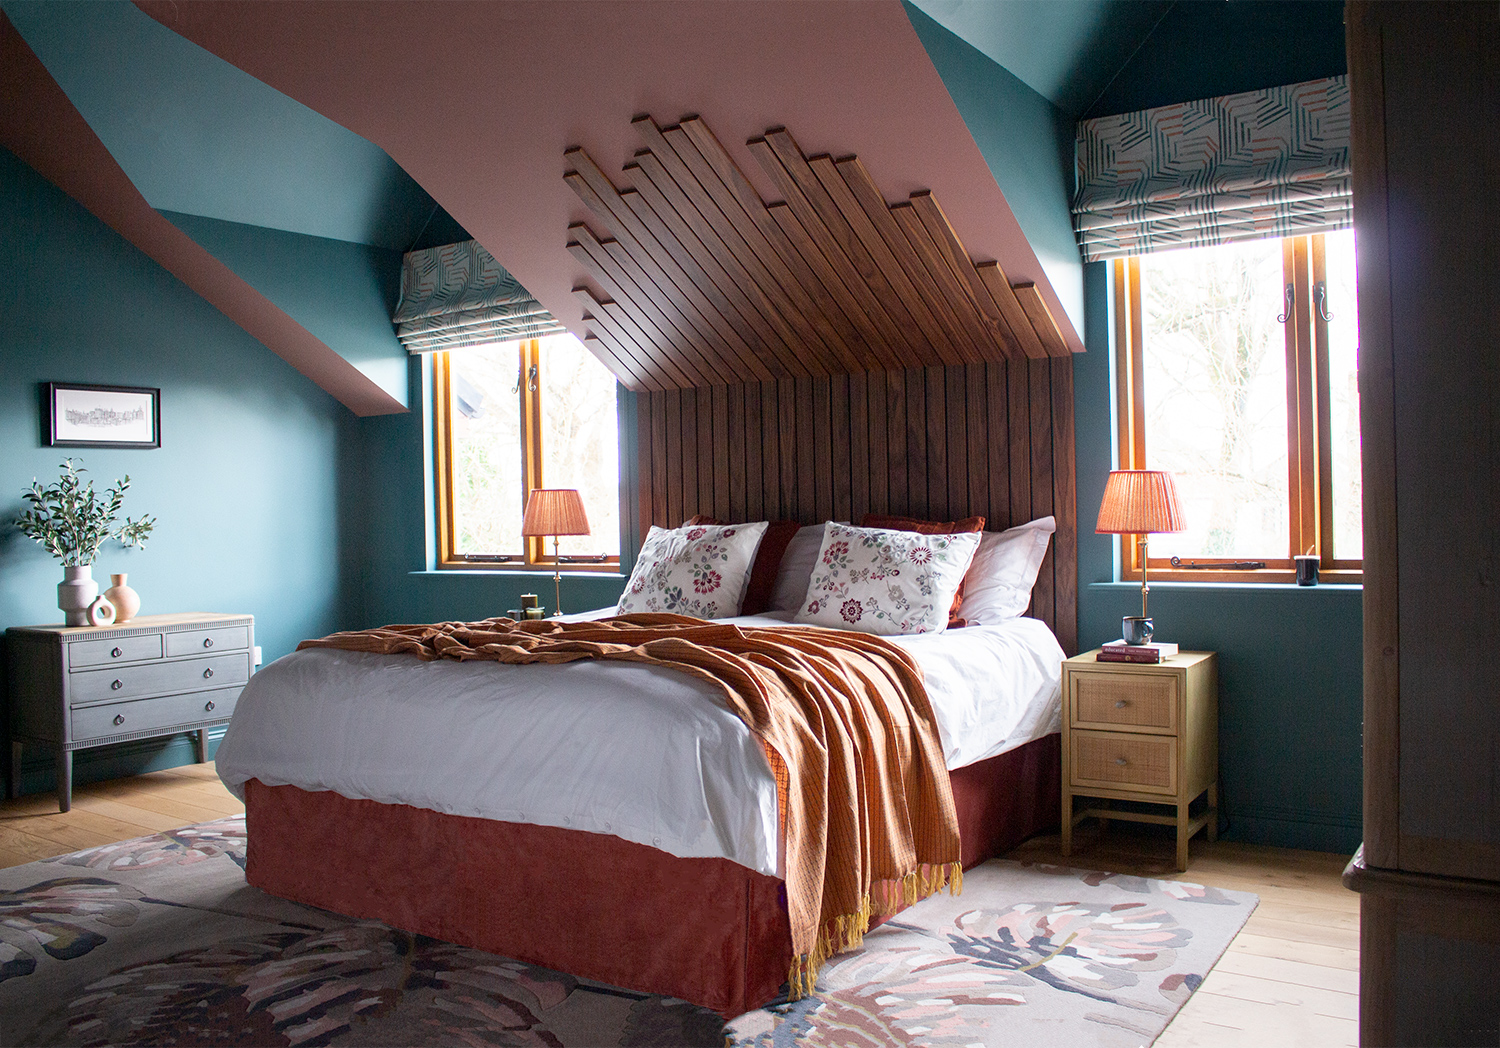
Next, I designed a walnut built in dressing table with drawers and shelves for storing make-up and towels, using the headboard I’d designed for the main bedroom as inspiration. The dressing table would have wooden slats the same width as those used to create the headboard design, and be finished in the same wood, which would link the two rooms visually. This design also meant the towels would be by the bath, so the clients could grab a fresh towel before getting out. Here’s a reminder of what the headboard looks like: |
||
 |
||
| the headboard I designed in the main bedroom | ||
|
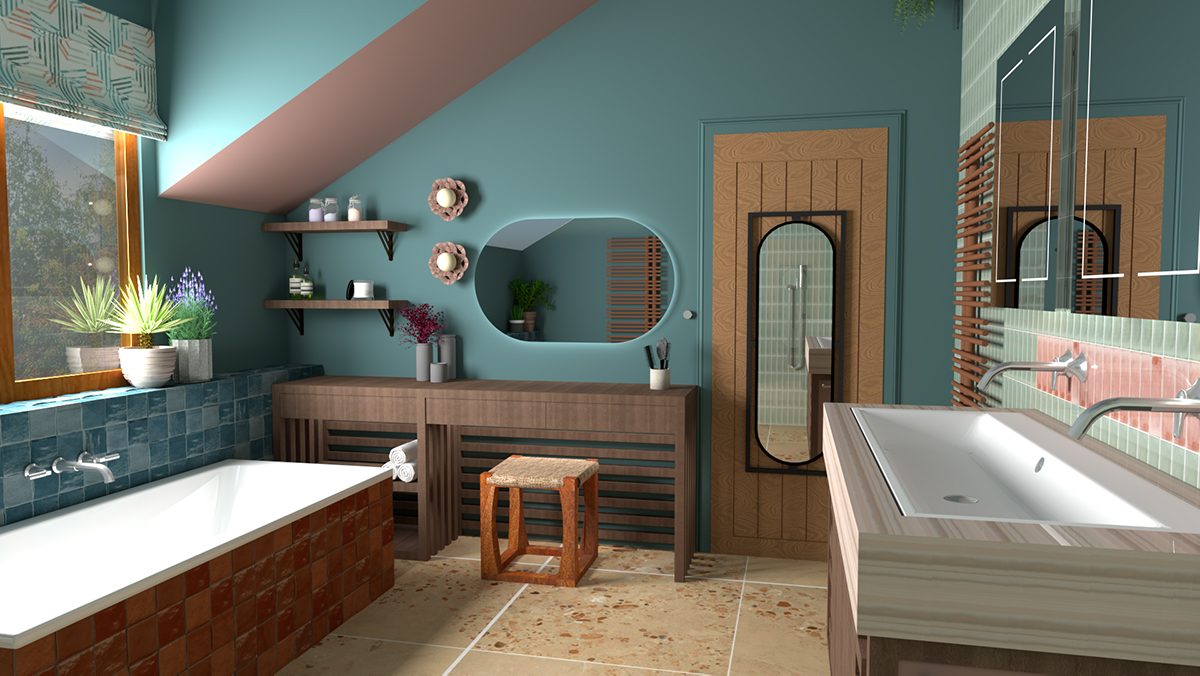
I designed the dressing table drawers to be flush fitting, with push click openings to look sleek and remove any handles which could get in the way when sitting at the dressing table. There would be warm white LED lighting under the dressing table, which would be operated by a sensor which switches on when someone walks into the room. Above the dressing table, I placed a large pill shaped mirror, which has backlighting and is steam free, so is perfect for getting ready after a shower. I also added some gorgeous wall lights made from fired clay, which can be switched on to illuminate the face when doing make up. Here’s the design for the dressing table area: |
||
 |
||
|
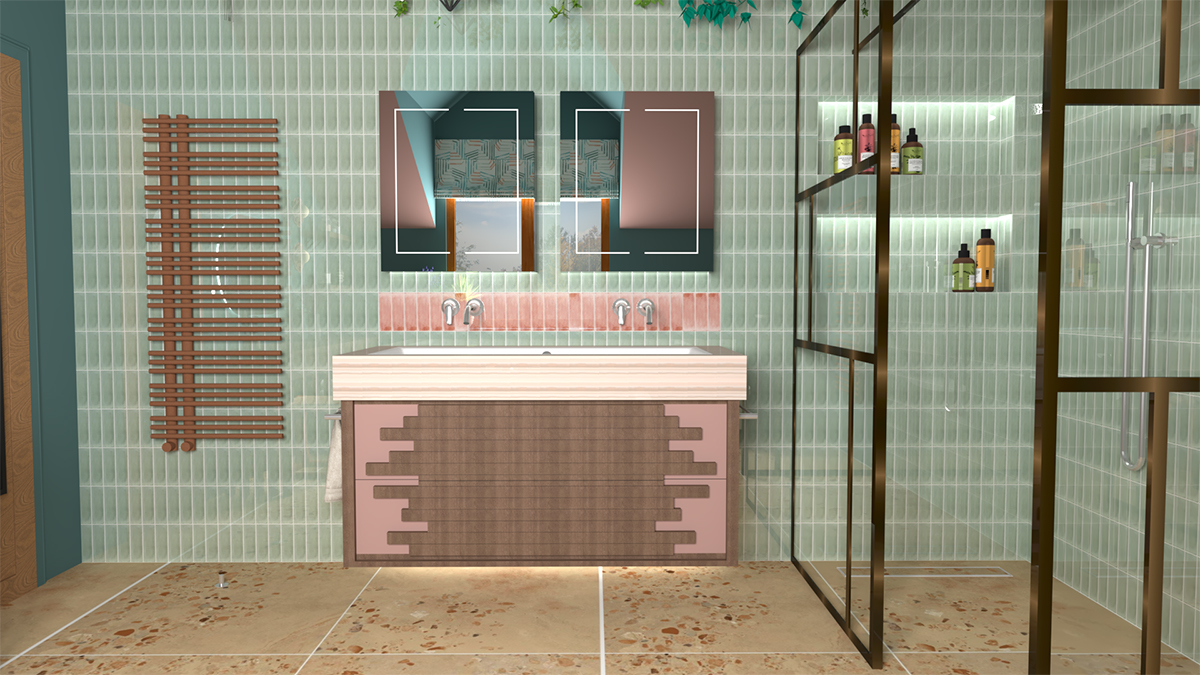
Following on from the dressing table design, I again decided to use the headboard for inspiration to design the floating sink unit. I continued the slat idea and used the wood in a staggered way on the front of the unit, with walnut on a blush pink base (the same colour as the ceiling from the main bedroom and en suite). There would be two large push click drawers in this unit to provide even more storage, with lighting underneath to enhance the floating effect. The lighting would be linked to the same sensor as the dressing table, so it would come on at the same time when someone walked into the room. I decided to add one large sink instead of two smaller ones, with two sets of taps, to add to the feeling of space and luxury in this bathroom. The long sink also echoed the shape of the dressing table mirror, and having one sink meant we only needed one waste trap, leaving more space inside the unit for storage - I’m sure most of us have had the experience of having the storage space under a sink eaten up by the pipework, which can be frustrating. Above the sink unit, I placed the new bathroom cabinet which we had only recently installed, and specified another identical one so the couple could have one cabinet each. The couple also love plants, so I added 9 hanging ones above the sink to decorate the large expanse of wall up to the high ceiling. |
||
 |
||
| the design for the sink unit | ||
|
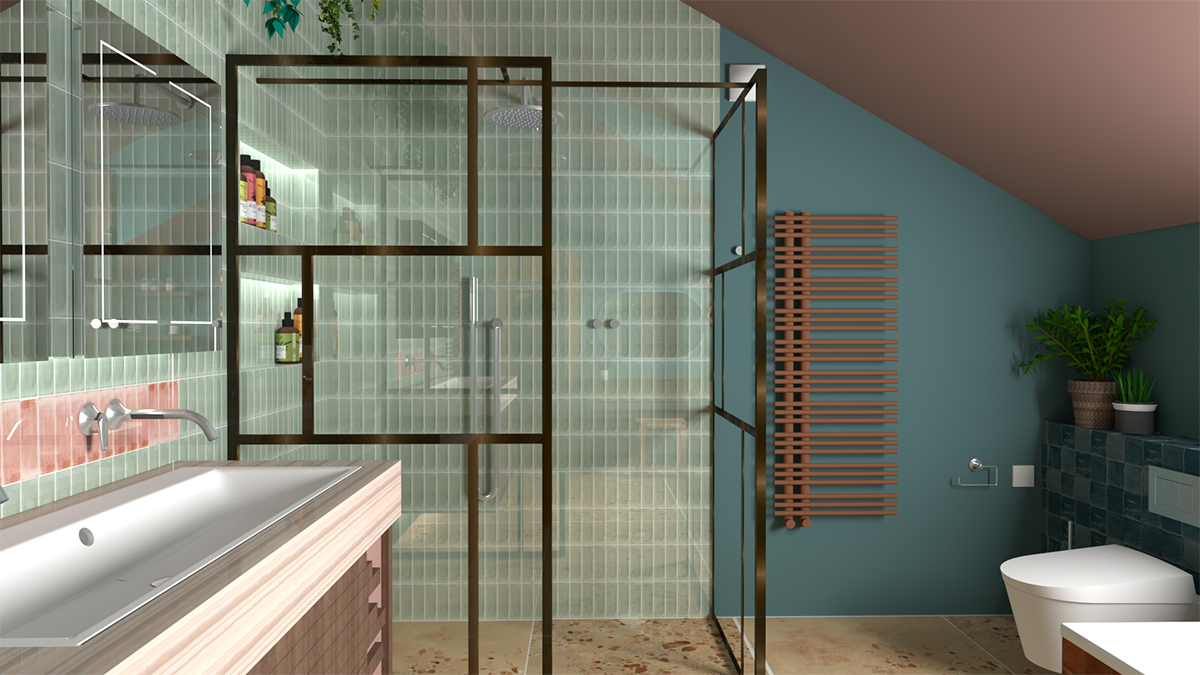
I then moved on to the shower itself. We were planning to install tanking so the shower would be in a wet area, which meant we could have level access with underfloor heating - the best way to heat a room and deal with any water splashes from the shower. Using two shower screen panels, I created a large walk in shower with a luxurious 300mm rainfall shower head. The screens I chose are pretty special - they are inspired by the canals, bridges and classical gardens of the Chinese city of Suzhou, and add an architectural element to the design. The finish is Dark Metallic Bronze, which is warm and striking, and ties in perfectly with the walnut wood and other finishes used throughout the house. In addition to the larger shower head, I added a handheld shower, as these are always useful alongside a fixed shower head. The controls are digital and can be set to specific temperatures and flow rates for different users. I also added an extra control by the door, so the clients can turn the shower on when walking into the room - no more getting wet trying to turn the shower on! I designed two large niches in the shower for keeping shampoos etc to hand, after measuring the couple’s toiletries to make sure they would fit, and added LEDs to the niches for an extra lighting source, which can be controlled by a switch outside the bathroom. |
||
 |
||
| the design for the shower area | ||
|
Once the design was complete and approved, we got to work on this tricky installation - there were so many details that relied on each other being perfect, and I spent a lot of time with the team making sure the design was installed as planned. Here are some pics of the installation process: |
||
 |
||
|
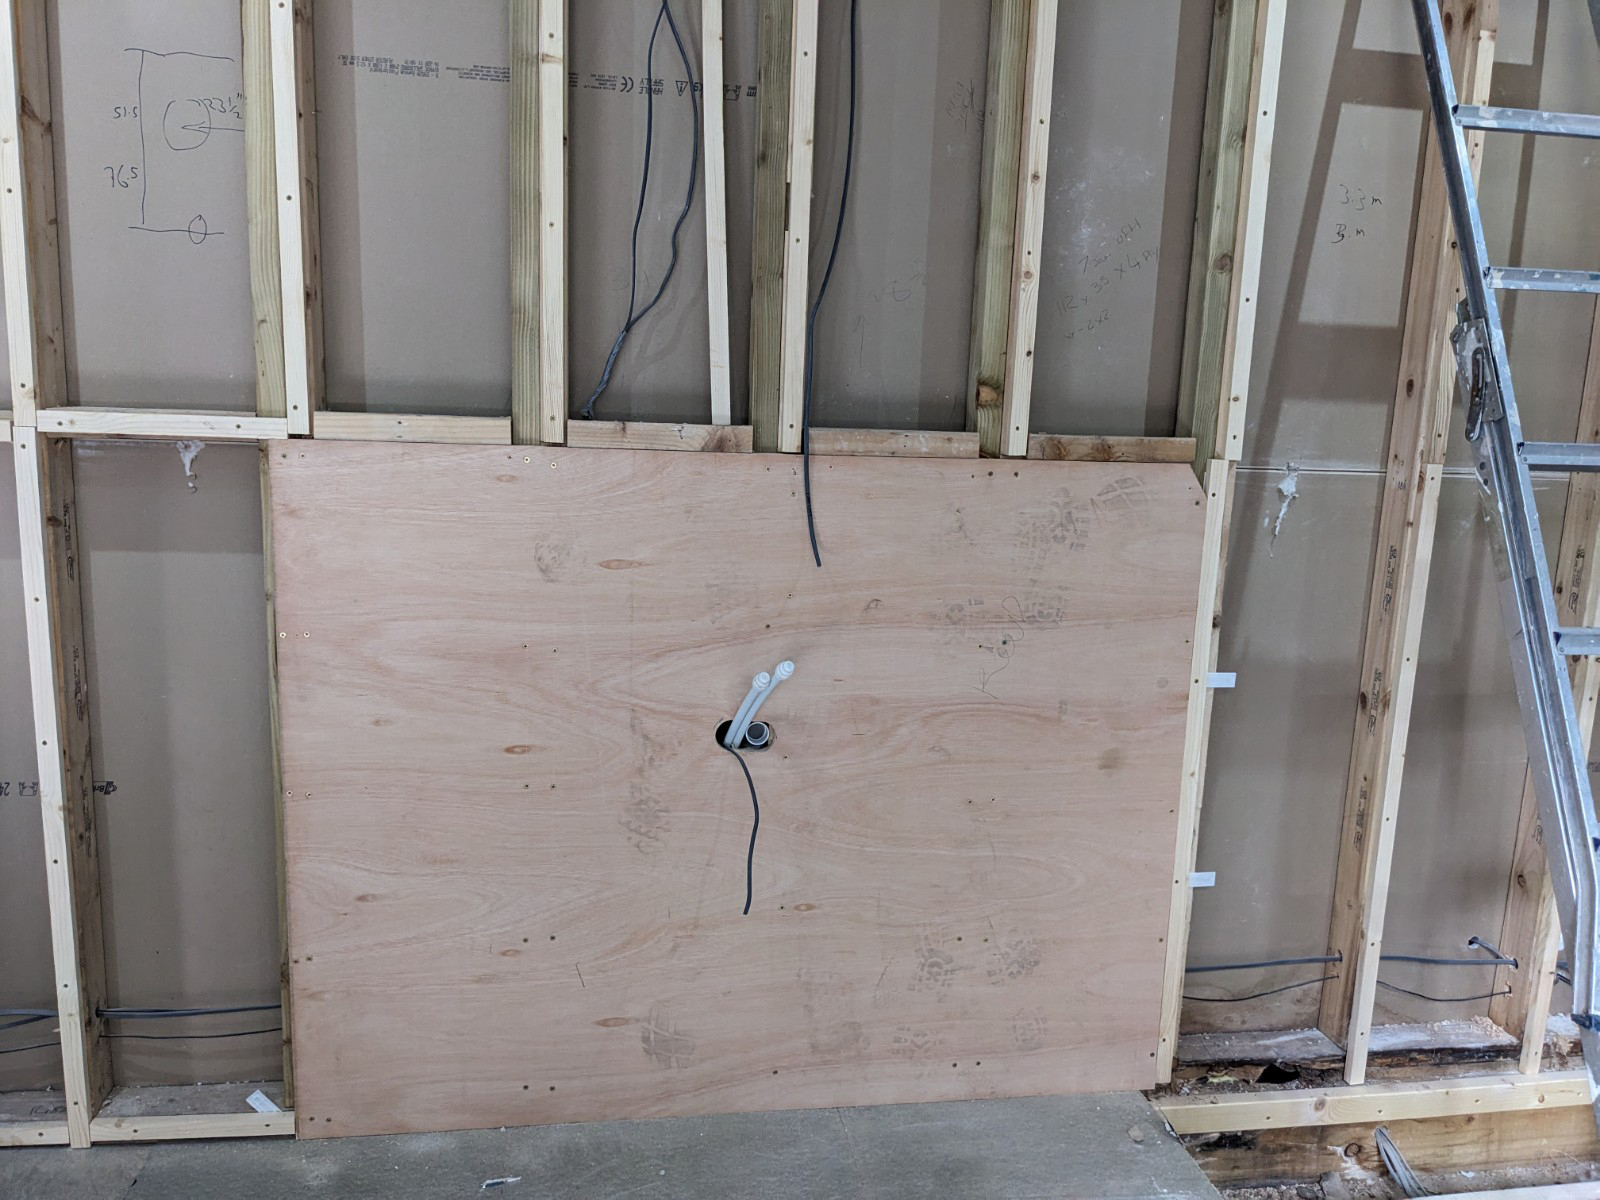
The new sink and vanity unit was quite heavy, and overall it was so large that we had to make sure we reinforced the wall before we installed it! |
||
 |
||
|
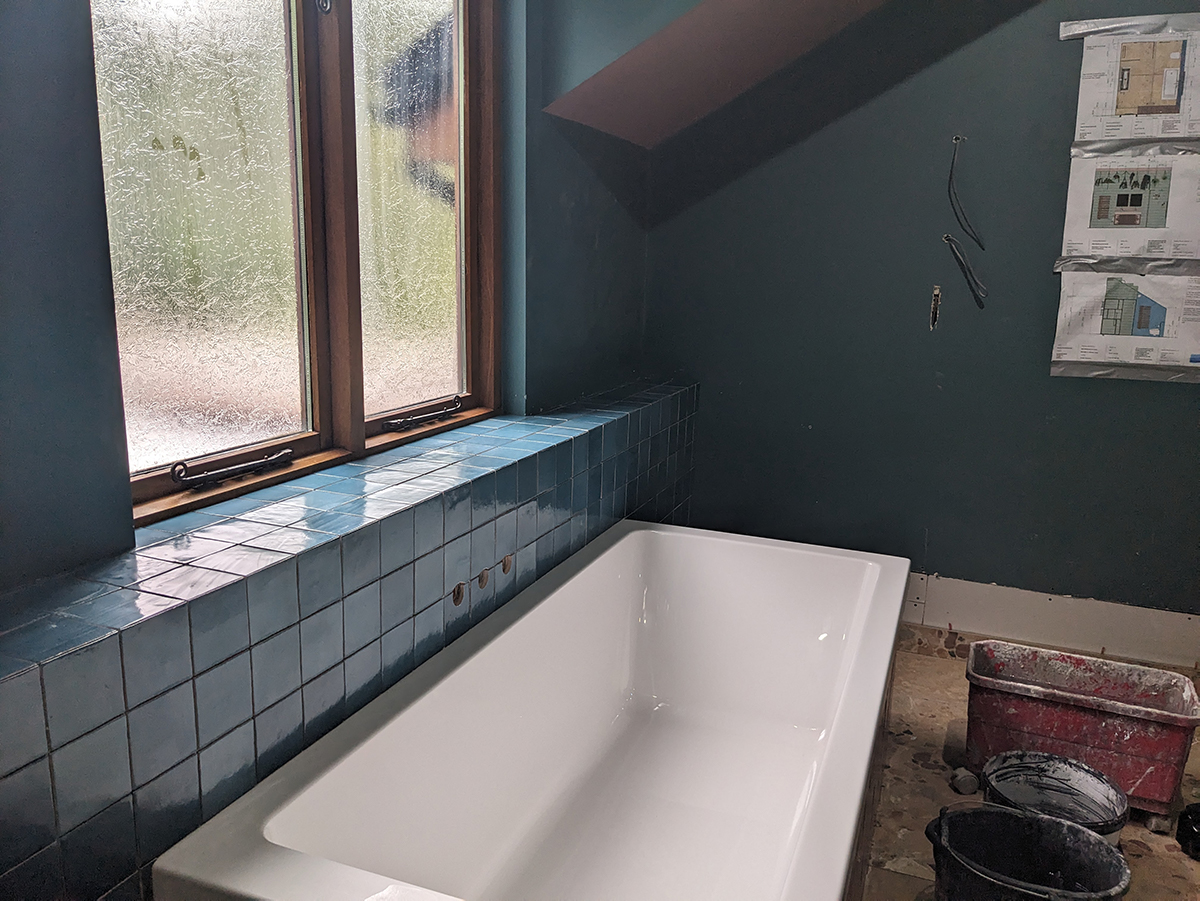
The new bath being tiled - you can see our plans taped to the wall so the trades can follow them |
||
 |
||
|
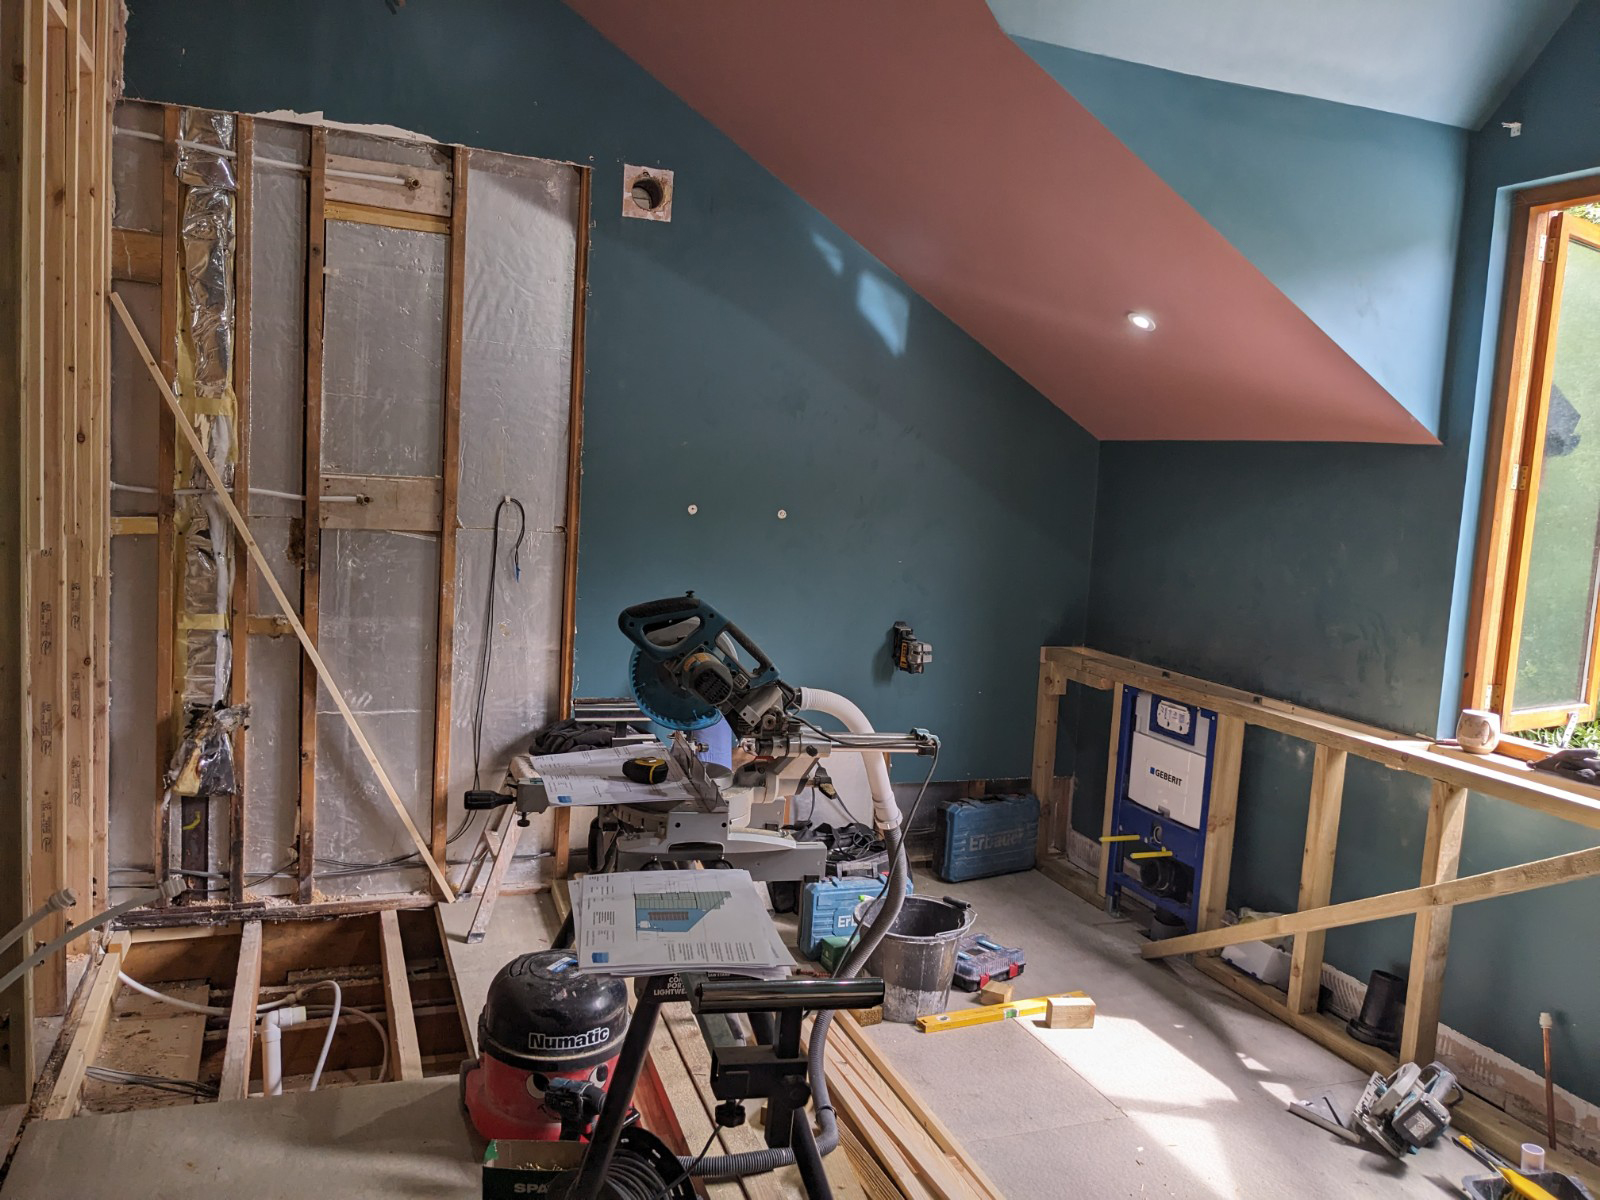
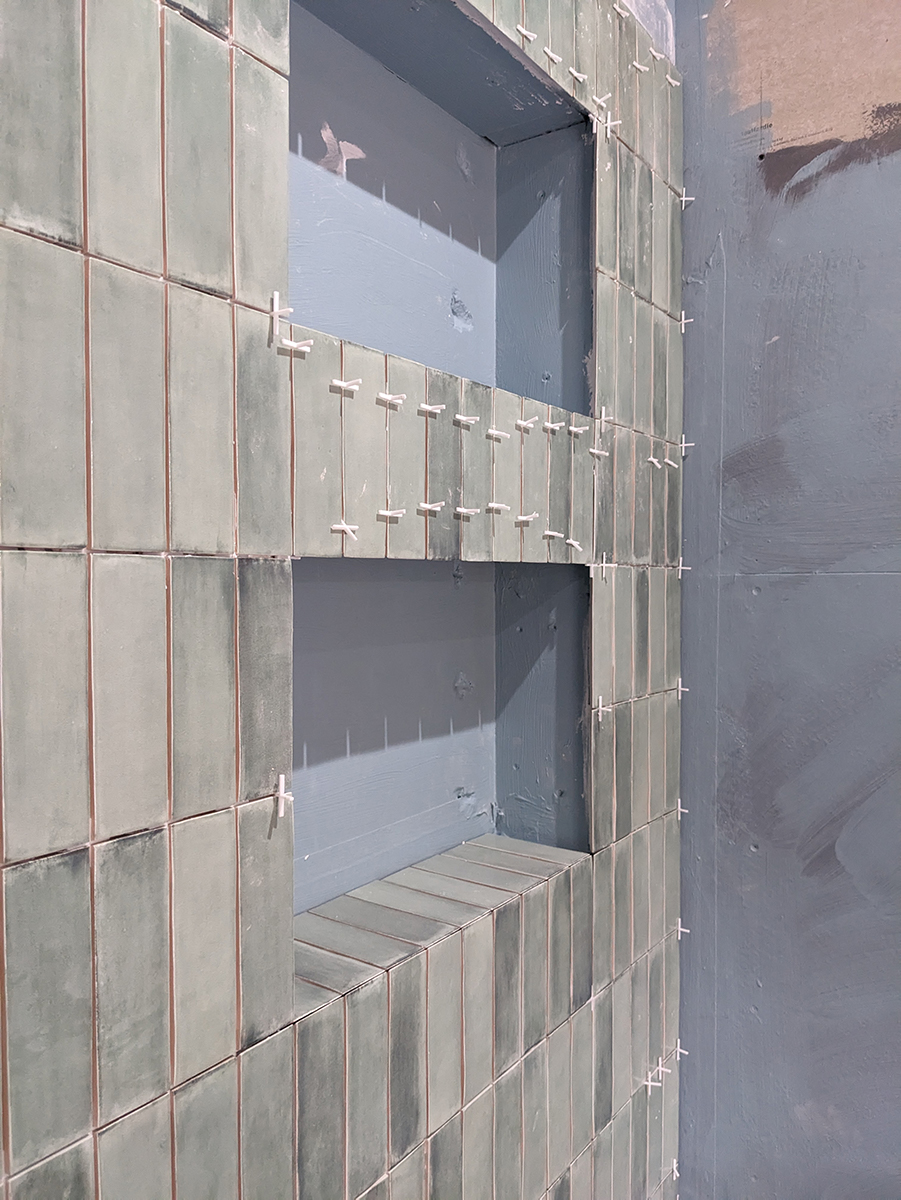
The new shower area and low false wall being built |
||
 |
||
|
I designed the niches so they wouldn’t have tile trim - the tiler had to very carefully mitre the corners to achieve this look |
||
 |
||
|
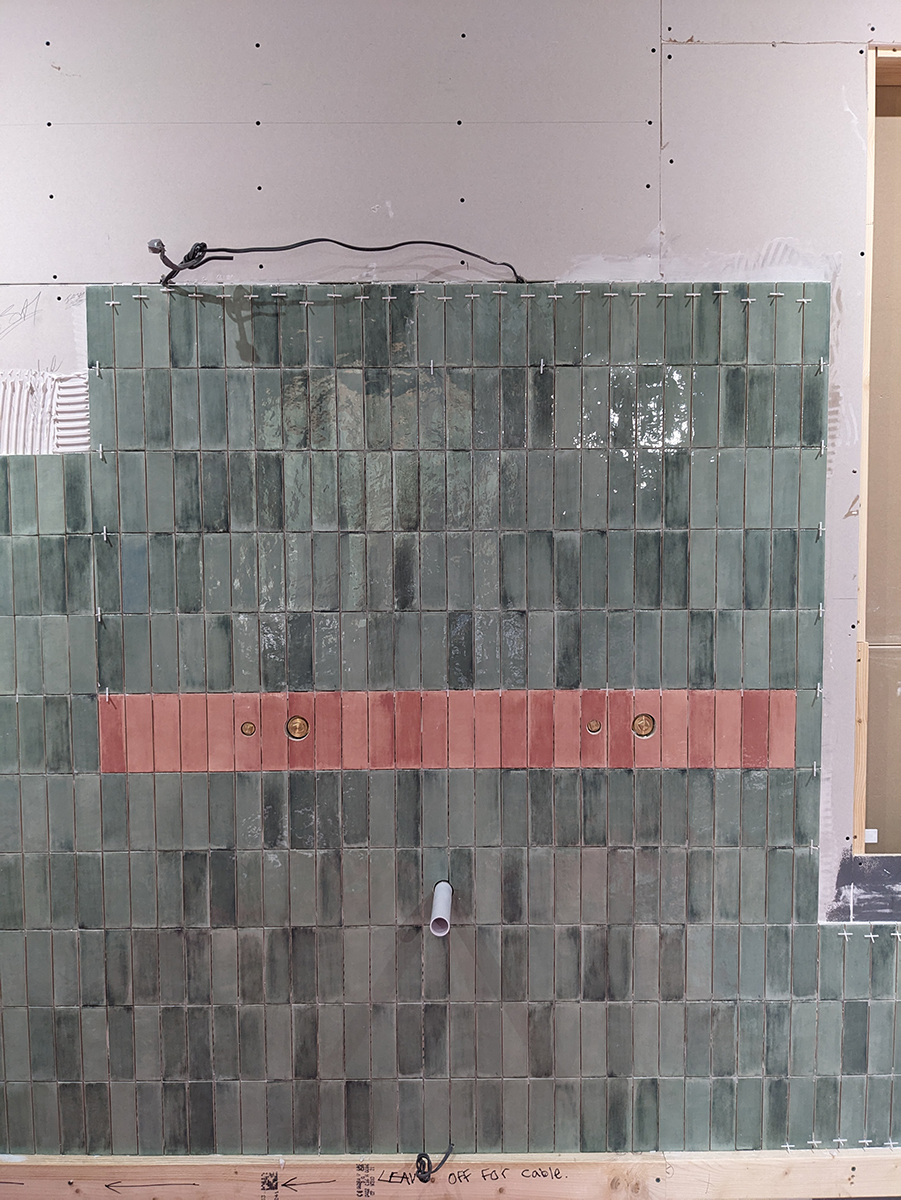
The tiling above the sink was picked out with a row of pink tiling to frame the wall hung taps and sink |
||
| The room is now complete, and we are all very proud of it. It was worth the weeks of hard work, and we’re so grateful to the installation team who all did a great job. The clients love the room with all its functionality, and say that it is ‘an oasis of calm’. We hit their brief and more, and gave them a very special bathroom. We have just completed a photo shoot of it, so look out for the finished pics on the website soon. |
Welcome to the design blog, where you'll see posts about anything from the projects we are working on, to the latest fabric and wallpaper collections, and all things interiors related. We love colour, pattern, architecture and old buildings, and we love to share our finds with you.
Happy reading!